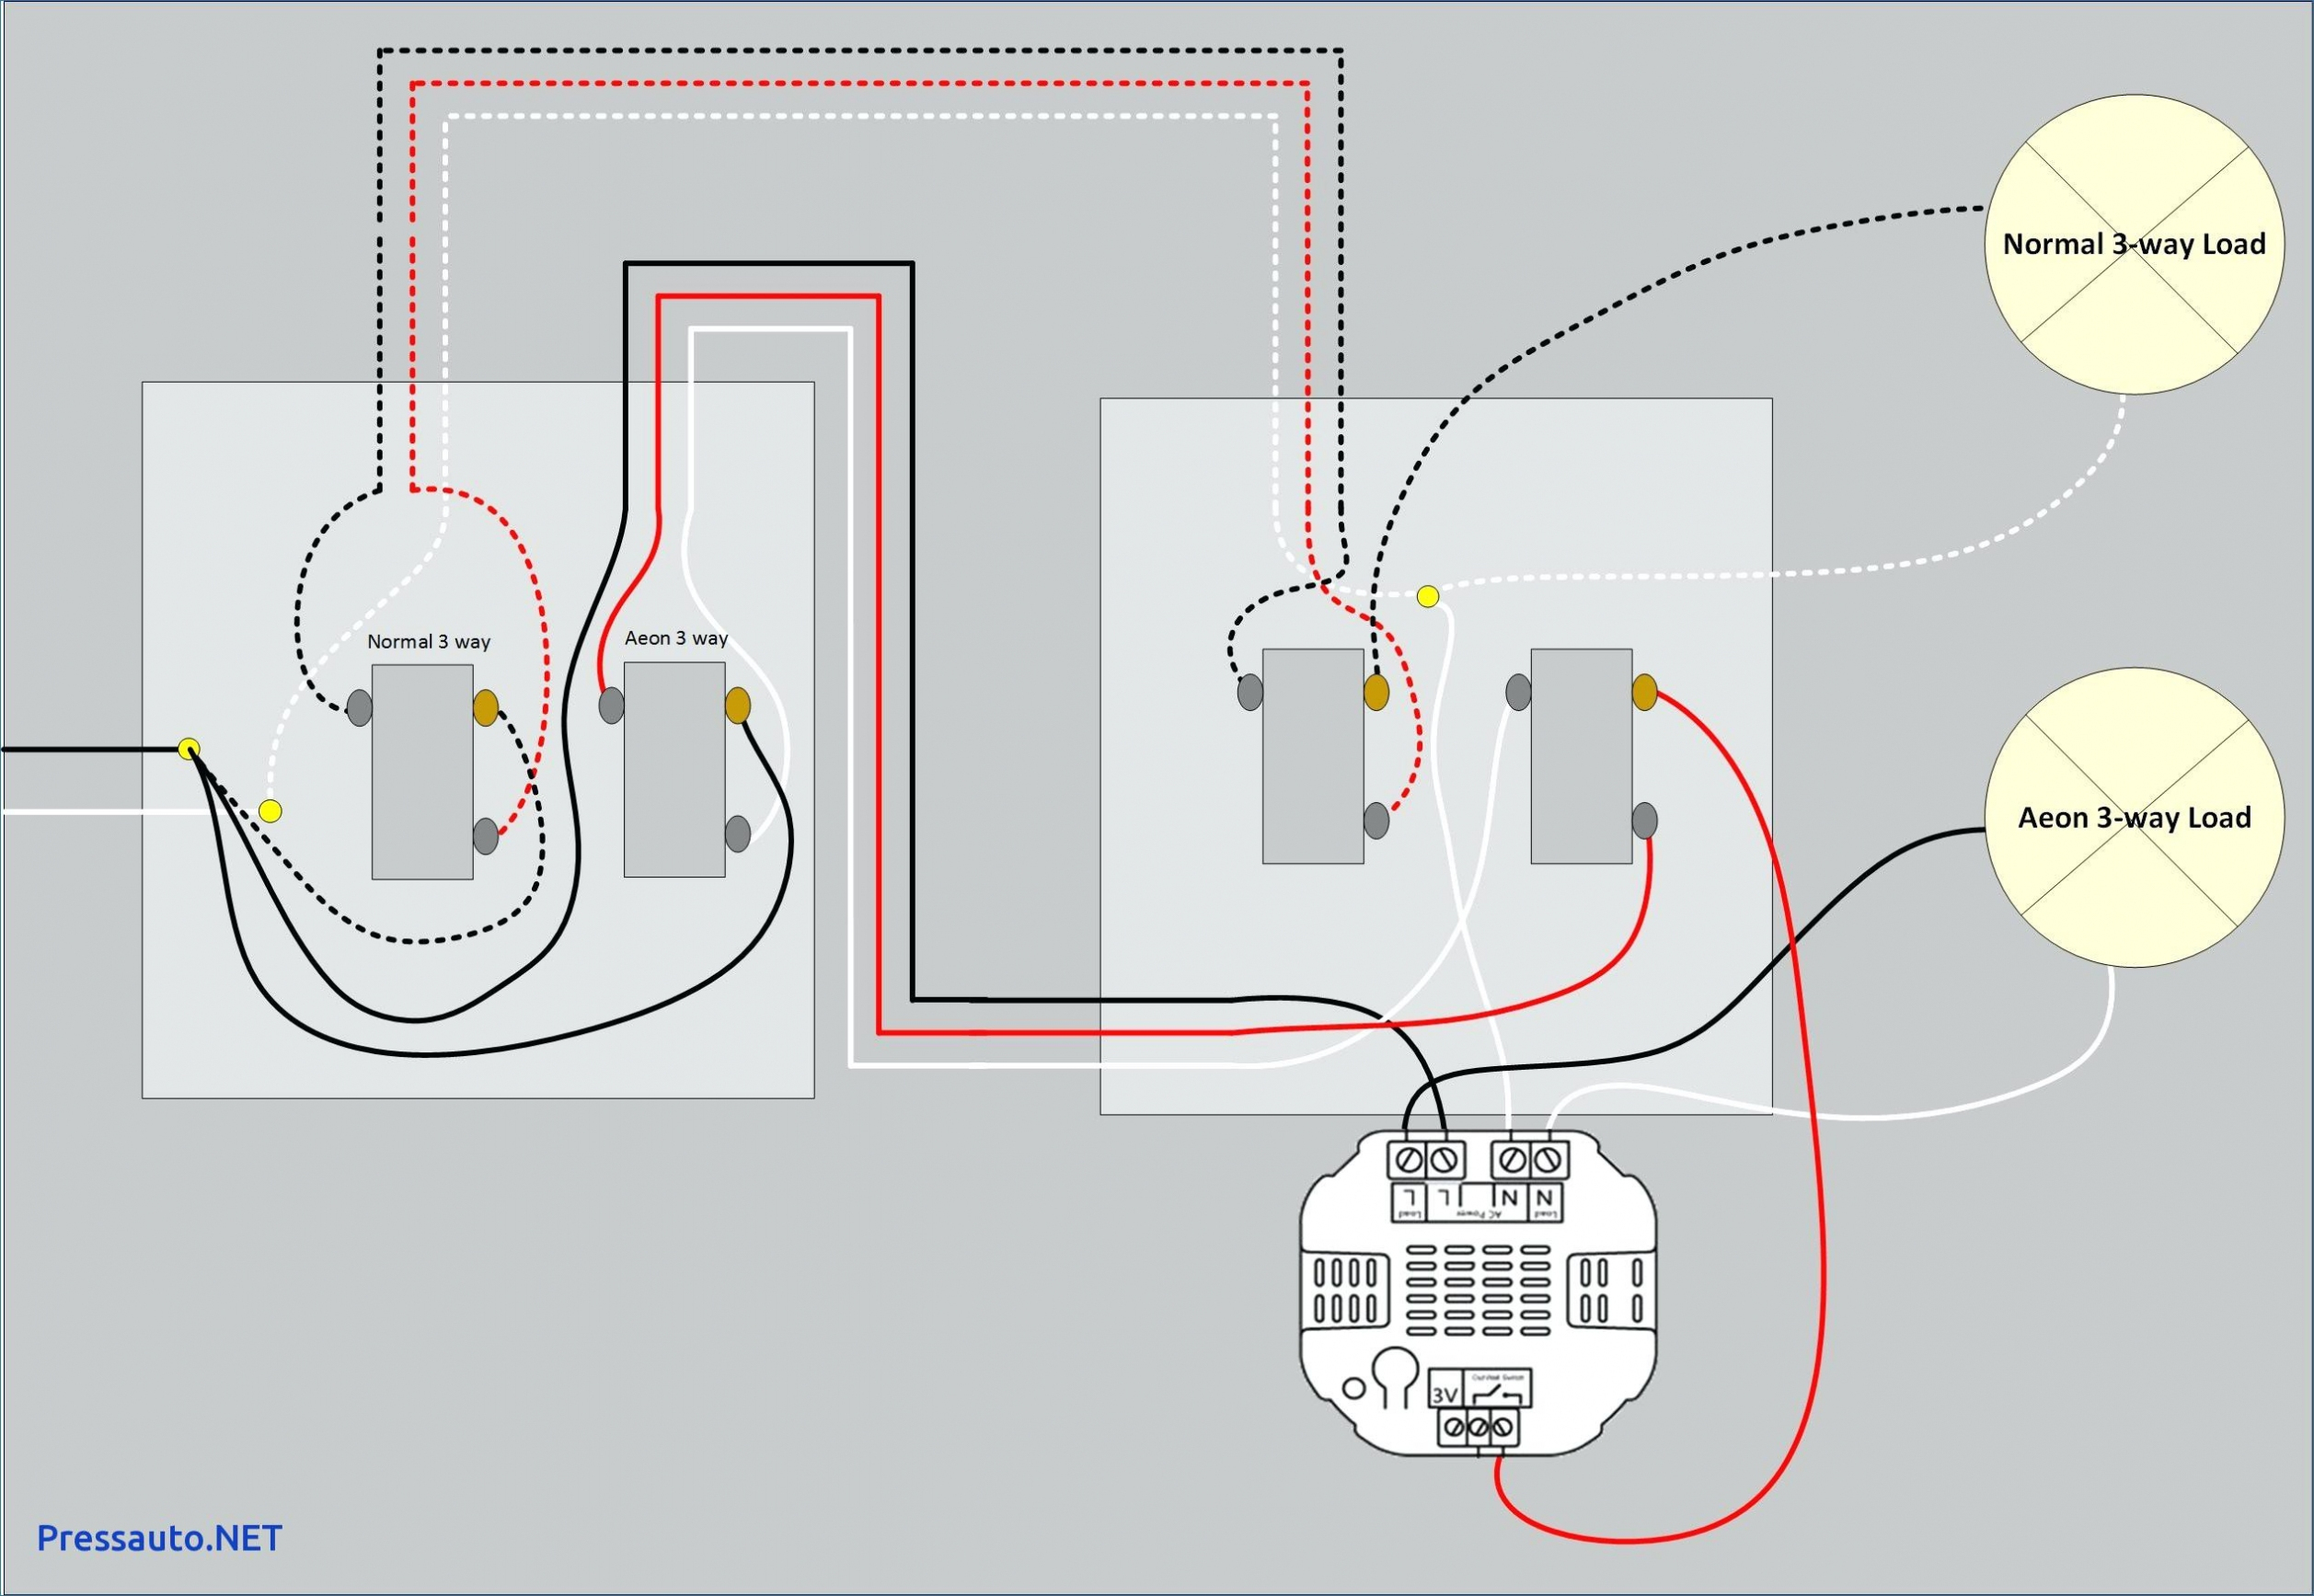
Ever wished you could control a light from both your bedroom *and* the hallway? You can! This guide makes wiring a 3-way switch easy, even for beginners. We’ll break down the process step-by-step, with diagrams and troubleshooting tips. Let’s get those lights under your control!
Understanding 3-Way Switches
Want control over a single light from two switches? You’re in the right place. This guide demystifies 3-way switch wiring, from the basics to advanced troubleshooting.
Why Use 3-Way Switches?
Imagine entering a long hallway and flipping a switch to illuminate it. At the other end, another switch turns off that same light. That’s the convenience of a 3-way switch! Enhanced control not only adds convenience but also improves safety in hallways, stairways, and larger rooms.
How 3-Way Switches Work
Unlike regular switches, 3-way switches route electricity between two paths. Think of it like train tracks with a diverting switch. Each 3-way switch acts as a director, controlling the flow of electricity to the light.
Gathering Your Supplies
Before starting, gather these essential tools and materials:
- Two 3-Way Switches: These have three terminals instead of the two found on standard switches.
- Traveler Wires (14/3 Romex Cable): Usually red and black, these wires carry current between the switches. They’re the “tracks” in our train analogy.
- 14/2 Romex Cable (for the LOAD Wire): For the wire carrying power from the switch to the light fixture.
- Common Wires: Usually black (or red, depending on the setup), these are the main power wires connecting to the power source and the light fixture.
- Ground Wire: This green or bare copper wire is vital for safety, preventing shocks.
- Neutral Wire: Essential in some setups, particularly when power feeds to the light fixture first.
- Wire Strippers, Screwdriver, Electrical Tape: Essential tools for the job.
- Non-Contact Voltage Tester: For verifying power is off.
Two Wiring Configurations
There are two common 3-way wiring methods, chosen based on the power source’s origin:
- Power at the Switch: Power enters the first switch, travels to the light, and returns to the second switch to complete the circuit.
- Power at the Light: Power goes directly to the light. Traveler wires between the switches act as messengers, controlling the light.
Wiring Your 3-Way Switches
How do you find the line and load side of a 3-way switch? It depends on the wiring configuration. Consulting a wiring diagram specific to your setup (3 4 connection box) is crucial. Diagrams visually represent wire connections to switch terminals and the light fixture (4 wire electriacl circuit). You can find these online or in home improvement stores.
Safety First! Always turn off the power at the breaker box before working with electrical wiring. Double-check with a non-contact voltage tester.
- Power Down: Turn off the correct breaker.
- Identify Wires: Carefully label each wire at each switch box and the light fixture box.
- Ground Wires: Connect all ground wires in each box.
- Connect Travelers: Connect the red and black traveler wires to the corresponding terminals on both switches. Ensure colors match.
- Connect Commons: Connect the incoming power (or wire to the light) to the common terminal on the first switch. Connect the remaining common wire (either to the light or the second switch) to the common of the second switch.
- Connect Neutral (If Needed): Connect white neutral wires in the light fixture box and at the switches (if present).
- Test: Turn the breaker back on and test both switches.
Troubleshooting
What happens if you wire a 3-way switch wrong? Here are some common issues and solutions:
- Light Doesn’t Turn On: Check the breaker and all connections. A loose wire can be the problem.
- Light Works From One Switch: This likely indicates a traveler wire issue. Double-check their connections.
- Hot Switch: Immediately turn off the breaker and consult an electrician. This is a serious safety concern.
Advanced Options
- Smart 3-Way Switches: Offer features like remote control and voice assistant integration.
- 4-Way Switching: For controlling a light from three or more locations.
Final Advice
Working with electricity can be dangerous. Consult a qualified electrician if you are unsure. Check local electrical codes for specific requirements.
Which wire goes where on a 3-way switch?
Let’s unravel 3-way switch wiring. They’re ideal for hallways, staircases, or large rooms. While seemingly complex, it’s logical once you understand the key components.
Understanding the Wires
- LINE: The incoming power source.
- LOAD: The wire carrying power to the light.
- Travelers: The two wires (often black and red) communicating between switches.
- Neutral: Completes the circuit, returning electricity to the source.
- Ground: Protects against shocks.
Choosing the Right Cables
Use 14/2 Romex for the LOAD wire from the switch to the light. Use 14/3 Romex between switches for the travelers and neutral. Choosing correctly ensures safety and functionality, whether you’re wiring how to wire a 3 way switch with multiple lights or how to wire a 3 way switch with 2 lights.
Installation Steps
TURN OFF THE POWER AT THE BREAKER BOX before starting.
- Identify Wires: Use a non-contact voltage tester to confirm which wire is live. This is crucial, even for simpler setups like how to wire a 3-way switch with 4 wires or how to wire a 3-way switch with 5 wires.
- Prepare Switch Boxes: Label each wire clearly.
- Connect Commons and Travelers: The LINE wire connects to the common terminal of one switch, the LOAD to the common of the other. Travelers connect to the remaining terminals on both switches. This applies whether you’re learning how to wire a 3 way switch from a light or how to add a 3 way switch to an existing circuit.
- Connect Neutral and Ground: Connect the neutral wire to the source neutral or the light fixture. Connect all ground wires together.
- Secure Connections: Use wire nuts.
- Test: Turn the breaker back on and test the switches. Refer to 3-way switch wiring diagram with power at the light or 3-way switch wiring diagram with power at the switch to double-check.
Troubleshooting
- Light Doesn’t Work: Likely a tripped breaker or loose connection.
- Light Works From One Switch: Probably a traveler wire problem.
- Hot Switch: Turn off the power immediately and call an electrician.
Quick Reference Table
| Wire Color | Wire Type | Connection Location(s) |
|---|---|---|
| Black (Often) | LINE | Common terminal of one 3-way switch |
| Red/Black | Traveler | Corresponding terminals on both 3-way switches |
| Black (Often) | LOAD | Common terminal of the other 3-way switch |
| White | Neutral | Light fixture or power source |
| Bare/Green | Ground | Ground screw in all switches and light fixture |
Always prioritize safety and consult an electrician if needed.
What happens if you wire a 3-way switch wrong?
Wiring a 3-way switch can be tricky. Let’s explore what can go wrong and how to fix it.
Hazards of Incorrect Wiring
Incorrect wiring isn’t just about malfunctioning lights; it can create fire hazards. Overheating wires and sparks are serious concerns.
Common Wiring Errors
- Traveler Wire Trouble: Swapped traveler wires can cause unpredictable light behavior.
- Light Fixture Fiasco: Incorrect connections at the fixture can prevent the circuit from working.
- Common Wire Confusion: Mixing up the common wire disrupts the entire circuit.
Troubleshooting
- Safety First: Turn off the power at the breaker box.
- Look for Clues: Inspect wires for damage.
- Double-Check Power: Use a voltage tester.
- Follow Travelers: Ensure they’re connected correctly.
- Check the Common: Verify its connection at both switches and the light.
- Test the Switches: Turn the breaker back on and test.
Two Wiring Methods
- Power to the Switch: Power enters the first switch, then travels through travelers to the second switch, and finally to the light.
- Power to the Light: Power goes directly to the light, and travelers signal the light to turn on/off.
Key Reminders
Prioritize safety, understand the wires’ functions, troubleshoot methodically, replace faulty components if necessary, and remember incorrect wiring is risky.
How do you find the line and load side of a 3-way switch?
Let’s figure out which wire is which in a 3-way switch setup.
How 3-Way Switches Work
Think of it as electrical ping-pong. Power (the “line”) enters one switch, travels between switches via “travelers,” and arrives at the light (the “load”).
The Common Terminal: The Key
The common terminal on each switch is crucial. One receives the “line,” the other sends power to the “load.”
Two Wiring Scenarios
Scenario 1: Power to the Switch
- Line: Connects to the common of the first switch.
- Travelers: Connect the switches.
- Load: From the common of the second switch to the light.
Scenario 2: Power to the Light
- Line: Goes directly to the light.
- Travelers: Connect the switches.
- Load: From the light to the common of one switch. A separate wire runs from the other switch’s common to the light.
Finding the Wires
Turn off the power first!
- Look for Clues: Check for labels (but verify).
- Find Common Terminals: Often a different color or offset.
- Voltage Tester (Optional, with caution): With the power temporarily ON, use a tester to identify the “line.” Be extremely careful!
Troubleshooting
- Flickering Lights: Loose connections or a failing bulb are often responsible.
- One Switch Doesn’t Work: Possibly a bad switch, loose connection, or traveler wire problem.
Always prioritize safety and consult an electrician when unsure. Remember local codes can vary.
- White Kitchen Backsplash Ideas For a Timeless, Stylish Update - November 15, 2025
- Contemporary White Kitchen Backsplash: Style and Design Ideas - November 14, 2025
- Decorative Backsplash Ideas: Colorful Kitchen Transformations for Your Home - November 13, 2025


