Wondering how to build concrete structures that can handle the rush of water? Picture this: you’ve got a culvert, a pipe that carries water, and a concrete headwall, a wall-like thing that stands tall at the culvert’s end. This dynamic duo works together to guide the water’s flow and keep everything in check. But building these concrete headwalls isn’t a piece of cake. We’ll take you through the ins and outs, from design tricks to construction know-how, so you can master the art of crafting sturdy concrete headwalls that’ll stand strong against the relentless force of water.
What are Concrete Headwalls and Why are They Important for Water Flow?
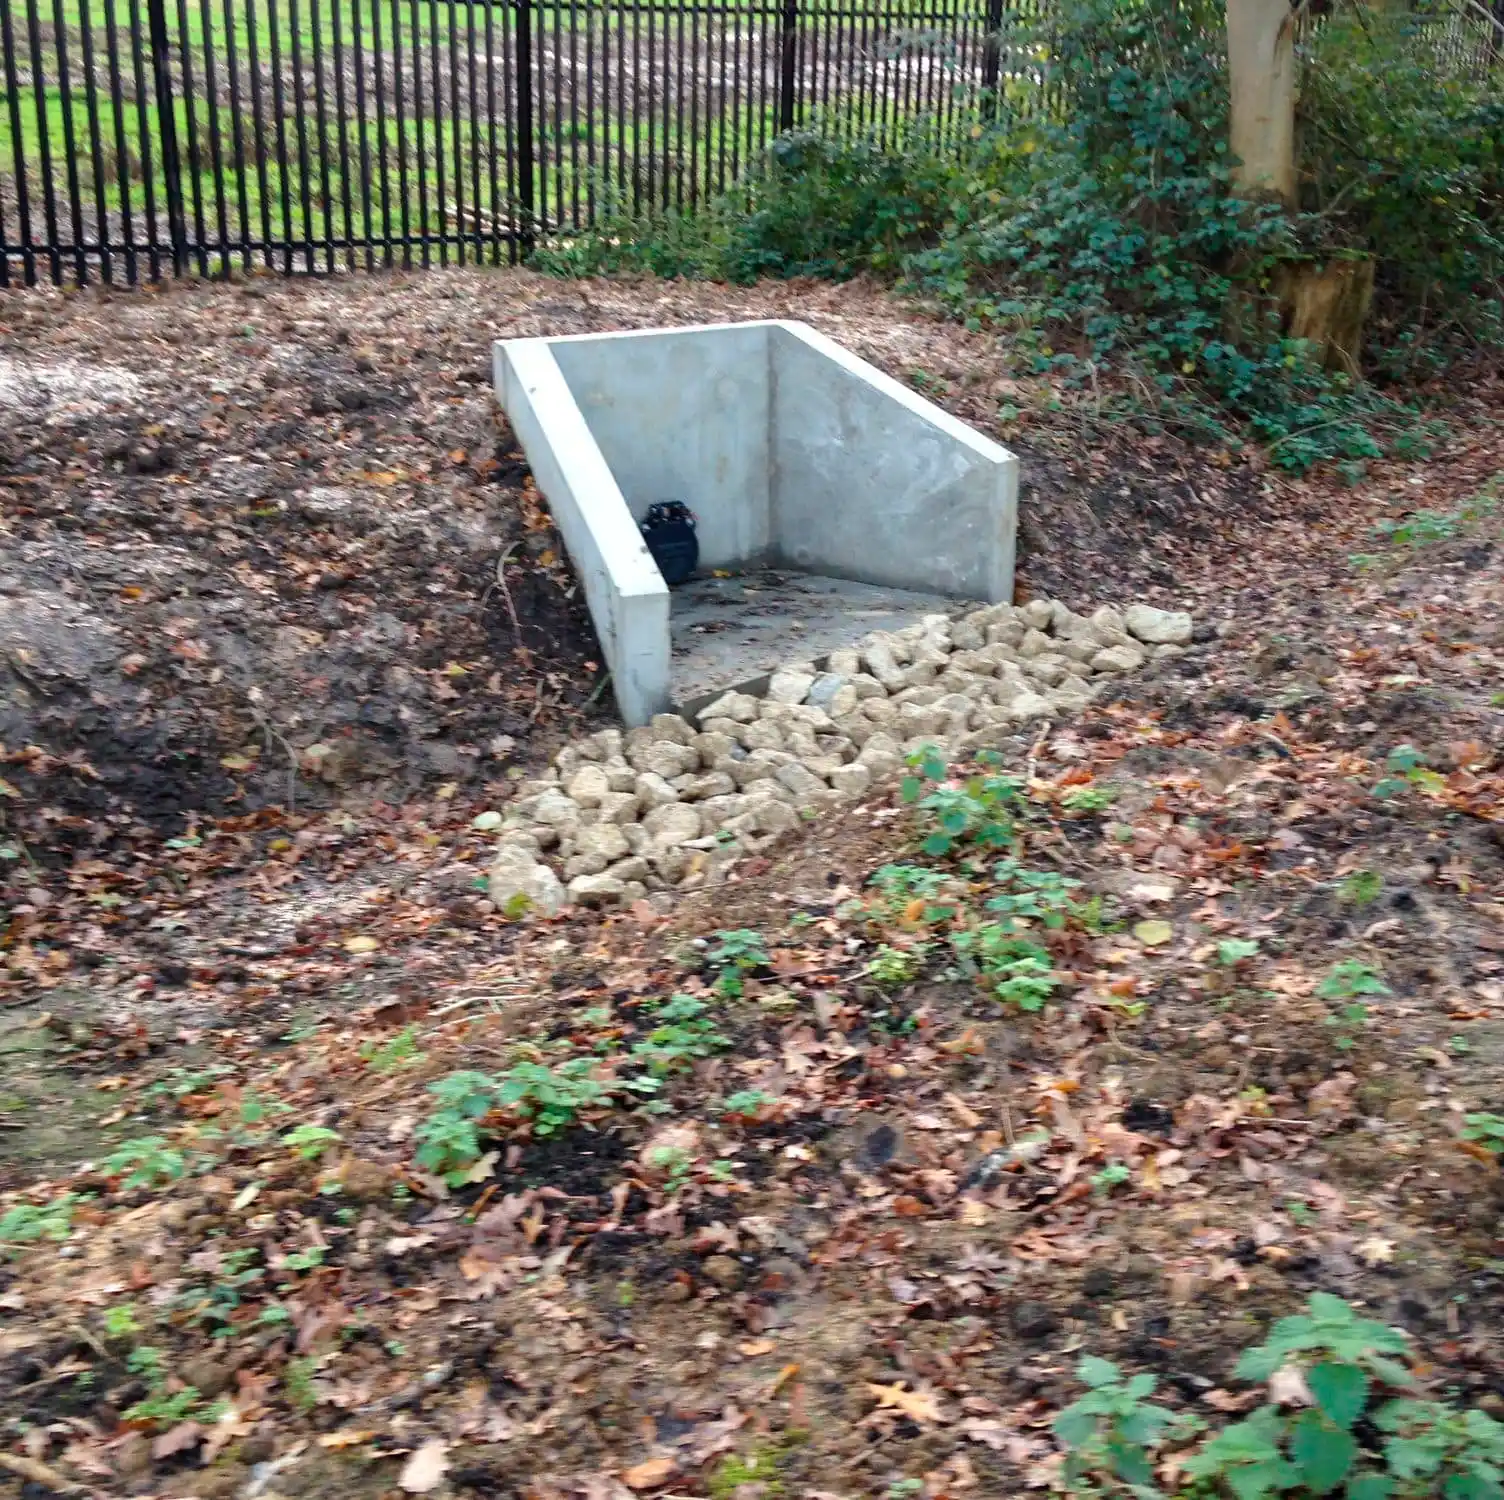
Imagine a powerful river coursing beneath a busy road, safely contained within a sturdy tunnel. This tunnel, known as a culvert, is a vital part of our infrastructure, allowing water to flow freely while preventing erosion and potential damage. But culverts need a strong guardian, a structure that can withstand the constant pressure of both water and soil – that’s where concrete headwalls come in.
Concrete headwalls are the unsung heroes of water management, serving as the sturdy guardians of our drainage systems. They’re the robust structures we often see at the ends of culverts, those vital underground tunnels that channel water under roads, railways, and other infrastructure. Without these steadfast protectors, culverts would quickly succumb to erosion, leading to costly repairs and potential hazards.
Here’s why concrete headwalls are essential:
1. Culvert Protection: Headwalls act like anchors, firmly securing the culvert pipe and preventing it from shifting or collapsing under the weight of soil and passing traffic. They protect against erosion caused by the constant force of water, ensuring the culvert’s longevity and effectiveness.
2. Erosion Prevention: By directing water flow and dissipating its energy, headwalls prevent the surrounding soil from washing away. This protection is crucial for maintaining the integrity of roads, embankments, and other nearby structures.
3. Enhanced Water Flow: Headwalls act as guides, smoothly transitioning water into and out of the culvert, reducing turbulence and improving flow efficiency. This prevents blockages, backwater effects, and potential flooding.
4. Durability and Low Maintenance: Built from highly durable concrete, headwalls are designed to withstand harsh weather conditions, resisting deterioration from moisture, freeze-thaw cycles, and chemical exposure. Their robust construction ensures long-term performance with minimal maintenance requirements.
5. Cost-Effectiveness: While the initial construction of a concrete headwall involves some investment, their durability and low maintenance needs translate to significant cost savings over time. Prefabricated concrete headwalls offer even greater cost-effectiveness by reducing labor and installation time.
Designing a Concrete Headwall: Key Considerations and Best Practices
Designing a concrete headwall is like crafting a suit of armor for your culvert – it needs to be strong, well-fitted, and able to withstand the specific challenges of its environment. Here are the key considerations to ensure your headwall design is up to the task:
Understanding the Water Flow
Before diving into concrete and steel, we need to understand the adversary – water. Specifically, we need accurate data on the volume and speed of water flowing through the culvert. This information dictates the headwall’s size, shape, and strength.
Knowing the Ground
A majestic headwall built on shaky ground is doomed to fail. Geotechnical investigations are crucial to understand the soil’s composition, strength, and drainage properties. This information determines the foundation’s depth and reinforcement needs.
Calculating the Load
Our headwall isn’t just going to be sitting pretty; it’s going to be carrying some serious weight. We need to factor in the soil pressing down, traffic rumbling above (if applicable), and the force of the water gushing through. Engineers meticulously calculate these loads to determine the headwall’s required load-bearing capacity.
Material Selection
Choosing the right concrete mix is crucial for a durable and long-lasting headwall. Factors like compressive strength, resistance to water permeability, and freeze-thaw durability should be considered based on the specific environmental conditions.
Reinforcing for Strength
Concrete might be tough, but it’s not invincible. Steel reinforcement bars, strategically placed within the headwall, increase its tensile strength and prevent cracking under pressure. The size and spacing of these rebar are determined by those meticulous calculations we mentioned earlier.
Environmental Considerations
Sustainable design practices can be incorporated into headwall construction. Using recycled materials, minimizing excavation, and incorporating features that promote vegetation growth can reduce the environmental impact.
Step-by-Step Guide: Constructing a Concrete Headwall for Water Management
Ready to build your own concrete headwall? Here’s a step-by-step guide to walk you through the process:
Step 1: Planning and Design Before breaking ground, consult with an engineer to finalize the headwall design. This step includes determining the appropriate dimensions, materials, and reinforcement based on the site-specific conditions and project requirements.
Step 2: Excavation and Formwork Excavate the area where the headwall will be installed, ensuring a level and compacted base. Construct sturdy formwork using wood or metal to create the mold for the concrete pour. Ensure the formwork is properly braced and secured to withstand the pressure of the wet concrete.
Step 3: Reinforcement Placement Place the steel reinforcement bars (rebar) within the formwork according to the engineered design. Secure the rebar in place using wire ties or chairs to ensure it stays in position during the concrete pour.
Step 4: Concrete Placement Mix the concrete according to the manufacturer’s instructions and pour it carefully into the formwork. Use a vibrator to eliminate air pockets and ensure the concrete flows around the reinforcement and into all corners of the formwork.
Step 5: Curing and Stripping Allow the concrete to cure for several days, keeping it moist to prevent premature drying and cracking. Once the concrete has reached sufficient strength, carefully remove the formwork.
Step 6: Backfilling and Finishing Backfill the area around the headwall with compacted soil or gravel, ensuring proper drainage and support. Finish the exposed concrete surfaces as desired, such as applying a sealant for added protection or incorporating decorative elements.
Maintaining Your Concrete Headwall
Building a concrete headwall is an accomplishment, but the job’s not over yet. Regular inspections and maintenance will ensure your creation stands the test of time.
- Keep it Clean: Remove any debris, vegetation, or sediment buildup that could obstruct water flow or trap moisture against the concrete.
- Inspect Regularly: Periodically check for any signs of cracking, erosion, or other damage. Early detection allows for prompt repairs, preventing minor issues from escalating into major problems.
- Address Issues Promptly: If you notice any damage, consult with a qualified professional to determine the appropriate repair methods. Addressing issues quickly will prevent further deterioration and extend the lifespan of your headwall.
Building a concrete headwall is a project you can tackle with careful planning, the right materials, and a bit of elbow grease. By following these tips and giving your headwall some TLC, you’ll ensure it effectively manages water flow and protects your property for years to come.

- The Best Battery Picture Lamps for Effortless Artwork Illumination - April 1, 2025
- Double Sink Bath Vanity Tops: A Buyer’s Guide - April 1, 2025
- Bath Towel Measurements: A Complete Guide to Choosing the Right Size - April 1, 2025