Autumn has painted the world in breathtaking hues, inspiring us to bring the vibrant spirit of the season into our homes. Embrace the joy of creating your own outdoor fall wreath, a charming addition that will transform your front door, mailbox, or patio into a festive autumnal display. Dive into a world of nature’s bounty, where fallen leaves, fragrant pine cones, and colorful berries await your creativity. Gather your loved ones, put on some cozy music, and let this guide be your companion as you embark on a delightful journey of crafting your own unique fall wreath.
Designing Your Dream Wreath: Essential Materials
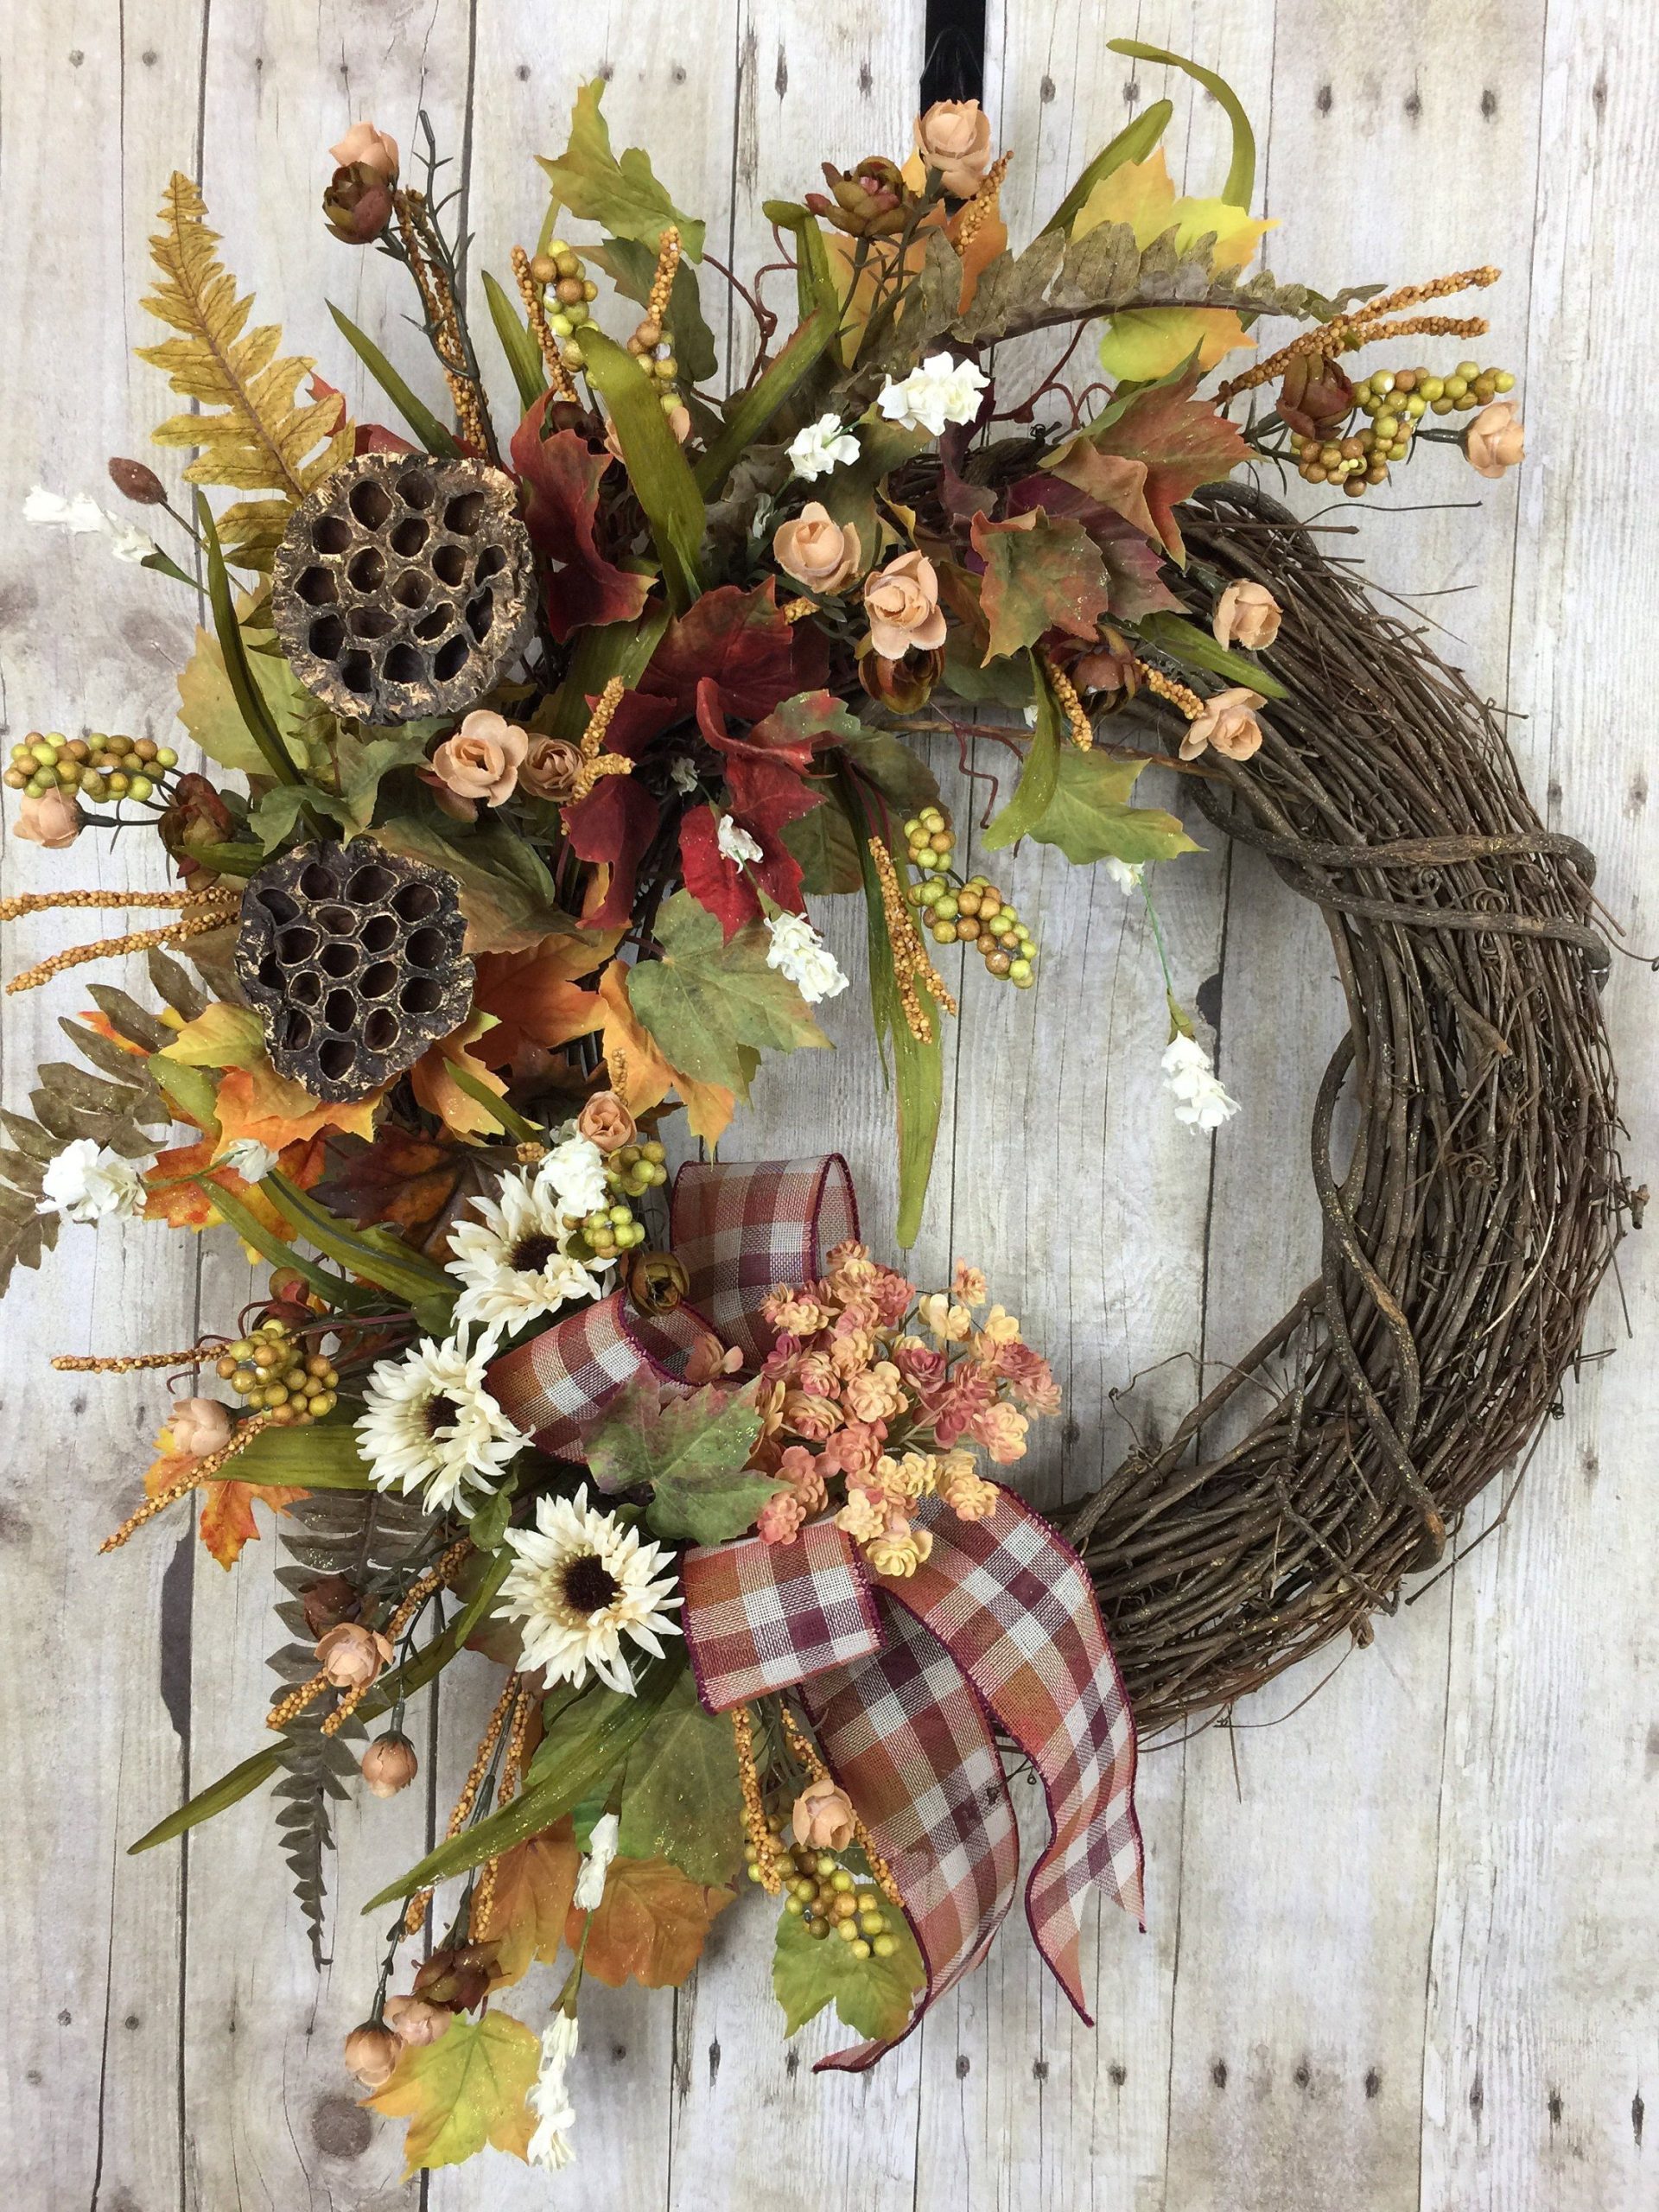
Nothing says “Welcome to fall!” quite like a gorgeous wreath adorning your front door, porch, or even a bare wall in your outdoor living space. And the best part? You can easily create your own unique masterpiece! Let’s dive into the world of DIY outdoor fall wreaths and discover how to make your home the envy of the neighborhood.
Before we get started, let’s gather our materials. One of the best things about wreath-making is that it’s super versatile – you can use a huge variety of items! Think about incorporating some of these elements:
Straight from Nature:
- Fallen Leaves: Nature’s confetti! Gather colorful leaves in different shapes and sizes.
- Dried Grasses and Grains: Add a touch of rustic charm with elements like wheat or pampas grass.
- Faux Foliage: Make your wreath last longer with artificial leaves, berries, and vines.
A Touch of Harvest:
- Pumpkins and Gourds: Miniature pumpkins and gourds scream fall and come in adorable sizes perfect for wreaths.
- Apples and Pears: Incorporate artificial fruits for longevity, or try drying slices of real fruit for a unique touch.
Floral Accents:
- Sunflowers: These cheerful blooms instantly brighten any space and embody the spirit of autumn.
- Dahlias and Chrysanthemums: These fall favorites come in a stunning array of colors to complement your design.
Textural Elements:
- Twigs and Branches: Intertwine bare branches for a rustic, natural base or to add dimension to your wreath.
- Pinecones: A classic fall staple that adds texture and a touch of woodsy charm.
Finishing Touches:
- Ribbons and Fabric: Burlap for a rustic vibe, velvet for a touch of elegance, or satin for a classic look—the possibilities are endless!
- Wire and Floral Tape: Essential for securing your materials to the wreath base.
Crafting Your Masterpiece: A Step-by-Step Guide
Ready to unleash your inner artist? Let’s create a wreath that’s uniquely yours!
1. Setting the Stage: Lay out all your chosen materials on a clean, spacious surface. This way, you can visualize your design and ensure everything is within arm’s reach.
2. Choosing Your Foundation: Select a wreath base that suits your design. Wire bases offer flexibility for incorporating heavier items. Foam bases are lightweight and easy to work with, while straw bases lend a rustic charm.
3. Layering Your Greenery: Start by attaching your foliage to the base. Secure it firmly using wire, floral tape, or hot glue (for artificial elements). Experiment with layering different types of foliage to create depth and visual interest.
4. Adding Accents: Now comes the fun part—adding your accents! Arrange your pumpkins, gourds, flowers, twigs, or any other embellishments you’ve chosen. Consider clustering similar items together or scattering them around the wreath for a balanced look.
5. Securing Your Design: Use wire, hot glue, or floral pins to ensure your embellishments are firmly attached to the wreath. You don’t want a rogue pumpkin making a break for it on a windy day!
6. The Finishing Touch: Complete your creation with a beautiful bow or wrap a ribbon around the entire wreath. Choose a ribbon that complements the colors and style of your wreath for a cohesive look.
Secrets to a Show-Stopping Wreath
Creating a beautiful wreath is easier than you might think! Here are some insider tips to help you achieve stunning results:
- Embrace Fall Colors: Think warm and inviting hues like fiery oranges, golden yellows, deep reds, and rustic browns. Don’t be afraid to experiment with different combinations to find what speaks to you.
- Texture is Key: Mix and match materials with varying textures to add visual depth and interest. Pair smooth pumpkins with rough-hewn twigs, delicate flowers with coarse burlap ribbon—you get the idea!
- Infuse Your Personality: This is your chance to let your creativity shine! Incorporate personal touches that reflect your style and interests—maybe it’s family photos, hand-painted pumpkins, or vintage trinkets.
- Weatherproof Your Creation: Since your wreath will be exposed to the elements, opt for durable materials like weather-resistant ribbons, artificial foliage, and sturdy accents.
- Maintain Your Masterpiece: Regularly dust or gently wipe down your wreath to keep it looking its best. When not in use, store it in a cool, dry place to protect it from damage.
Can I Use Artificial Greenery for My Outdoor Wreath?
You absolutely can! Those faux wreaths are tougher than they look. Since they’re usually made from things like plastic, foam, and weather-resistant fabrics, a little sunshine, rain, or wind won’t hurt them. So go ahead and hang one on your front door, your windows, maybe even your mailbox – get that fall feeling going strong!
Now, you might be thinking, “Why would I choose a fake wreath over a real one?”. Well, let’s talk about that.
Why Faux Can Be Fabulous:
- Built to Last: Think about it – real plants wilt, right? Not these guys. They’re designed to withstand the elements and look fresh year after year. Sun, rain, even a bit of snow – they can handle it!
- Low-Maintenance Love: No need to water them, trim them, or worry about pesky bugs. Just hang your wreath and enjoy!
- Years of Use: With just a bit of care, a good artificial wreath can last for ages. They’re a smart investment that brings joy for many seasons to come!
- Endless Options: From classic to quirky, there’s a fake wreath out there for every style and every season. You can find them in all sorts of colors, sizes, and styles to perfectly match your taste.
Choosing the Perfect Faux Wreath:
Ready to pick your perfect wreath? Keep these tips in mind:
- Material Matters: Opt for materials that are specifically designed for outdoor use. Look for words like “weather-resistant,” “fade-proof,” or “UV-protected.”
- Size It Up: Before you buy, measure the space where you plan to hang your wreath. You want it to look proportional – not too big, not too small, but just right!
- Reflect Your Style: Choose a wreath that complements your home’s personality. Whether your vibe is modern, rustic, or somewhere in between, there’s a wreath out there to match.
Keeping Your Wreath Looking Fresh:
Even though fake wreaths are low-maintenance, a little TLC goes a long way:
- Dust Regularly: Every now and then, give your wreath a gentle cleaning. A soft cloth, a brush, or even a quick blast from the hose (if it’s safe for the materials) can work wonders.
- Store Safely: When the season’s over, find a dry, indoor spot to store your wreath. This will help protect it from the elements and keep it looking its best for next year.
- UV Protection is Key: If your wreath will be exposed to direct sunlight, consider using a UV-resistant spray. This can help prevent fading and keep the colors vibrant.
The Bottom Line:
Faux wreaths are a fantastic way to add a touch of warmth and personality to your home’s exterior, without the upkeep of real plants. With so many styles and materials available, you’re sure to find the perfect one to welcome guests and brighten your doorstep!
What Types of Greenery Work Best for a Fall Wreath?
Choosing your greenery is like setting the stage. It’s the background that makes everything else pop! Think about the colors and textures you want – do you picture something classic and rustic like oak leaves or maybe something more modern and elegant like eucalyptus?
Nature is bursting with choices this time of year! Maple leaves are always a winner with their vibrant reds and oranges. Oak leaves offer a more rustic vibe with their deep browns and reds. If you’re a fan of that evergreen look, pine and fir branches are perfect for creating a long-lasting base for your wreath. Want something a little different? Eucalyptus brings those cool, silvery-green tones that can look really sophisticated. And don’t forget about herbs! Rosemary and sage not only add interesting textures but also bring a wonderful fragrance to your wreath.
Feeling adventurous? Why not try something totally unexpected? Magnolia leaves have a unique shape and texture, and wheat or ornamental grasses can add a touch of whimsy and movement.
Whatever you choose, just make sure it’s fresh! Wilted or damaged leaves won’t do your wreath any favors. With a little planning and a trip to your local garden center or even just your backyard, you’ll have a stunning fall wreath ready to welcome in the season.
Crafting an Outdoor Autumn Wreath: A Step-by-Step Guide
So, you’ve got the front door prepped and ready for a touch of fall magic, but what about a wreath? Let’s dive into how to craft a wreath that screams “fall vibes” without screaming, well, “craft store explosion.”
Gathering Your Supplies
Think of this as less of a rigid “materials list” and more of a “what speaks to your inner autumn-lover” guide.
You’ll probably want:
- A Wreath Base: Grapevine brings that rustic charm, while straw or foam are like blank canvases ready for your creativity.
- Foliage: Maple leaves like fire, oak leaves like leather, pine boughs whispering secrets – grab whatever foliage makes your heart sing. Don’t be afraid to mix and match textures and colors!
- Natural Accents: Pinecones still sticky with sap, acorns promising new beginnings, berries like tiny jewels – these are your wreath’s personality accents.
- The Essentials: Ribbon or twine for hanging (and maybe a touch of rustic flair), wire cutters for taming unruly stems, and scissors for any trimming needs.
Assembling Your Wreath
-
Choosing Your Base: Choose a wreath form that fits your door and your vision. A grand entrance might call for a larger, more substantial wreath, while a smaller door might benefit from something more delicate.
-
Prepping Your Greenery: Give your foraged foliage a quick once-over – remove any leaves that look a little worse for wear and trim those stems down to a manageable length.
-
Adding the Foliage: Now for the fun part! Use wire or floral tape (like nature’s glue) to attach your greenery to the wreath form. Start at the outer edges and work your way inwards, overlapping leaves for that lush, abundant look. Think layers, like you’re building a cozy autumn nest.
-
Incorporating Accents: This is where those pinecones, acorns, and berries come into play. Place them strategically amongst the foliage, securing them with wire. Don’t be afraid to experiment! You might find that asymmetrical arrangements create a more organic, natural feel.
-
Hanging Your Wreath: Tie a length of ribbon or twine around the top of your wreath, creating a loop for hanging. A plaid ribbon could add a touch of rustic whimsy, while a velvet ribbon might lean into that cozy, luxurious feel. It all depends on your personal style!
-
Admire Your Work: Hang your wreath on your door (or, you know, a nearby wall if you’re still admiring it up close) and take a moment to appreciate your handiwork.
Quick Tips from a Fellow Wreath Enthusiast:
- Nature is full of surprises! Don’t be afraid to incorporate unexpected elements into your wreath – dried seed pods, feathers, even small twigs can add texture and interest.
- Keep an eye on your wreath, especially if it’s exposed to the elements. You might need to replace wilted foliage or secure any loose embellishments.
- Most importantly, have fun with it! There’s no right or wrong way to make an autumn wreath, so embrace your creativity and let those autumnal vibes flow.

- The Best Battery Picture Lamps for Effortless Artwork Illumination - April 1, 2025
- Double Sink Bath Vanity Tops: A Buyer’s Guide - April 1, 2025
- Bath Towel Measurements: A Complete Guide to Choosing the Right Size - April 1, 2025