Transform Your Walls with Wainscoting: An Elegant Upgrade
Want to add a touch of timeless elegance and sophistication to your home? Wainscoting, a stylish and versatile wall treatment, might be the perfect solution. This comprehensive guide covers everything you need to know about wainscoting, from understanding its rich history and diverse styles to mastering the installation process and achieving a professional finish. Whether you’re a seasoned DIYer or a complete beginner, this guide will equip you with the knowledge and confidence to transform your walls from drab to fab. Discover how wainscoting can not only enhance your home’s aesthetic appeal but also protect your walls and potentially increase its value.
What is Wainscoting? A Deep Dive into this Classic Wall Treatment
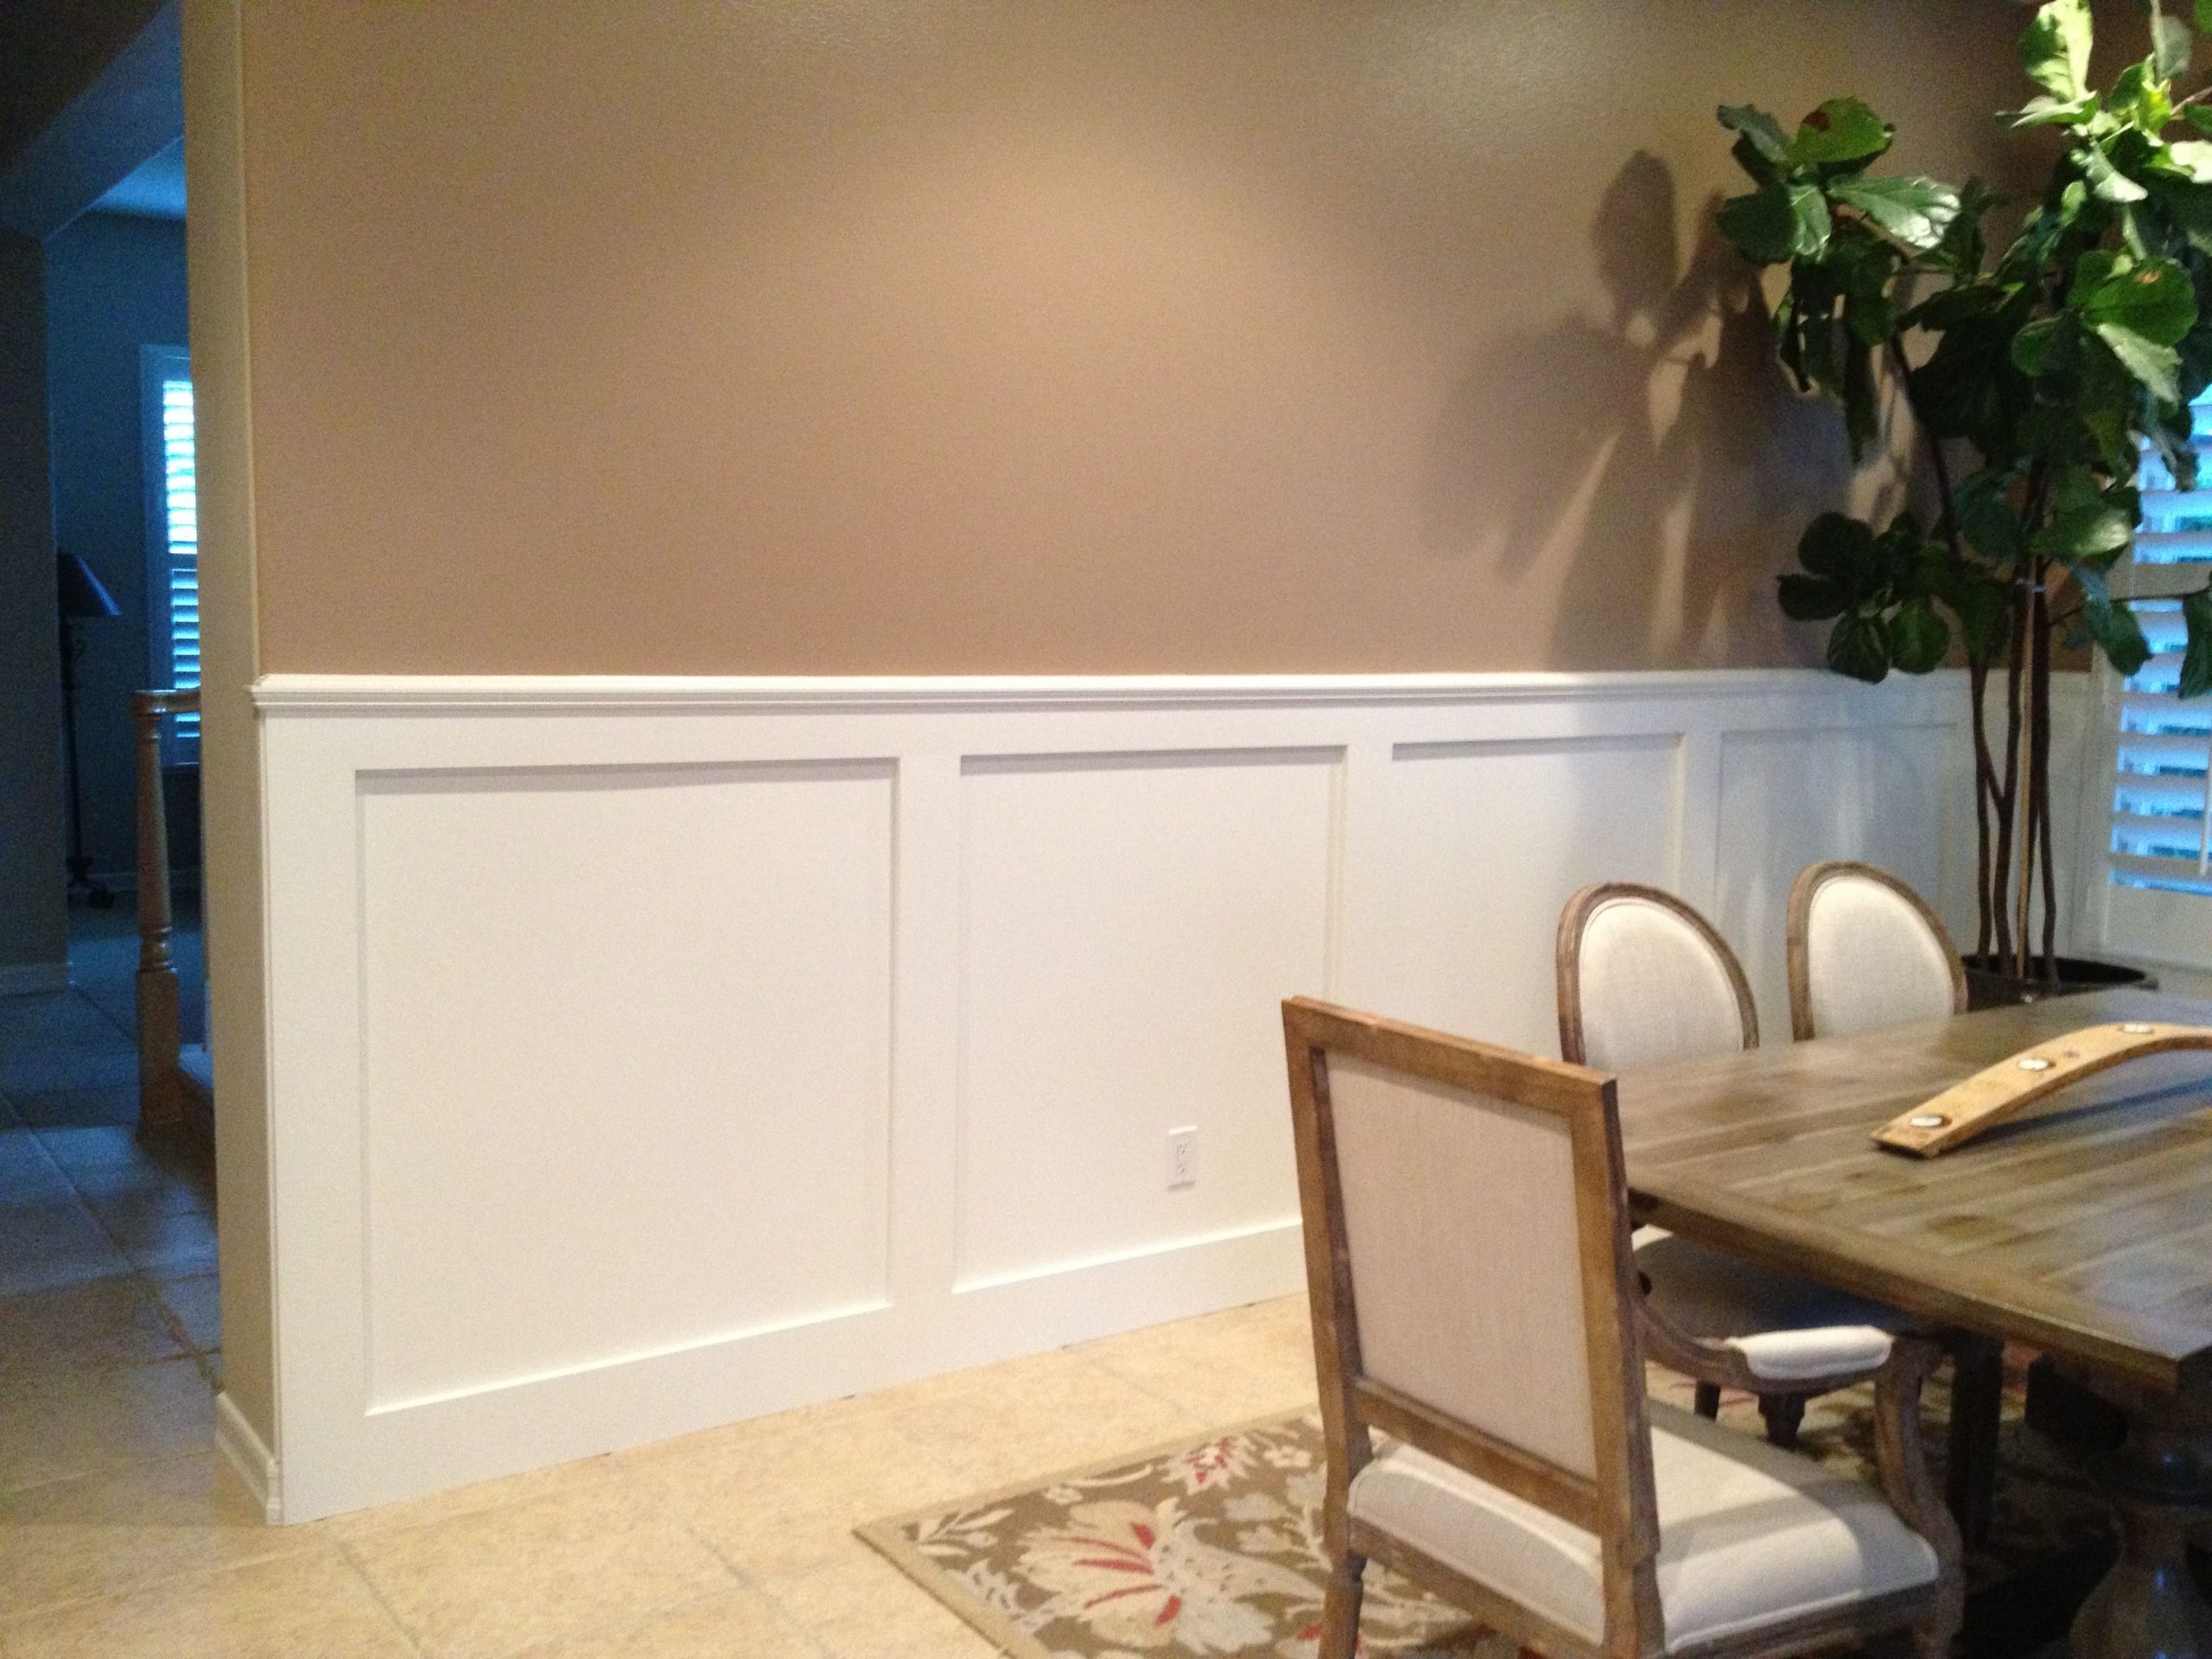
Wainscoting is a form of architectural wall covering applied to the lower portion of a wall. It can consist of decorative wooden panels, moldings designed to mimic panels, or beadboard. While historically used for protection against dampness and wall damage, it now serves primarily as a decorative element. Think of it as architectural detailing you can DIY. Imagine damp, chilly stone walls in older homes – wainscoting likely made a huge difference in comfort and keeping the interiors intact. This probably explains why its protective qualities became so appreciated.
Today, wainscoting continues to offer wall protection (especially useful in high-traffic areas like hallways) and has become a design star, adding architectural detail and depth to any room. It transforms plain walls into captivating focal points, injecting character and charm. Some experts believe its enduring popularity stems from this blend of practicality and visual appeal.
Wainscoting: Origin, Materials, & Versatility
Originally, wainscoting offered much-needed protection in older homes before the advent of central heating and modern insulation. The lower sections of walls, particularly vulnerable to dampness and damage, benefited from the durable, moisture-resistant qualities of wood like oak.
The beauty of modern wainscoting lies in its versatility. No longer limited to traditional wood, it’s available in a plethora of materials, from budget-friendly medium-density fiberboard (MDF) and easy-to-clean vinyl to luxurious solid wood. This variety allows you to seamlessly match your wainscoting to your existing décor, whether you are drawn to the budget friendly materials or to waterfall edge countertops. The range means achieving the classic look of wood wainscoting is possible even without the budget for the real deal.
This isn’t your grandma’s wainscoting, though. It offers a wider range of styles and price points than the traditional wood. And let’s not forget the sheer variety of styles! Whether you prefer the clean lines of beadboard, the elegant profiles of raised panels, the understated charm of recessed panels, or the simplicity of flat panels, there’s a wainscoting style to complement every aesthetic.
| Wainscoting Style | Description | Potential Use Cases |
|---|---|---|
| Beadboard | Features vertical grooves, creating a classic, cottage-like feel. | Bathrooms, kitchens, hallways, bedrooms |
| Raised Panels | Offers a more formal and traditional look with ornate raised panels. | Dining rooms, living rooms, libraries |
| Recessed Panels | Creates a subtle, sophisticated look with indented panels. | Living rooms, dens, home offices |
| Flat Panels | A simple and versatile option with smooth, flat panels. | Any room, especially modern or minimalist spaces |
Even the installation process offers flexibility. Simpler wainscoting styles can be a rewarding DIY project for those handy with tools. However, for more complex designs or if you’re short on time, professional installation is recommended. Ongoing research into new materials and application techniques suggests that even more innovative wainscoting options might appear in the future. So, while we may not know exactly what the future holds for wainscoting, one thing remains clear: its combination of beauty, practicality, and adaptability ensures its continued presence in interior design.
The Golden Rule of Wainscoting: Finding the Perfect Height
The “one-third rule” is a common guideline for wainscoting height, suggesting that the top of your wainscoting should sit roughly one-third of the way up the wall. This generally creates a pleasing, balanced look, especially in rooms with standard ceiling heights. However, it’s essential to remember that this is a guideline, not a hard and fast rule. The perfect wainscoting height depends on various factors, including ceiling height, room style, and personal preference.
Beyond the One-Third Rule: Adapting to Your Space
For rooms with high ceilings, strictly adhering to the one-third rule might create an awkward gap between the wainscoting and the ceiling. In such cases, consider going a bit higher, perhaps up to half the wall height, but avoiding placing it exactly halfway. This often leads to an unappealing “chopped-up” look, visually dividing the room in an unbalanced way.
Functionality also influences height decisions. In high-traffic areas, taller wainscoting provides more protection against scuffs and bumps. Room style plays a role as well. Taller, more elaborate wainscoting suits formal dining rooms, while lower, simpler paneling adds warmth to cozy bedrooms.
Proportions and Relationships: Creating Visual Harmony
Within the wainscoting itself, certain proportions generally create a balanced look. The chair rail (the horizontal piece at the top) is typically narrower than the baseboard. In raised panel designs, the stiles (vertical pieces) and rails (horizontal pieces) forming the panels have similar dimensions, though this may vary based on style.
The “one-third rule” offers a convenient starting point, but achieving truly harmonious proportions requires considering the specific characteristics of your room. Experiment until you find the wainscoting height that best complements your space.
Installing Wainscoting Over Drywall: A Practical Guide
Installing wainscoting directly over drywall is a common and effective method—likely the most popular approach for adding this elegant touch. It’s simpler and more budget-friendly than removing the drywall, working beautifully in most situations. This gives you the classic, upscale look without the major demolition and expense of more involved wall treatments.
Drywall provides a smooth, stable surface for wainscoting panels, beadboard, or board and batten. Key to a secure, lasting finish are construction adhesive and nails. The adhesive bonds tightly, preventing rattling or movement, while nails reinforce. A horizontal rail attached to the drywall helps guide installation, keeping panels aligned, especially valuable for DIY beginners.
Materials and Tools: Gathering Your Supplies
- Wainscoting panels (your chosen style)
- Construction adhesive (for paneling)
- Small finish nails (appropriate size)
- Measuring tape
- Level
- Pencil
- Safety glasses
- Miter saw (or hand saw)
- Nail gun (or hammer)
- Caulk gun and paintable caulk
Installation Steps: A Step-by-Step Guide
- Prepare the Drywall: Clean, dry, and free of debris. Patch holes and sand smooth.
- Measure and Mark: Decide on the wainscoting height, measure, and mark consistently around the room using a level. A chalk line or laser level can be very helpful. Marking stud locations is also a good idea.
- Attach a Leveling Rail (Optional but Recommended): A thin, straight piece of wood at your marked height adds support and guidance for your first row.
- Apply Adhesive: Apply a generous bead of adhesive to each panel’s back in a zig-zag pattern or evenly spread. Observe adhesive wait times (if any).
- Position Wainscoting: Align the panel’s bottom edge with your marked line (or leveling rail). Press firmly for good contact.
- Secure with Nails: For reinforcement, secure with finish nails every 8-12 inches. Stud locations offer extra support.
- Install Remaining Panels: Repeat steps 4-6, ensuring tight seams.
- Caulk and Fill: Apply paintable caulk to seams and nail holes. Smooth with a damp finger.
- Finish: Paint or stain to match your décor. Primer may be needed.
Pros and Cons: Weighing Your Options
| Pros | Cons |
|---|---|
| Easy and relatively quick installation | Adds slight thickness to the wall |
| Cost-effective | May be slightly harder to remove later |
| Durable and long-lasting | Requires careful drywall prep |
| Adds architectural interest and charm | |
| Protects the lower portion of the wall |
Cost Considerations: Budgeting for Your Project
Wainscoting costs vary significantly based on chosen materials (MDF, wood, PVC), area covered, and labor (DIY vs. professional). Material prices range from a few dollars to over $15 per square foot, with additional labor costs for professional installation.
Final Thoughts: Wainscoting for a Timeless Transformation
Wainscoting can dramatically enhance any room. Installing it over drywall proves a practical and beautiful way to transform your space with a touch of timeless elegance. While ongoing innovations emerge, this current method provides a reliable, effective approach. Remember to measure carefully, and enjoy transforming your home.
- Burning Plastic Smell in House: Causes, Solutions, and Safety Measures - April 8, 2025
- Best Bug Killer for Yard: Effective Pest Control Guide (2024) - April 8, 2025
- Brown Recluse Spider Bites: Identification, Treatment, and Prevention - April 8, 2025


