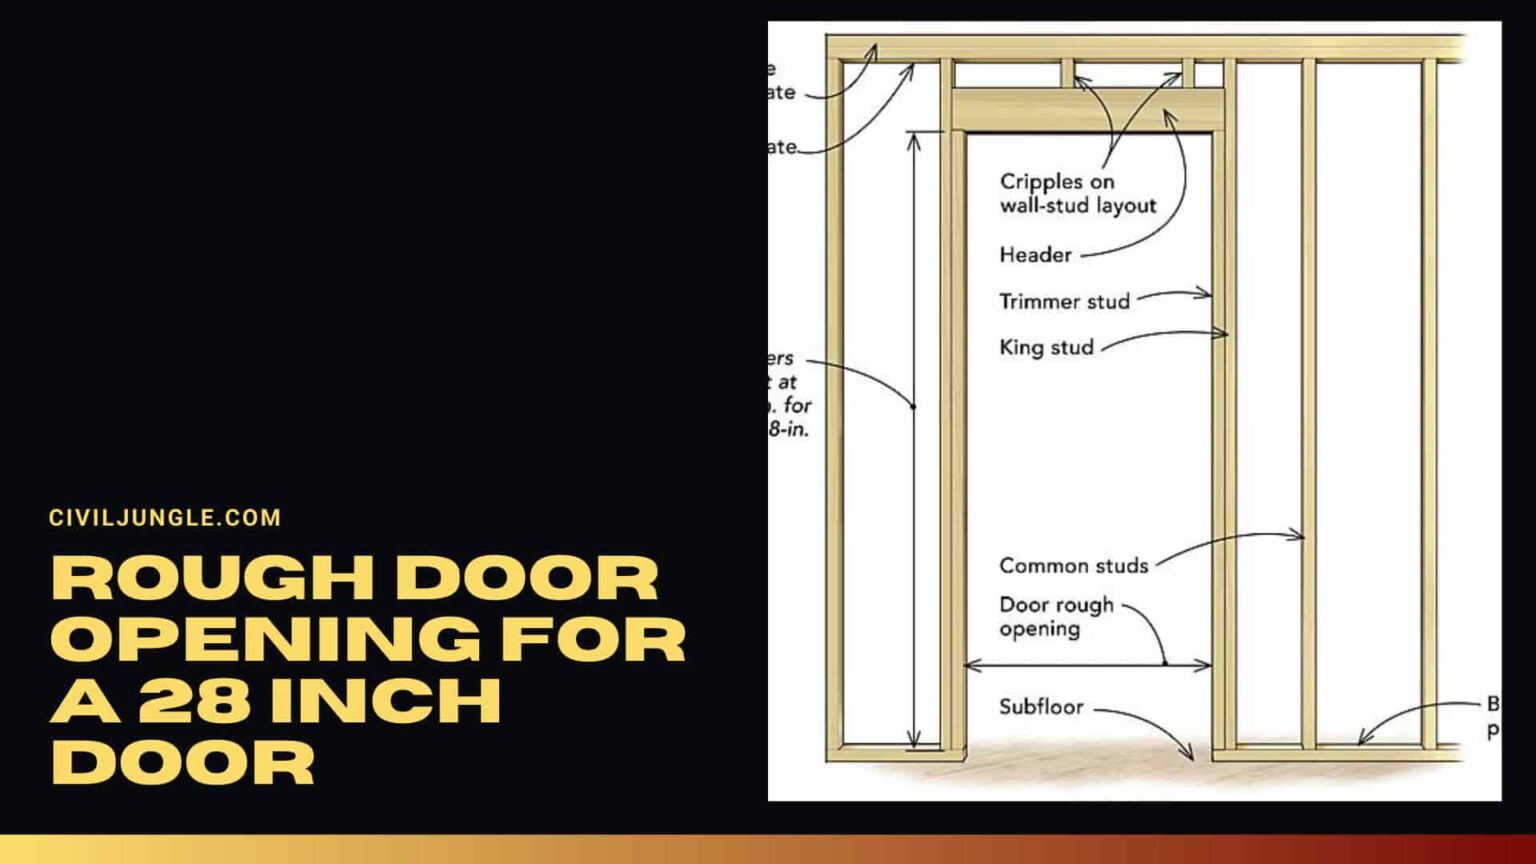
Framing a rough opening might seem like a small step, but it’s the foundation of a properly installed door. Whether you’re a seasoned contractor or a weekend DIYer, nailing this crucial step will save you time, money, and frustration. This comprehensive guide will walk you through everything you need to know, from understanding the basics to tackling trickier installations.
Understanding the Rough Opening
So, what exactly is a rough opening? Simply put, it’s the framed hole in your wall where the door and its frame will sit. Think of it as the perfect puzzle piece slot, ready to receive your door. Getting this measurement right is paramount for a door that swings smoothly, seals tightly, and looks professionally installed. A poorly sized opening can lead to drafts, sticking doors, and even structural issues down the line.
Calculating the Rough Opening: The General Rule
For a standard interior door, a good rule of thumb is to add 2 inches to the door’s width and 2.5 inches to its height. This extra space accommodates the door frame, shims (those thin wedges used for leveling), and provides some wiggle room for adjustments. The extra half-inch in height typically accounts for the threshold and any slight unevenness in the floor.
Example: A 30×80 inch door would typically require a 32×82.5 inch rough opening.
But hold on! While this “2 and 2.5” rule is a handy starting point, it’s not set in stone. Factors like door type, wall material, and local building codes can influence the ideal rough opening size. Always, always consult the manufacturer’s instructions and your local building codes before making any cuts. They’re your ultimate guide and can override any general rules.
Quick Reference: Standard Door Rough Openings
For your convenience, here’s a quick-reference chart for common door sizes:
| Door Size (Width x Height) | Rough Opening (Width x Height) |
|---|---|
| 24×80 | 26×82.5 (approximately) |
| 28×80 | 30×82.5 (approximately) |
| 30×80 | 32×82.5 (approximately) |
| 32×80 | 34×82.5 (approximately) |
| 36×80 | 38×82.5 (approximately) |
Remember, these are approximate dimensions. Always defer to the manufacturer’s specifications and local building codes.
Framing the Rough Opening: A Step-by-Step Guide
- Measure Meticulously: “Measure twice, cut once” isn’t just a catchy phrase—it’s the carpenter’s golden rule. Carefully measure your door’s width and height, double-checking for accuracy. Even a small discrepancy can throw off the entire installation.
- Calculate with Precision: Using the manufacturer’s instructions (and considering local building codes), calculate your rough opening dimensions.
- Mark with Clarity: Transfer those precise measurements to the wall, using a level and straight edge to ensure your lines are plumb and square.
- Cut with Confidence: With the appropriate saw for your wall material, carefully cut along your marked lines. Safety first! Wear appropriate safety gear, especially eye protection.
- Frame it Right: Install the header (the horizontal beam at the top), the sill (the bottom piece), and the jack studs (the vertical supports for the header). Use a level and shims to ensure everything is perfectly plumb, level, and square.
- Verify and Adjust: Before you proceed, double-check that the rough opening is square and plumb. Minor adjustments can usually be made with shims.
Special Considerations: Beyond the Standard Door
Not all doors are created equal. Here are some key considerations for different door types:
Exterior Doors
Exterior doors often require additional clearance for weatherstripping and flashing, which protect against the elements. Consult the manufacturer’s instructions and check for local building code requirements regarding weatherproofing and fire ratings.
Double Doors
Double doors essentially combine two single doors, requiring a significantly wider rough opening. Consider the center post and any necessary hardware when calculating the opening size.
Pocket Doors
Pocket doors slide into the wall, requiring a rough opening roughly twice the width of the door itself to accommodate the pocket and sliding hardware. Refer to the manufacturer’s instructions for precise measurements.
Troubleshooting Common Issues
Even with careful planning, things can occasionally go awry. Here are a few common problems and their solutions:
- Rough Opening Too Small: This is the trickier scenario. You might need to expand the opening, which can be a labor-intensive process. Prevention is key here—measure thrice, cut once!
- Rough Opening Too Large: A slightly oversized opening is generally easier to manage. Shims can fill small gaps, while larger gaps might require additional framing.
Elevating your entryway: The Door Threshold
Don’t overlook the importance of a well-installed door threshold. It’s the finishing touch that creates a seamless transition between rooms or between inside and out, further enhancing the functionality and aesthetics of your doorway.
Building Codes and Ongoing Research
Always check your local building codes before starting any project. These codes are in place to ensure safety and structural integrity and may have specific requirements that supersede general guidelines. Additionally, remember that construction best practices are constantly evolving. Stay informed about new materials and techniques that could impact future door installations.
By following these guidelines, you’ll be well on your way to creating a perfect rough opening for any door. Remember, taking the time to get it right the first time will ultimately save you effort and ensure a beautifully installed, smoothly functioning door for years to come.
- How to Remove Water Stains from Fabric: A Complete Guide - April 26, 2025
- How to Get Motor Oil Out of Clothes: Proven Methods & Expert Tips - April 26, 2025
- How to Get Deodorant Out of Black Shirts: Easy Stain Removal Guide - April 26, 2025


