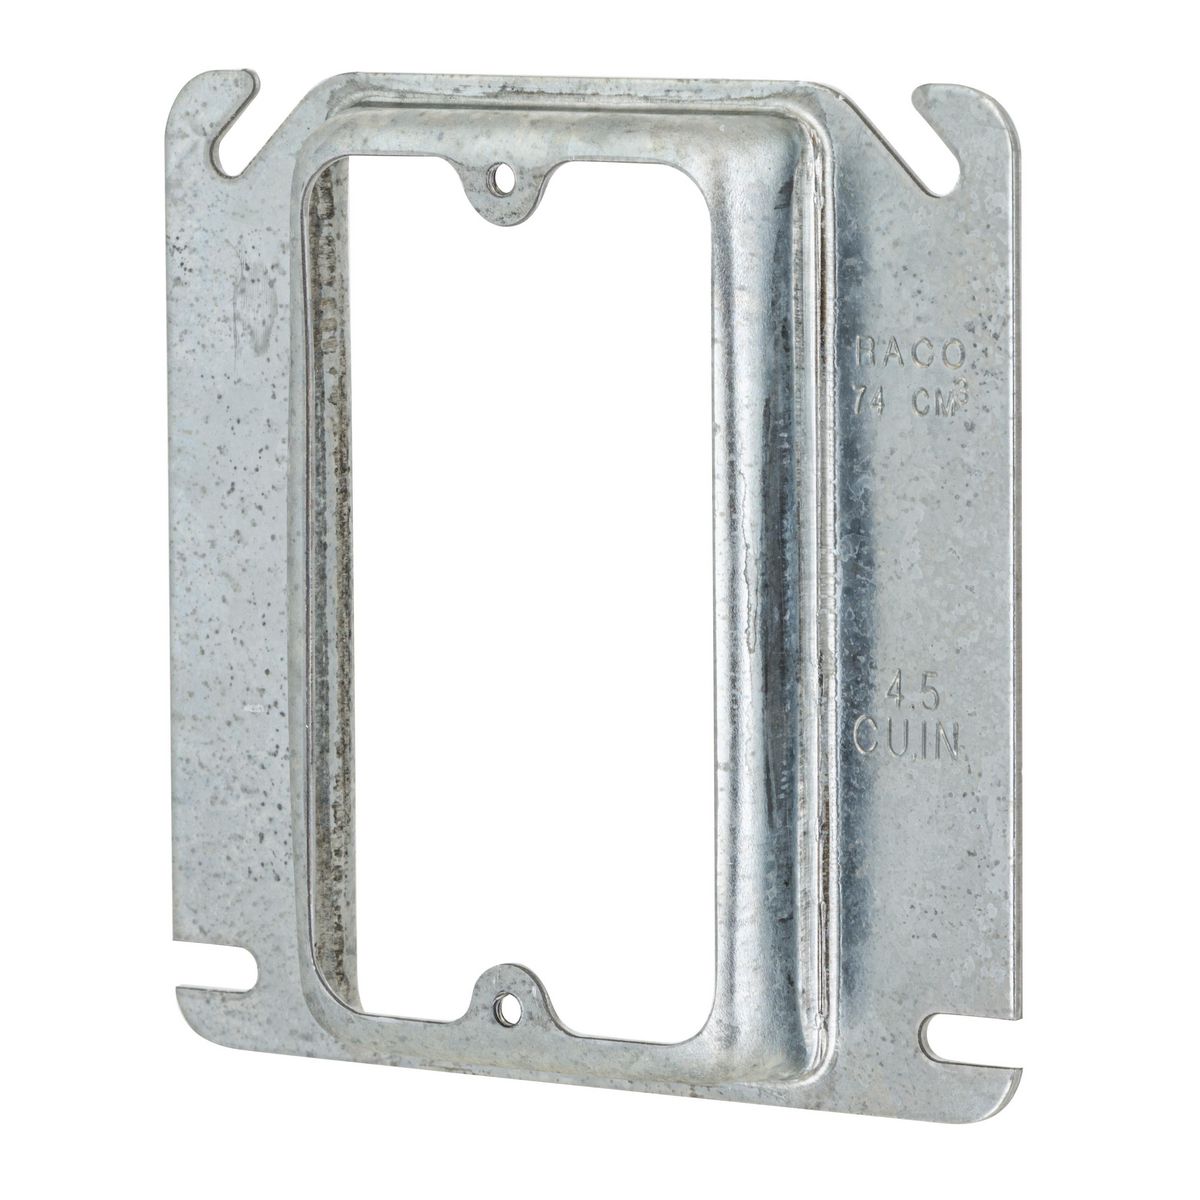
Ever notice how a slightly recessed outlet or light switch can disrupt the clean lines of a room? The secret to achieving a flush, professional finish lies in the humble mud ring. This comprehensive guide dives deep into the world of mud rings, covering everything from their purpose and types to installation and troubleshooting. Whether you’re a seasoned electrician or a weekend DIY warrior, this guide will equip you with the knowledge to become a mud ring master.
Understanding the Mud Ring
What is a Mud Ring?
A mud ring, also known as a plaster ring or mud plate, is a crucial component in electrical installations. It acts as a bridge between the electrical box, nestled within the wall, and the wall surface itself. This creates a flush surface for mounting outlets and switches, ensuring they sit perfectly level with the wall. This seemingly simple device plays a vital role in both aesthetics and safety.
Why Mud Rings Matter
Mud rings are more than just cosmetic enhancements. They contribute significantly to the safety and functionality of your electrical system. By providing a secure mounting point for devices, mud rings protect wiring from being pinched or damaged by the sharp edges of the electrical box. This protective function is paramount in preventing fire hazards caused by exposed or damaged wires. Additionally, they ensure a stable surface for screwing in faceplates, keeping your outlets and switches securely in place.
Materials and Sizes: Decoding the Options
Mud rings come in a variety of materials and sizes to accommodate diverse electrical setups. Understanding these options is crucial for selecting the right mud ring for your project.
Materials:
-
Steel: The workhorse of the mud ring world. Steel rings offer superior strength, impact resistance, and fire protection, making them ideal for high-traffic areas and commercial settings. They are also preferred in areas where fire safety is a major concern.
-
Plastic (PVC): The lightweight and cost-effective choice. Plastic mud rings are resistant to corrosion, making them suitable for damp locations like bathrooms and kitchens. While not as robust as steel, they are perfectly adequate for most residential applications.
-
Aluminum: A less common option that offers a balance between strength and weight. There is some debate among experts about the ideal applications for aluminum mud rings. Some believe they are suitable for specialized installations, research may shed more light on their optimal uses.
Sizes:
Mud ring sizes are categorized by “gangs,” which refer to the number of devices the ring can accommodate:
- Single-Gang: For a single device, like a standard outlet or switch.
- Double-Gang: Accommodates two devices side-by-side, such as a double light switch or two outlets.
- Three/Four-Gang: Designed for more complex setups with three or four devices.
Depth:
Mud ring depth is just as important as gang size. The depth should match the thickness of your wall material. Common depths include 1/2-inch, 5/8-inch, and 3/4-inch. Measuring your wall thickness before purchasing a mud ring is crucial for a proper fit.
| Mud Ring Type | Material Options | Typical Applications |
|---|---|---|
| Single Gang | Plastic/Metal | Standard outlets and single switches |
| Double Gang | Plastic/Metal | Double switches, outlets, or combinations |
| Deep | Plastic/Metal | Electrical boxes set further back in the wall |
| Shallow | Plastic/Metal | Boxes positioned close to the wall surface |
| 4-Square/Rectangular | Metal/Plastic | Used with 4-square or rectangular electrical boxes |
Installing a Mud Ring: A Step-by-Step Guide
Installing a mud ring is a straightforward process, even for DIY enthusiasts. However, always prioritize safety and turn off the power to the circuit at the breaker box before starting any electrical work.
-
Prepare the Electrical Box: Ensure the electrical box is securely attached to the wall stud. A loose box will result in a loose mud ring and a potentially unsafe installation.
-
Choose the Right Mud Ring: Measure the depth of your electrical box and select a mud ring that matches the measurement. If unsure, choose a slightly deeper ring rather than one that’s too shallow.
-
Secure the Mud Ring: Position the mud ring over the electrical box, ensuring it sits flush against the wall. Secure it to the box using the provided screws. Avoid overtightening, which could damage the ring or the box.
-
Test the Fit: Before finishing the wall, test-fit your outlet or switch to identify any potential issues. This allows for easy adjustments before the mud ring is concealed.
Troubleshooting
Even with careful planning, you might encounter a few common issues during installation. Here’s how to address them:
- Loose Mud Ring: Check the screws. Tighten or replace any damaged screws. If the problem persists, a deeper mud ring may be necessary.
- Gap Between Mud Ring and Wall: This likely indicates that the chosen mud ring is too shallow. Replace it with a deeper one for a flush fit. Avoid using shims as a long-term solution, as they can compromise the installation’s stability and even create fire hazards.
Alternatives and Why They’re Not Ideal
While alternatives like box extenders exist, they’re often cumbersome to install and might not provide the same level of stability as a properly installed mud ring. Shims are a temporary fix at best and are discouraged due to their potential to create further issues. A dedicated mud ring is specifically engineered for this purpose and provides the most reliable and effective solution.
Beyond Aesthetics: Safety and Functionality
Mud rings go beyond mere aesthetics. They play a critical role in protecting your electrical wiring by preventing it from being pinched or damaged between the electrical box and the wall surface. Damaged wiring poses a significant fire hazard, making the mud ring’s protective function just as important as its contribution to a polished finish. A properly installed mud ring ensures a safe, secure, and code-compliant installation, offering peace of mind.
Elegantly display your prized possessions with a sleek and stylish long floating shelf. Add a touch of timeless elegance and architectural flair to your staircase with a beautifully crafted newel post.
- How to Remove Water Stains from Fabric: A Complete Guide - April 26, 2025
- How to Get Motor Oil Out of Clothes: Proven Methods & Expert Tips - April 26, 2025
- How to Get Deodorant Out of Black Shirts: Easy Stain Removal Guide - April 26, 2025


