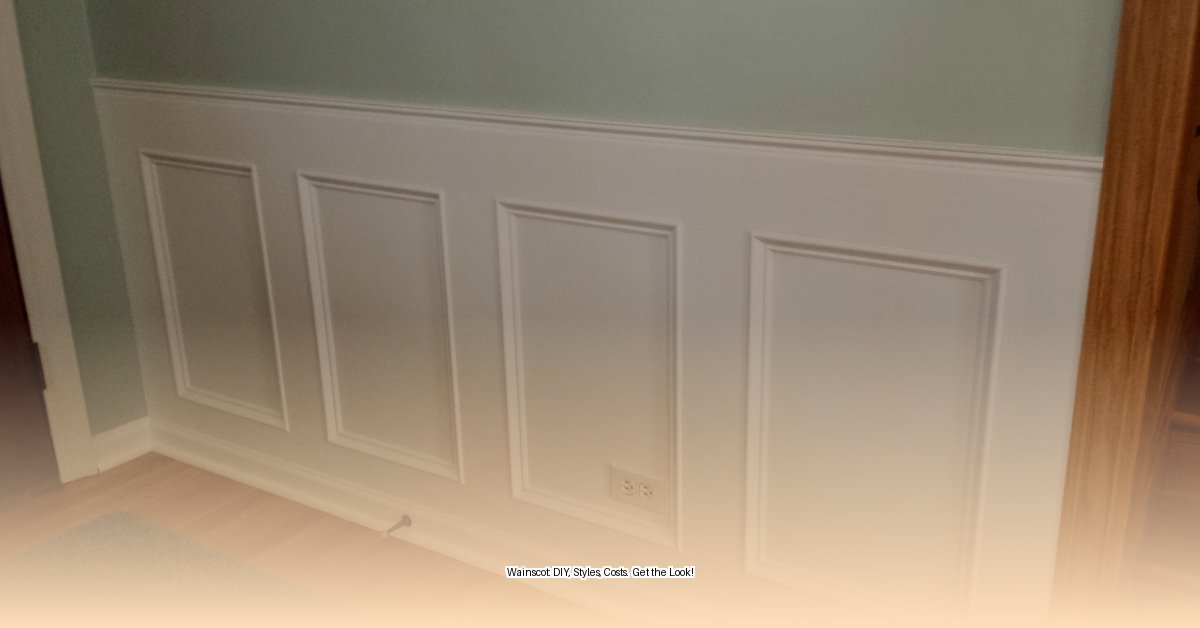
Understanding Wainscoting
Wainscoting adds architectural detail and a touch of elegance to any room, while also offering practical protection against everyday wear and tear. It’s a versatile design element that can transform a space, whether you’re aiming for classic charm or modern flair. This comprehensive guide will walk you through the various wainscoting styles, materials, costs, and installation methods, empowering you to make informed decisions for your next home improvement project.
Exploring Wainscoting Styles
Choosing the right wainscoting style is crucial for achieving the desired aesthetic. Here’s a breakdown of popular options:
-
Flat Panel: Clean lines and a minimalist look define this versatile style. It’s a great choice for contemporary and transitional interiors, offering a subtle yet stylish upgrade.
-
Raised Panel: This classic style features beveled edges and recessed panels, creating a sense of depth and sophistication. Raised panel wainscoting is ideal for formal dining rooms, living rooms, or homes with a traditional aesthetic.
-
Beadboard: Rows of vertical grooves characterize beadboard, adding texture and warmth. This style is often associated with cozy cottages and traditional homes, adding a touch of charm and character.
-
Board and Batten: Vertical boards with thin strips (battens) covering the seams create a rustic, farmhouse look. Board and batten wainscoting offers architectural interest and durability, especially in high-traffic areas.
-
Shiplap: Similar to board and batten, shiplap utilizes overlapping horizontal boards, offering a clean, modern farmhouse aesthetic. It’s a stylish choice for any room, adding a touch of casual elegance.
-
Overlay: Intricate designs are layered over flat panels, creating a highly decorative and customized look. Overlay wainscoting is perfect for those seeking a unique and eye-catching statement.
Decoding Wainscoting Materials and Costs
The material you choose impacts both the look and durability of your wainscoting. Here’s a comparison:
Wainscoting Material Comparison
| Material | Pros | Cons | Estimated Cost (per sq ft, installed) |
|---|---|---|---|
| Solid Wood | Timeless appeal, various species, durable, adds value | Expensive, requires regular maintenance | $10-$20 (can be higher for premium woods) |
| MDF | Affordable, smooth surface for painting, easy to work with | Not moisture-resistant, prone to dents | $8-$15 |
| PVC | Waterproof, durable, low maintenance, resists warping | Can look less authentic than wood, limited style options | $7-$12 |
| Engineered Wood | Combines wood fibers with resin, increased moisture resistance | Can be more expensive than MDF | $12 – $25 |
Cost Factors
Several factors influence the overall cost, including:
- Style: Intricate styles like raised panel and overlay typically cost more than simpler options like flat panel or beadboard.
- Material: Solid wood tends to be the most expensive, followed by engineered wood, PVC, and MDF as the most budget-friendly.
- Room Size: Larger rooms require more material, impacting the overall cost.
- Labor Costs: Professional installation adds to the expense, with rates varying by region.
- Finishing: Painting or staining adds to the final cost.
DIY Wainscoting Installation: A Step-by-Step Guide
Installing wainscoting can be a rewarding DIY project. Here’s a general overview:
-
Measure and Plan: Carefully measure the area to be covered and create a detailed plan. Consider the placement of electrical outlets, windows, and doors.
-
Prepare the Walls: Ensure your walls are clean, smooth, and free of imperfections. Patch any holes and sand rough spots for a flawless finish.
-
Mark Your Layout: Use a level and pencil to mark the desired height of the wainscoting and the placement of each panel. Double-check your measurements for accuracy.
-
Cut the Panels: Use a saw appropriate for your chosen material (a miter saw is recommended for angled cuts). Measure twice, cut once!
-
Attach the Panels: Secure the panels to the wall using adhesive, nails, or screws, depending on the material and wall type. Follow the manufacturer’s instructions.
-
Finishing Touches: Caulk any seams, fill nail holes, and add trim for a polished look. Prime and paint or stain the wainscoting to complete the transformation.
Board and Batten Installation (Example)
-
Prepare the Walls: Clean the walls, patch imperfections, and ensure a smooth surface.
-
Measure and Mark: Determine and mark the desired wainscoting height with a level and pencil.
-
Install Vertical Boards: Evenly space and align vertical boards with wall studs, securing them with nails or screws.
-
Attach Battens: Cover seams between boards with battens, creating a grid. Secure with nails or adhesive.
-
Caulk and Finish: Caulk gaps and seams. Once dry, paint or stain the wainscoting.
Where to Buy Wainscoting
You can likely find wainscoting panels at your local home improvement store (Home Depot, Lowe’s). Lumberyards offer a wider selection of wood species. Specialty millwork shops and online retailers carry unique or custom options.
Maintaining Your Wainscoting
Regular dusting is typically sufficient. Use a damp sponge for tougher grime. Avoid harsh chemicals, which could damage the finish.
Additional Tips and Trends
- Reclaimed Wood: Adds character and an eco-friendly touch.
- Geometric Patterns: Create a modern twist.
- Unconventional Applications: Consider wainscoting on kitchen islands, ceilings, stair risers, or furniture.
- Peel-and-Stick Wainscoting: A quick and easy DIY option, especially for renters or those wanting a temporary change.
Disclaimer: Costs are estimates for 2025 and may vary. Consult local suppliers and installers for accurate pricing. Always follow safety precautions when undertaking DIY projects and consult with professionals when needed, especially for electrical work. This information is for general guidance only and does not constitute professional advice.
By understanding the various wainscoting styles, materials, and installation methods, you can confidently transform your living space and add lasting value to your home. Whether you choose a classic or contemporary look, wainscoting is a timeless design element that enhances any interior.
- Dora the Explorer Wipe-Off Fun: Safe & Mess-Free Activities for Little Explorers - April 18, 2025
- Does Lemongrass Repel Mosquitoes? Fact vs. Fiction + How to Use It - April 18, 2025
- Do Woodchucks Climb Trees?Fact vs. Fiction - April 18, 2025


