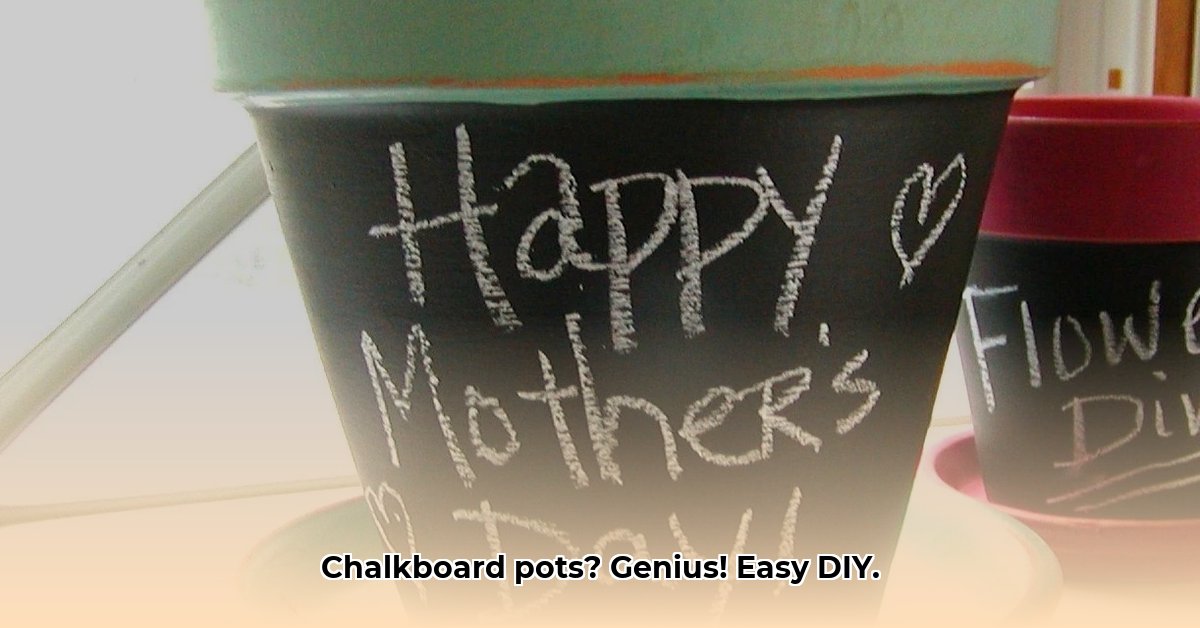
Imagine the vibrant green of your herbs against the matte black of a chalkboard pot, a charming touch of rustic style adding personality to your garden. Chalkboard flower pots offer endless possibilities, from practical labeling to whimsical designs. Whether you’re a DIY enthusiast or prefer ready-made options, this guide will inspire you to bring this charming trend into your own space.
Crafting Your Own Chalkboard Pots
Transforming ordinary pots into stylish chalkboard masterpieces is easier than you might think. This section provides a comprehensive guide for creating your own, building upon popular crafting techniques.
Gathering Your Supplies
This project is likely to use materials you already have at home. For the DIY approach, you’ll need:
- Terracotta pots: These classic clay pots are ideal, but any pot with a smooth surface will work.
- Chalkboard paint: Choose from classic black, earthy green, or any color that sparks your imagination.
- Painter’s tape (optional): For crisp lines and precise designs.
- Twine (optional): Adds a touch of rustic flair.
- Chalk: For writing and decorating.
Preparing Your Pots
Before you begin painting, ensure your pots are clean and dry. This allows the paint to adhere properly and prevents future chipping. This initial cleaning is crucial for a professional finish.
Painting Techniques: Two Approaches
Method 1: The Full Chalkboard Canvas
- Prep work: Thoroughly clean your pot, removing any dirt or debris.
- Painting: Apply thin, even coats of chalkboard paint, allowing each coat to dry completely before applying the next. Two to three coats are usually sufficient.
- Rim Enhancement (optional): Add a pop of color or a contrasting design to the rim with acrylic paints or markers.
- Seasoning: Rub chalk all over the chalkboard surface to prevent “ghosting.”
- Planting: Pot your plant and add your creative chalkboard labels or designs.
Method 2: A Touch of Chalkboard Charm (Rim Only)
- Cleaning: Focus on cleaning the rim of the pot.
- Priming (optional): A light coat of primer on the rim can improve paint adhesion.
- Painting: Apply two thin coats of chalkboard paint to the rim, letting each coat dry completely.
- Rustic Touch (optional): Wrap twine around the pot for a farmhouse aesthetic.
- Seasoning: Rub chalk all over the painted rim.
- Planting and Labeling: Add your plants and labels.
Ready-Made Chalkboard Pots: A Convenient Alternative
Short on time or prefer a quicker solution? Ready-made chalkboard pots are widely available. Consider the following when choosing:
| Feature | Option 1 | Option 2 | Option 3 |
|---|---|---|---|
| Size | Small (4″) | Medium (6″) | Large (10″) |
| Material | Terra Cotta | Ceramic | Plastic |
| Drainage | Yes | Yes | Yes |
| Price Range | $5 – $10 | $10 – $15 | $8 – $12 |
| Where to Buy | Garden Centers, Craft Stores | Online Retailers, Home Improvement Stores | Discount Stores, Online Marketplaces |
Unleashing Your Creativity: Design Inspiration
Chalkboard pots offer a canvas for your imagination. Here are some ideas:
- Herb Garden Chic: Label herbs with their culinary uses (“Basil for Pesto”).
- Seasonal Flair: Decorate with festive messages for holidays.
- Personalized Gifts: Pot a plant and personalize it with a message.
- Whimsical Designs: Draw, doodle, and add artistic flourishes.
- Inspirational Quotes: Share your favorite quotes.
- Plant Care Reminders: Jot down watering or fertilizing schedules.
Sustainability and Upcycling
Repurposing old pots with chalkboard paint is a sustainable and creative practice. Give new life to forgotten containers, reducing waste and adding unique charm to your garden. You can likely discover old pots in your very home or from local thrift stores.
Troubleshooting and Tips
- Chipping Paint: Ensure the pot is clean before painting and consider a sealant after the paint dries. Ongoing research suggests certain sealants may impact the chalkboard’s functionality, so testing is recommended.
- Smudging Chalk: Try chalk markers for smudge-resistant designs. “Seasoning” the chalkboard can also help reduce smudging.
- Changing Designs: Simply wipe the chalkboard surface clean with a damp cloth for a fresh start.
“Crafting is a way to express yourself and create something beautiful.” – Unknown
Expanding Your Chalkboard Horizons
Explore colored chalkboard paint for a wider range of design possibilities. Consider using stencils, decorative tapes, or freehand drawing for intricate details.
Conclusion
Chalkboard flower pots bring a touch of personalized charm to any space. Whether you choose the DIY route or opt for ready-made options, these versatile planters offer endless possibilities for creative expression. So, gather your supplies, unleash your inner artist, and enjoy the process of transforming ordinary pots into extraordinary garden accents. Share your creations on social media and inspire others to join in the fun!
- How to Measure Your Belt Size (for Women): 3 Easy & Accurate Methods - April 27, 2025
- How to Remove Permanent Hair Dye From Hair: Safe & Effective Methods - April 27, 2025
- How to Remove Ink from Leather: Effective DIY Methods and Expert Tips - April 27, 2025


