Your heat’s out and the house is freezing—we get it. It’s frustrating! This guide provides clear, step-by-step instructions to help you troubleshoot common heating problems. We’ll cover quick checks you can do yourself, and when it’s time to call in a professional. Let’s get started!
Initial Checks: Quick Wins for a Warm Home
Before diving into more complex issues, let’s start with the easy stuff. These quick checks often solve the problem without needing any tools.
1. Thermostat Tune-Up
- Check the Setting: Is the thermostat set to “heat” and at a temperature higher than the current room temperature? It seems obvious, but it’s an easy oversight.
- Battery Boost: If your thermostat is battery-powered, try replacing the batteries. Weak batteries can cause all sorts of strange behavior.
- Program Check: If you have a programmable thermostat, double-check the scheduled settings. It might be accidentally set to an “away” mode or an unexpected temperature. Consult your thermostat’s manual for specific instructions if needed.
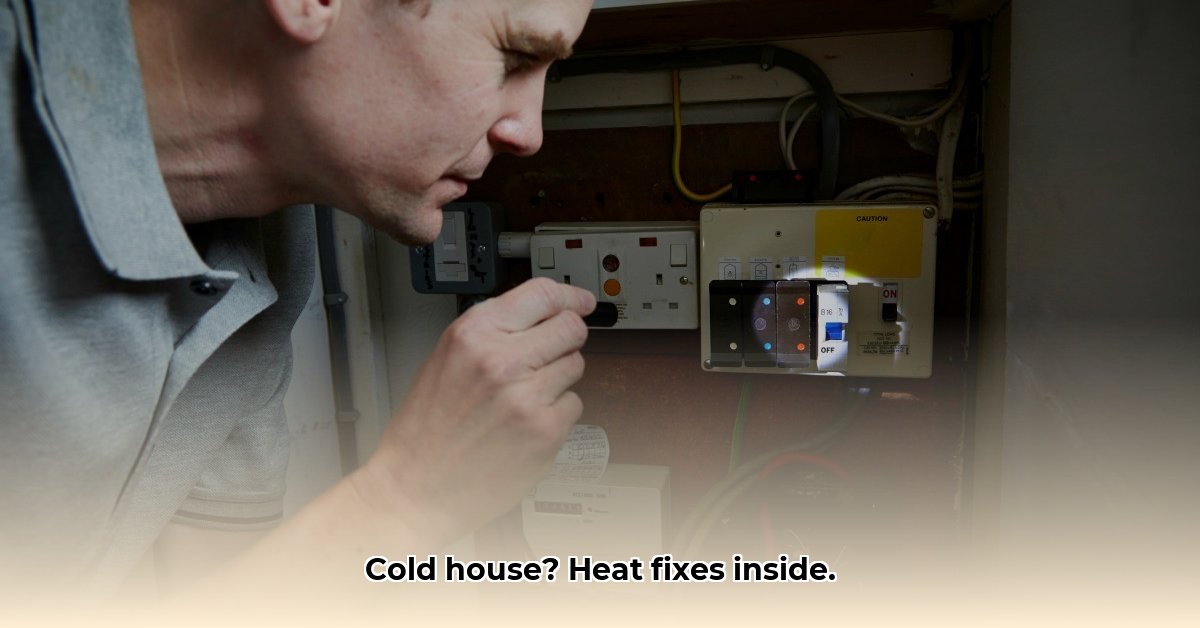
2. Electrical Essentials
- Breaker Check: Locate your electrical panel and find the breaker dedicated to your furnace or heat pump. Is it tripped? If so, flip it back on.
- Power Switch: Some furnaces and heat pumps have a dedicated power switch near the unit. Make sure it’s in the “on” position.
3. Filter Fix
- Filter Inspection: A dirty air filter restricts airflow, making your system work harder. Locate your filter (usually near the blower motor or return air vent) and check its condition.
- Filter Replacement: If the filter is gray and dusty, replace it with a new one of the correct size and MERV rating (check your owner’s manual for recommendations).
Gas Furnace Specific Checks
If you have a gas furnace, these additional checks might pinpoint the problem.
4. Gas Supply Scrutiny
- Gas Valve: Locate the gas shut-off valve for your furnace. Ensure it’s fully open (parallel to the gas pipe). Safety First: If you smell gas, evacuate your home immediately and contact your gas company. Do not attempt to locate the leak yourself.
- Pilot Light (Older Furnaces): If your furnace has a standing pilot light and it’s out, follow these steps for relighting (consult your owner’s manual for model-specific instructions):
- Turn the gas valve knob to “Pilot.”
- Press and hold the reset button while lighting the pilot with a long lighter or match.
- Continue holding the reset button for about a minute after the pilot ignites.
5. Exhaust Flue Examination
- Obstruction Check: Ensure the exhaust flue (your furnace’s chimney) is clear of any obstructions like bird nests, leaves, or debris.
- Damage Check: Look for signs of corrosion, rust, or damage to the flue. Safety Note: A blocked or damaged flue is a serious safety hazard. Contact a professional immediately if you suspect any issues.
Heat Pump Specific Checks
For those with heat pumps, these checks focus on the outdoor unit.
6. Outdoor Unit Assessment
- Clear the Area: Remove any debris, snow, or ice that could be blocking airflow around the outdoor unit.
- Ice Buildup: If the coils are frosted over, carefully pour lukewarm (not hot!) water over them after turning off the power to the unit at the breaker. Caution: Frequent ice buildup might indicate a problem with the defrost cycle, requiring professional attention.
7. Emergency Heat Check
- Emergency Heat Activation: If your heat pump isn’t providing enough heat, try switching to the “emergency heat” setting on your thermostat (consult your owner’s manual). Note: Emergency heat is more expensive to run and isn’t meant for extended use. Frequent reliance on emergency heat suggests a potential problem with your heat pump.
Ductwork Detective Work
8. Vent Verification
- Open Registers: Ensure all room registers (vents) are open and unobstructed. Closed vents can restrict airflow and impact heating efficiency.
- Duct Inspection: Visually inspect any accessible ductwork for leaks or gaps. Seal any leaks you find with metallic duct tape. For leaks hidden behind walls or for a thorough duct cleaning, contact a professional.
When to Call a Pro
While many heating issues can be resolved with DIY troubleshooting, some situations require professional expertise. Call a qualified HVAC technician if you experience:
- Gas Smell: Suspected gas leaks are extremely dangerous and require immediate professional attention.
- Unusual Noises: Banging, whistling, rattling, or squealing from your furnace or heat pump could indicate a serious problem.
- Repeated Breaker Trips: This suggests an underlying electrical issue that could be hazardous.
- Persistent Problems: If you’ve tried the DIY fixes outlined in this guide and your heat still isn’t working, it’s time to call a pro.
- Complex Issues: Issues like a cracked heat exchanger, refrigerant leaks (in heat pumps), or problems with the internal workings of your unit require specialized tools and knowledge.
Troubleshooting Table
| Problem | Possible DIY Fix | When to Call a Pro |
|---|---|---|
| No Heat | Check thermostat, batteries, air filter, breaker, power switch | Persistent issues, unusual noises, gas smell, pilot light problems |
| Uneven Heating | Check air filter, vents, ductwork | Duct leaks, significant airflow issues, closed dampers |
| Condensate Line Issues | Thaw frozen pipe, try clearing blockage | Persistent blockage, damaged line |
| Condensate Pump Issues | Check power, clean float switch | Pump failure, unusual noises |
| Iced-up Heat Pump | Gently melt ice | Frequent ice buildup, suspected defrost cycle malfunction |
| Emergency Heat Issues | Check emergency heat breaker | Breaker trips repeatedly, unknown cause of malfunction |
| Strange Sounds | None, Investigate Sounds | Any new or unusual sounds |
By following these steps, you’ll likely be able to identify the cause of your heating problem and potentially fix it yourself. Remember, safety first! Don’t hesitate to call a professional when needed. A warm and safe home is worth the peace of mind.

- How to Measure Your Belt Size (for Women): 3 Easy & Accurate Methods - April 27, 2025
- How to Remove Permanent Hair Dye From Hair: Safe & Effective Methods - April 27, 2025
- How to Remove Ink from Leather: Effective DIY Methods and Expert Tips - April 27, 2025