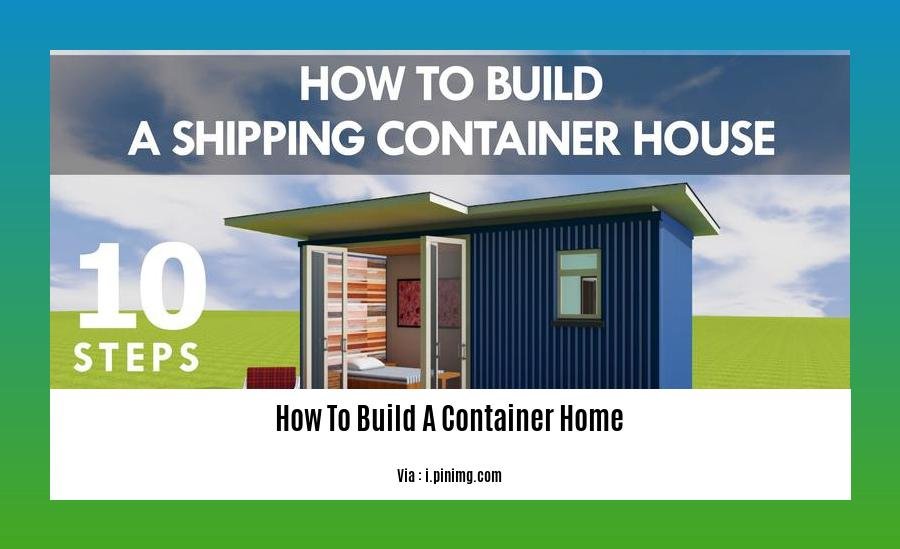
Embark on a transformative journey in sustainable living with [1. How to Build a Container Home: A Comprehensive Guide to Sustainable Living and Eco-Conscious Design]. Discover the secrets to crafting an energy-efficient, cost-effective, and environmentally friendly home using shipping containers. Prepare to be inspired as we delve into the art of sustainable architecture, transforming raw containers into modern, eco-friendly dwellings.
Key Takeaways:
-
Legal Compliance: Research local building regulations and obtain necessary permits.
-
Shipping Container Acquisition: Determine quantity, size, and condition; arrange transportation and delivery.
-
Team Assembly: Engage project manager, builders, and subcontractors for specialized tasks.
-
Site Preparation: Clear the area, install utilities, and prepare foundation.
-
Foundation: Create a stable base using concrete footings or piers.
-
Container Modifications: Cut openings, insulate, weatherproof, and install ventilation.
-
Structural Assembly: Secure containers to foundation, connect them, and ensure stability.
-
Windows, Doors, and Ventilation: Install windows, exterior doors, skylights, and ventilation systems.
-
Finishing Touches: Complete interior and exterior finishes, including insulation, flooring, paint, siding, and roofing.
-
Utilities and Appliances: Connect water, sewer, electricity, and install appliances.
-
Finalization: Obtain certificate of occupancy, conduct final inspection, and make any necessary adjustments.
-
Useful Resources:
How to Build a Container Home: A Complete Guide
Hello, everyone! In this comprehensive guide, I’ll help you navigate the world of container home construction. Whether you’re an experienced builder or a curious homeowner, we’ll cover every step from planning and preparation to finalizing your eco-friendly oasis. Let’s dive in!
Step 1: Laying the Foundation for Your Sustainable Abode
-
Research Local Regulations and Permits:
-
Begin by understanding local building codes, zoning regulations, and permit requirements for container homes. Make sure your project complies with all legal aspects.
-
Selecting the Right Containers:
-
Decide on the number and size of shipping containers you’ll need. Choose new or used containers in good condition to ensure structural integrity.
-
Preparing the Site:
-
Clear and level the building site to create a stable base for your container home. Remember to install necessary utilities like water, sewer, and electricity.
Step 2: Bringing Your Container Home to Life
-
Modifying the Containers:
-
Cut precise openings for doors, windows, and skylights, allowing natural light to flood in. Remember to add insulation and ventilation to maintain comfort.
-
Attaching the Containers:
-
Securely attach the containers to the foundation using approved methods. Connect them together using structural elements, ensuring stability and safety.
-
Installing Windows, Doors, and Ventilation:
-
Install windows and exterior doors for easy access and natural illumination. Don’t forget skylights for extra brightness. Proper ventilation systems are essential for fresh air circulation.
-
Finishing the Interior and Exterior:
-
Apply insulation, drywall, and flooring to create a cozy living space. Customize the interior with paint or wallpaper that reflects your style. For the exterior, choose weather-resistant siding and roofing materials.
Step 3: Connecting Utilities and Appliances
-
Connecting Utilities:
-
Connect water, sewer, and electricity to your container home, ensuring a reliable supply of essential services.
-
Installing Appliances:
-
Choose energy-efficient appliances that align with your sustainable lifestyle. Install a kitchen stove, refrigerator, and HVAC system to make your home comfortable and functional.
Step 4: Finalizing Your Eco-Friendly Sanctuary
-
Obtain Certificate of Occupancy:
-
Get a certificate of occupancy from local authorities, confirming that your container home meets all building codes and regulations.
-
Conduct Final Inspection:
-
Perform a thorough inspection of your home to ensure 100% compliance with building codes. Make any necessary adjustments or repairs before moving in.
By following these steps, you’ll create a sustainable living space that’s both eco-conscious and stylish. Remember, building a container home requires careful planning, attention to detail, and a commitment to environmental stewardship. Embrace this journey, and you’ll soon be enjoying the fruits of your labor in your very own container home paradise!
Discover the cost dynamics of modular homes by clicking here: how much does a modular home cost
Get crafty with repurposed materials and turn a shipping container into your dream home. Follow the simple steps provided in this guide: how to make container home
Relocating a mobile home on a budget? Look no further! Find out how to move a mobile home without breaking the bank in our comprehensive guide: how to move a mobile home for free
Navigate the process of selling a mobile home seamlessly. Our expert advice will guide you through every step, from preparing your property to closing the deal: how to sell a mobile home
Take control of the sale of your mobile home and maximize your profits by selling it directly to buyers. Discover the strategies and tips you need to succeed in this guide: how to sell a mobile home by owner
Securely Attach the Container to the Foundation
When building a container home, securely attaching the container to the foundation is crucial for the structural integrity and safety of the structure. Proper attachment ensures the container remains stable and withstands various external forces, such as strong winds, seismic activity, or ground movement. Let’s delve into the critical steps involved in securely attaching the container to the foundation:
Step 1: Foundation Preparation
-
Selecting the Right Foundation: Choose a foundation type suitable for your soil conditions, local building codes, and budget. Common options include concrete slab, pier, or screw pile foundations.
-
Site Preparation: Clear and level the building site to create a stable base for the foundation. Install necessary utilities (water, sewer, electricity) before pouring the foundation.
Step 2: Container Placement
-
Positioning the Container: Carefully place the container on the foundation, ensuring proper alignment and leveling. Use precise measurements and markings to achieve accurate placement.
-
Temporary Support: Before securing the container, install temporary supports to prevent movement or shifting during the attachment process.
Step 3: Attachment Methods
-
Bolting Method: This is a commonly used method for securely attaching the container to the foundation. Drill holes through the container’s base and the foundation, then insert high-strength bolts to create a solid connection.
-
Welding Method: For a permanent and robust attachment, welding the container to the foundation is an option. This method requires specialized equipment and expertise, but it provides exceptional stability.
-
Seismic Restraints: In areas prone to seismic activity, additional seismic restraints may be necessary to prevent the container from displacing during an earthquake.
Step 4: Finishing Touches
-
Caulking and Sealing: After securing the container to the foundation, seal any gaps or openings around the perimeter to prevent water infiltration and drafts.
-
Insulation and Waterproofing: Apply insulation to the container’s exterior to improve energy efficiency, and add waterproofing membranes to protect against moisture and leaks.
Key Takeaways:
- Selecting the appropriate foundation type is crucial for the stability and longevity of the container home.
- Precise placement and leveling of the container on the foundation ensure structural integrity.
- Bolting or welding methods are commonly used to securely attach the container to the foundation.
- Temporary supports prevent movement during the attachment process.
- Seismic restraints are essential in areas prone to earthquakes.
- Caulking and sealing gaps prevent water infiltration and drafts.
- Insulation and waterproofing enhance energy efficiency and protect against moisture.
Sources:
- Discover Containers – Shipping Container Home Foundations
- The Container Brothers – How to Build a Shipping Container Home: A Step-by-Step Guide
Insulate and finish the interior of the container home.
Hey readers, we’ve journeyed through the exciting world of container home construction, and now it’s time to focus on the crucial step of insulating and finishing the interior to create a cozy and comfortable living space. Let’s dive in!
Key Takeaways:
-
Insulation is key: Don’t let heat escape through the metal walls of your container home. Insulating the interior walls, ceiling, and floor is essential for maintaining a comfortable temperature year-round.
-
Choose your insulation wisely: There’s a range of insulation options available, from traditional fiberglass to eco-friendly alternatives like recycled denim cotton. Consider factors like cost, ease of installation, and environmental impact when making your choice.
-
Don’t forget the vapor barrier: Moisture can be the enemy of insulation. Installing a vapor barrier between the insulation and the interior wall panels will prevent moisture from damaging the insulation and causing mold growth.
-
Finishing the interior: Now it’s time to make your container home truly livable. Install drywall or paneling on the walls, choose flooring that suits your style, and don’t forget about paint or wallpaper to add a personal touch.
Steps to Insulate and Finish the Interior of Your Container Home:
-
Prepare the walls and ceiling: Ensure the surfaces are clean, dry, and free from any debris. This will help the insulation adhere properly.
-
Install the insulation: Depending on your chosen insulation material, follow the manufacturer’s instructions for installation. Ensure complete coverage and avoid any gaps or air pockets.
-
Add a vapor barrier: Install a vapor barrier over the insulation using staples or adhesive. Overlap the joints and seal them properly to prevent moisture проникновение.
-
Finish the interior: Install drywall or paneling on the walls, ensuring they’re securely attached to the studs. Choose flooring that suits your style and preferences, ranging from hardwood to laminate or carpet.
-
Paint or wallpaper: Add your personal touch by painting the walls or applying wallpaper to create the desired ambiance.
Remember, insulating and finishing the interior of your container home is a crucial step in creating a comfortable and energy-efficient living space. Take your time, follow the recommended steps carefully, and enjoy the satisfaction of transforming your container home into a cozy and inviting sanctuary.
How to Insulate a Shipping Container Home: A Step-by-Step Guide
Insulating a Shipping Container Home
Connect Utilities and Add Finishing Touches.
Now, it’s time to make your container home livable and functional by connecting essential utilities and adding the final touches that turn it into a comfortable and inviting space.
Key Takeaways:
-
Ensure proper electrical wiring and plumbing connections for a functional home.
-
Choose energy-efficient appliances and lighting fixtures to minimize environmental impact.
-
Install a reliable HVAC system for year-round comfort and energy efficiency.
-
Opt for sustainable materials and finishes for a healthier and eco-conscious living space.
-
Personalize your container home with furniture, décor, and landscaping that reflect your style.
1. Connect Utilities:
- Electrical Wiring:
- Hire a licensed electrician to install electrical wiring, outlets, and light fixtures.
-
Ensure proper grounding and circuit breaker protection for safety.
-
Plumbing Connections:
- Have a qualified plumber connect water supply lines and drainage systems.
-
Install energy-efficient faucets and showerheads to conserve water.
-
HVAC System:
- Choose an energy-efficient heating, ventilation, and air conditioning (HVAC) system.
- Consider installing a solar-powered HVAC system for sustainable living.
2. Add Finishing Touches:
- Flooring:
- Install flooring options such as hardwood, laminate, or sustainable bamboo.
-
Add rugs or carpets for warmth and comfort underfoot.
-
Walls and Ceiling:
- Paint the interior walls with low-VOC (volatile organic compound) paints for a healthier environment.
-
Consider installing acoustic panels for better soundproofing.
-
Furniture and Décor:
- Choose furniture and décor that fits your personal style and needs.
-
Incorporate sustainable materials like reclaimed wood or recycled furniture.
-
Landscaping:
- Plant trees, shrubs, and flowers around your container home to enhance its beauty and provide privacy.
- Consider installing a rainwater harvesting system for sustainable gardening.
By following these steps, you can connect utilities, add finishing touches, and transform your container home into a comfortable, sustainable, and stylish living space.
Sources:
-
How to Build a Shipping Container Home: A Step-by-Step Guide
-
Shipping Container Homes: The Complete Guide
FAQ:
Q1: What factors should I consider before building a container home?
A1: Before embarking on a container home project, you should research local regulations and permits, determine your budget and lifestyle needs, and choose a suitable location with a proper foundation.
Q2: How can I ensure my container home is energy-efficient and sustainable?
A2: To achieve energy efficiency and sustainability in your container home, consider using pre-insulated shipping container kits, selecting eco-friendly insulation materials, and implementing strategies like solar panels and rainwater harvesting systems.
Q3: What are the key steps involved in converting a shipping container into a livable home?
A3: Transforming a shipping container into a home involves treating it for rust, adding insulation, cutting openings for doors and windows, installing electrical and plumbing systems, adding interior finishes like flooring and walls, and finally, adding exterior siding, roofing, and paint.
Q4: How can I make my container home comfortable and stylish?
A4: To create a comfortable and stylish living space in your container home, focus on selecting appropriate furnishings and décor, maximizing natural light, and incorporating energy-efficient appliances and systems.
Q5: What are some of the challenges I might encounter when building a container home?
A5: Some common challenges you may face during the construction of your container home include obtaining the necessary permits, dealing with zoning restrictions, ensuring structural stability, and addressing insulation and ventilation issues.

- Ceramic Kitchen Wall Tiles: Style and Protection for Your Walls - December 17, 2025
- Kitchen tiling wall: Elevate your kitchen with stylish wall tiles - December 16, 2025
- Gray Kitchen Backsplash Tile: Ideas for a Stylish Upgrade - December 14, 2025