Revitalize Your Brick with Stunning DIY Stain Projects
Want to give your home a fresh new look without the hefty price tag of a full remodel? Brick staining offers a remarkable transformation, breathing new life into tired, dated brick surfaces. This comprehensive guide provides the inspiration and step-by-step instructions to achieve professional-looking results, whether you’re updating a fireplace, accent wall, or your entire home’s exterior. Get ready to unlock the potential of your brick and boost your curb appeal with a DIY project that will make you the envy of the neighborhood.
Why Choose Brick Stain?
Brick stain offers a distinct advantage over paint. While paint masks the brick’s natural texture, stain penetrates the pores, enhancing its character and beauty. This allows the unique variations and charm of the brick to shine through, resulting in a richer, more nuanced finish. Stain also tends to be more breathable, which can be beneficial in certain climates. Some experts suggest that paint can trap moisture, potentially leading to issues down the road, but further research is ongoing in this area.
Where to Use Brick Stain
The versatility of brick stain makes it suitable for a wide range of applications. From interior fireplaces and accent walls to exterior facades and chimneys, the possibilities are vast. Imagine transforming a drab fireplace into a stunning focal point or giving your home’s exterior a complete makeover. Brick stain can revitalize virtually any brick surface, inside or out.
Choosing the Right Brick Stain
Selecting the right stain is crucial for achieving your desired results. Here’s a breakdown of common types:
| Stain Type | Pros | Cons | Best For |
|---|---|---|---|
| Water-Based | Easy cleanup, low odor, environmentally friendly | Can be less durable, may not penetrate as deeply | Interior projects, environmentally conscious DIYers |
| Solvent-Based | More durable, better penetration | Strong odor, requires special cleaning solvents | Exterior projects, high-traffic areas |
| Acrylic | Good color retention, mildew resistant, varying sheen | Can peel or crack if not applied properly | Damp locations, areas prone to mold and mildew |
| Semi-Transparent | Enhances natural texture, allows original color to peek through | Less coverage, may require multiple coats | Showcasing texture, subtle changes |
| Opaque | Full coverage, hides imperfections | Can look like paint if applied too thickly | Dramatic color changes, covering blemishes |
Choosing the “best” stain depends on your project and priorities. Consider factors like location, durability needs, desired color intensity, and environmental impact.
Colors: From Drab to Fab
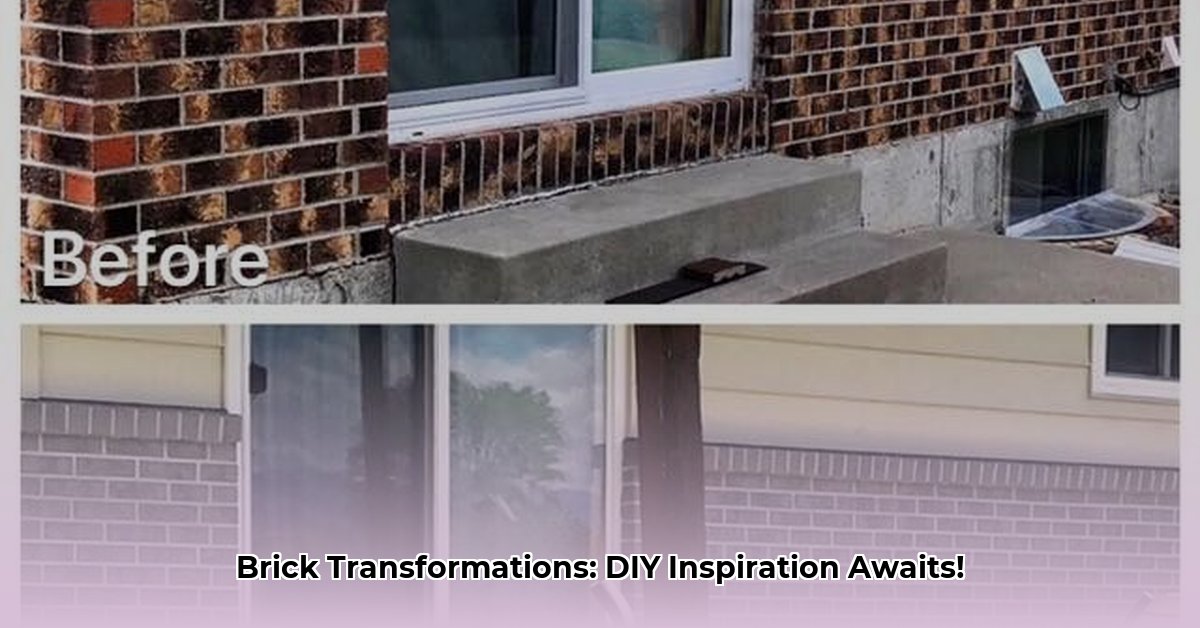
Brick stain offers a spectrum of color possibilities, allowing you to dramatically transform your home’s appearance.
(Insert a series of high-quality before-and-after photos showcasing various brick types and color transformations. Use captions like “From Faded Brick to Modern Gray” or “Updating Red Brick with a Warm Brown Tone.”)
How to Stain Brick: A Step-by-Step Guide
1. Preparation is Key
- Clean: Thoroughly clean the brick surface with a pressure washer or a stiff brush and appropriate cleaning solution. This removes dirt, grime, and any existing sealant, ensuring proper stain penetration.
- Repair: Patch any cracks or damaged areas with mortar repair caulk. A smooth surface is essential for a flawless finish.
- Dry: Allow the brick to dry completely, typically at least 24 hours, before applying stain.
2. Applying the Stain
- Protect: Mask off adjacent areas you don’t want stained.
- Apply: Using a brush, roller, or sprayer, apply thin, even coats of stain, working in manageable sections. Multiple thin coats are preferable to one thick coat, as they promote even coverage and prevent drips.
- Dry: Allow each coat to dry completely before applying the next. Drying times vary depending on the type of stain and environmental conditions. Refer to the manufacturer’s instructions for specific recommendations.
3. Sealing (Optional but Recommended)
Applying a sealant after the stain dries protects the finish from the elements, enhances durability, and makes cleaning easier.
Troubleshooting
| Problem | Potential Cause | Solution |
|---|---|---|
| Uneven Color | Inconsistent application, varying brick porosity | Apply another thin coat, focusing on lighter areas. Consider a brick primer. |
| Blotchy Appearance | Surface contamination, sealant residue | Thoroughly clean the brick, ensuring complete sealant removal. |
| Stain Doesn’t Adhere | Existing sealant, incompatible cleaner | Remove existing sealant, use a cleaner recommended for brick. |
| Efflorescence | Moisture issues within the brick | Address underlying moisture problems before staining. Consult a professional. |
Maintenance
Keep your stained brick looking its best with regular cleaning using a mild detergent and water. Reapply sealant every few years to maintain protection and enhance longevity.
Safety Precautions
Always follow the manufacturer’s safety instructions for handling stain and sealant products. Ensure proper ventilation, especially when working indoors, and wear appropriate protective gear, including gloves and eye protection.
Cost Considerations
Brick staining is a cost-effective way to update your home’s exterior. The total cost depends on the project size, stain type, and whether you DIY or hire a professional. Obtaining estimates from reputable contractors is advisable if you’re not comfortable with the DIY approach. While online resources and before-and-after photos can provide inspiration and ballpark figures, consulting with a local expert can offer more precise cost projections tailored to your project’s specifics.
This guide provides general information and while we strive for accuracy, ongoing research and product advancements may lead to updated best practices. Consulting with experienced professionals is always recommended for project-specific advice and addressing unique challenges. Your brick’s unique characteristics and local environmental conditions can significantly influence the outcome, so a personalized approach is often the most prudent course of action.

- Burning Plastic Smell in House: Causes, Solutions, and Safety Measures - April 8, 2025
- Best Bug Killer for Yard: Effective Pest Control Guide (2024) - April 8, 2025
- Brown Recluse Spider Bites: Identification, Treatment, and Prevention - April 8, 2025