Welcome to the ultimate guide for budget-conscious tech enthusiasts who aspire to build their own cheap home server! This comprehensive resource will take you through every step of the process, from selecting cost-effective components to deploying and managing your server. Embrace your inner system administrator and embark on this exciting journey to create a powerful and affordable home server that meets your unique computing needs. [- Building a Cheap Home Server: A Comprehensive Guide for Budget-Conscious Tech Enthusiasts] is about to begin!
Key Takeaways:
-
Opt for a CPU with at least 4 cores for a budget build.
-
If the server is not meant for graphic-intensive tasks, a GPU might not be necessary.
-
Aim for at least 8GB of RAM for smooth operation, consider getting 32GB if running Virtual Machines (VMs).
-
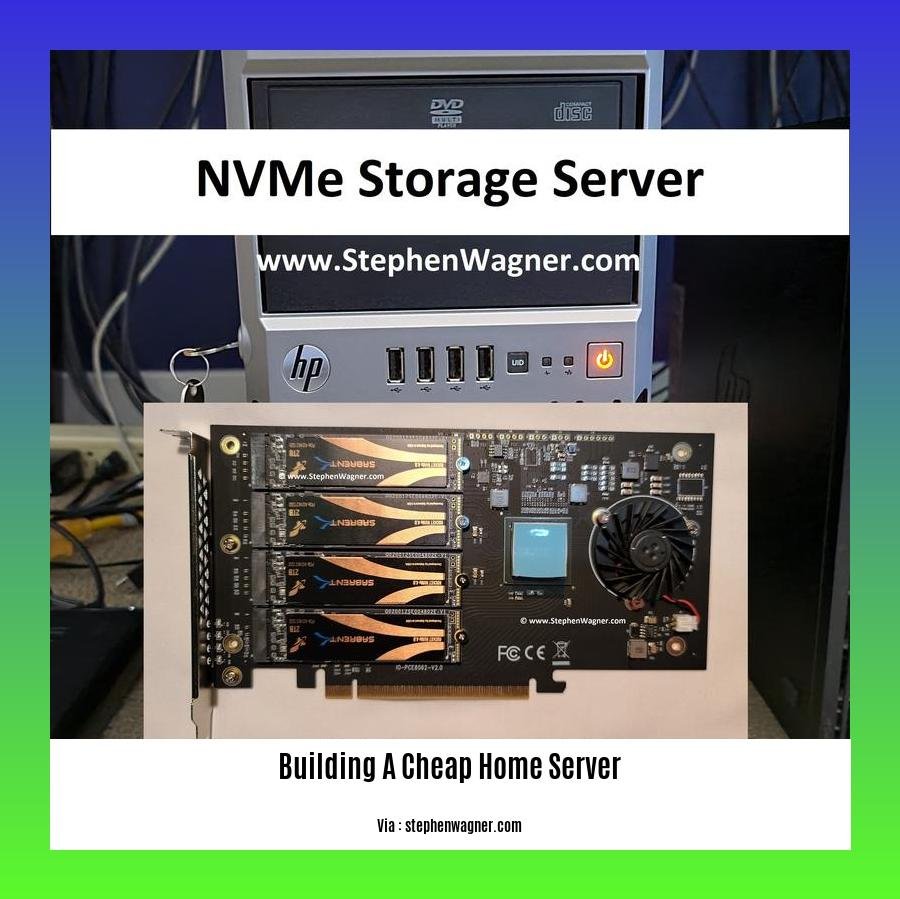
The amount of storage space required depends on the user’s needs, hard drives can often suffice instead of solid-state drives (SSDs) for budget builds.
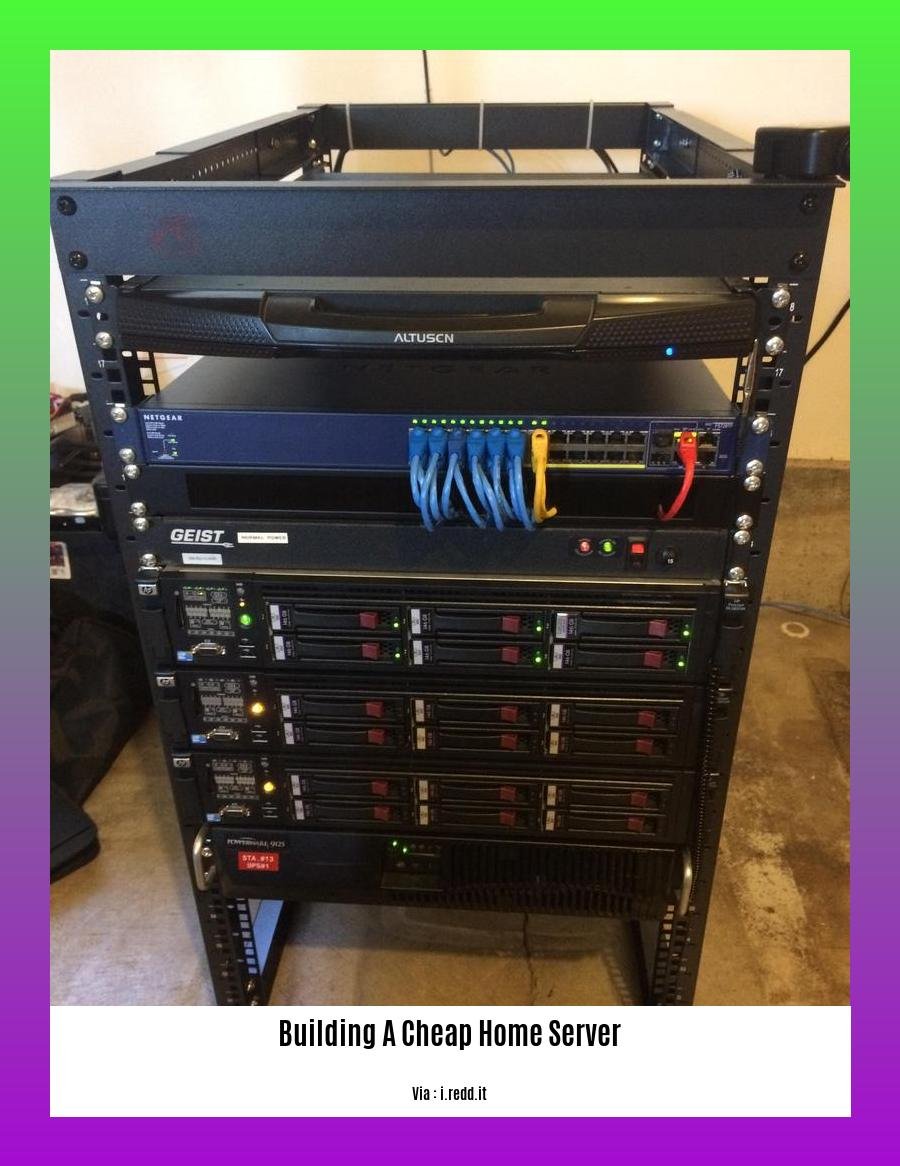
Building a cheap home server
Hey there, tech enthusiasts! If you’re looking to build a cheap home server, you’ve come to the right place. Building a home server can be a daunting task, especially if you’re on a tight budget. But fear not! With a little planning and some savvy shopping, it’s entirely possible to build a powerful and affordable home server that meets your needs.
So, let’s dive right in!
1. Defining Your Needs
Before you start shopping for components, take some time to think about what you want your home server to do. Will it be used for file storage, media streaming, or hosting websites? Knowing the intended purpose of your server will help you make informed decisions about the hardware you need.
2. Choosing the Right Components
Now, let’s talk about the fun part – choosing the components for your cheap home server. Here are a few things to keep in mind:
-
CPU: Opt for a CPU with at least 4 cores. This will provide enough processing power for most basic server tasks.
-
GPU: If you don’t plan on using the server for graphic-intensive tasks like gaming or video editing, a GPU is not necessary. However, if you do need a GPU, look for one that fits your specific needs.
-
Memory: Aim for at least 8GB of RAM. This will ensure smooth operation of the server. If you plan on running multiple virtual machines, consider getting 16GB or more.
-
Storage: The amount of storage space you need depends on your intended use. If you’re just storing files, a few terabytes of hard drive space should suffice. But if you plan on hosting media or running multiple virtual machines, you’ll need more storage.
-
Networking: Make sure you have a reliable network connection for your server. A wired connection is always preferable, but a strong Wi-Fi signal can also work.
3. Assembling Your Server
Once you have all the necessary components, it’s time to assemble your server. If you’re not comfortable working with computer hardware, you can always hire a professional to do it for you. But if you’re feeling adventurous, here are a few steps to follow:
-
Install the CPU and RAM. Make sure to follow the instructions that came with your motherboard.
-
Connect the motherboard to the power supply. Again, follow the instructions in your motherboard’s manual.
-
Install the storage drives. Most motherboards have multiple SATA ports that you can use to connect your storage drives.
-
Connect the network card. If your motherboard doesn’t have a built-in network card, you’ll need to purchase one and install it.
-
Power on the server and install the operating system. Once the server is assembled, it’s time to power it on and install the operating system of your choice.
4. Configuring and Securing Your Server
Once the operating system is installed, you’ll need to configure it for your specific needs. This includes setting up user accounts, installing applications, and configuring security settings.
Here are a few tips for securing your cheap home server:
-
Use a strong password for the administrator account.
-
Enable firewall protection.
-
Keep the operating system and applications up to date.
-
Back up your data regularly.
5. Enjoy Your New Home Server!
With a little planning and effort, you can build a cheap home server that meets your needs. So, what are you waiting for? Get started today!
-
For those seeking affordable house and land packages in Adelaide, explore our curated selection of budget-friendly options that won’t compromise on quality or comfort.
-
Discover the cheapest home builders in Ohio, offering exceptional construction services at the most competitive rates. Their dedication to affordability makes your dream home a reality.
-
Explore our cheapest house and land packages and seize the opportunity to own a property that fits your budget without compromising on comfort or style.
-
Planning to build an RV garage? Learn about cost to build RV garages and ensure you have all the necessary information to make informed decisions about your project.
-
Searching for cheapest houses in New Zealand? Our comprehensive list showcases the most affordable properties across the country, tailored to fit your budget and lifestyle.
Setting Up the Operating System:
Embarking on the thrilling journey of building your home server is akin to constructing a digital haven, a sanctuary for your precious data, multimedia, and applications. But before this sanctuary can thrive, we must carefully select and configure its operating system, the lifeblood that will orchestrate its operations.
Key Takeaways:
-
Opt for an OS that harmonizes with your intended server’s purpose.
-
Linux distributions such as Ubuntu, Debian, and CentOS offer stability and flexibility.
-
FreeNAS and Nas4free excel at data management and network-attached storage (NAS) capabilities.
-
Research thoroughly to discover the OS most suited to your unique needs.
-
Step 1: Selecting the Ideal Operating System:
Just as a chef meticulously chooses ingredients for a delectable dish, selecting the right OS for your server is crucial. Whether your server’s mission is media streaming, file storage, or web hosting, there’s an OS out there that’s a perfect fit.
-
Linux: Beloved by seasoned Linux users, distributions like Ubuntu, Debian, and CentOS provide a stable and versatile foundation for your server. With their open-source nature, you’ll revel in a vast array of software and customization options, empowering you to mold your server into a bespoke creation.
-
FreeNAS and Nas4free: If data management and NAS capabilities are your server’s raison d’être, FreeNAS and Nas4free await your command. These specialized operating systems are tailor-made for storing, securing, and organizing your digital treasures, ensuring your data remains safe and accessible.
-
Other Contenders: The realm of server operating systems is vast and ever-evolving, with contenders like OpenMediaVault, XigmaNAS, TrueNAS, Proxmox VE, and UnRAID vying for your attention. Explore their features, compare their strengths, and select the OS that resonates with your vision for your home server.
-
Step 2: Installation – Unleashing the Power:
With your chosen OS in tow, it’s time to embark on the installation process, akin to planting a seed that will blossom into a vibrant digital ecosystem. Whether you prefer a bootable USB drive or the elegance of a network installation, follow the instructions meticulously, ensuring each step is executed with precision. Remember, patience is a virtue, especially when embarking on this technological odyssey.
- Step 3: Configuration – Weaving the Fabric of Your Server:
Once your chosen OS gracefully resides on your server, it’s time to weave the intricate fabric of its configuration. This step is where you bestow upon your server its identity and purpose, akin to a sculptor shaping a masterpiece. Configure network settings, establish user accounts, install essential applications, and tailor security measures to safeguard your digital realm.
- Conclusion:
With the operating system meticulously installed and configured, your home server stands poised to fulfill its destiny, a beacon of digital prowess in your abode. Whether you seek a media haven, a data sanctuary, or a web-serving fortress, your server awaits your command, ready to embark on a journey of limitless possibilities.
[Sources:]
-
Lifehacker: What Operating System Should I Use for My DIY Home Server?
-
Sysprobs: 12 Best Home Server OS in 2023 (Linux & Windows) for Media Streaming, NAS, and More
Installing Additional Software
Key Takeaways:
- Select the Right Operating System: Match your OS choice to your server’s intended purpose.
- Research and Choose Software: Explore available open-source and paid software for your needs.
- Follow Installation Instructions: Read documentation and follow step-by-step guides for smooth installation.
- Use a Package Manager: Simplify software installation and updates with a package manager.
- Test and Verify Functionality: Ensure software is installed correctly and functions as intended.
- Regular Updates: Stay updated with software updates to maintain security and functionality.
Once your cheap home server is up and running, you can start Installing Additional Software. This includes the applications and services that you want to run on your server.
There are a few things to keep in mind when choosing software for your home server:
- Consider your needs: What do you want your server to do? Do you want to use it for file storage, media streaming, or hosting a website? Once you know what you want your server to do, you can start looking for software that meets your needs.
- Do your research: There are a lot of different software options available for home servers, and it’s important to do your research before you make a decision. Read reviews, compare features, and make sure that the software is compatible with your operating system.
- Follow the installation instructions: Once you’ve chosen the software you want to install, follow the installation instructions carefully. Most software will come with detailed instructions that will guide you through the process.
If you’re not sure how to install software on your home server, there are a few resources that can help you:
- The software’s documentation: The documentation for the software you’re installing should include instructions on how to install it.
- Online tutorials: There are many online tutorials available that can show you how to install software on your home server.
- Technical support: If you’re having trouble installing software, you can contact the software’s technical support team for help.
Once you’ve installed the software you want to use, you need to test it to make sure that it’s working properly. This means running the software and making sure that it’s able to do what you want it to do. If you find any problems, you can try troubleshooting them yourself or you can contact the software’s technical support team for help.
It’s important to keep your software up to date. Software updates often include security patches and bug fixes, so it’s important to install them as soon as they’re available. You can usually configure your software to update automatically, or you can check for updates manually.
Here are some of the most popular software options for home servers:
- Plex: Plex is a media server that allows you to stream your media to your TV, computer, or mobile device.
- Emby: Emby is a media server that is similar to Plex. It offers a wide range of features, including the ability to stream media to your TV, computer, or mobile device.
- Jellyfin: Jellyfin is a free and open-source media server that offers similar features to Plex and Emby.
- Nextcloud: Nextcloud is a self-hosted file sharing and synchronization service. It allows you to share your files with others and synchronize them across your devices.
- OwnCloud: OwnCloud is a self-hosted file sharing and synchronization service that is similar to Nextcloud.
These are just a few of the many software options available for home servers. With a little research, you can find the software that’s right for your needs.
Citations:
- How to Install Software on a Linux Server
- The Best Software for Home Servers
Troubleshooting and Maintenance: Ensuring Optimal Performance of Your Home Server
Hey there, fellow tech enthusiasts!
After meticulously crafting your cheap home server, it’s crucial to keep it humming smoothly. Let’s dive into some essential troubleshooting and maintenance tips to ensure your server thrives.
Key Takeaways:
– Regular Updates: Keep your server’s operating system, applications, and firmware up to date to patch vulnerabilities and ensure optimal performance. Neglecting updates can open doors for security breaches and performance issues.
– Health Monitoring: Install monitoring tools like Nagios or Zabbix to keep a watchful eye on server vitals such as CPU usage, memory consumption, and disk space. Proactively identifying potential issues allows for prompt intervention before they snowball into major problems.
– Regular Backups: Safeguard your precious data with regular backups. Whether you prefer local or cloud storage, having a backup plan in place provides peace of mind and allows you to restore data in case of hardware failure or accidental deletion.
– Security Measures: Implement robust security measures to shield your server from malicious attacks. Utilize strong passwords, enable firewalls, and keep an eye out for suspicious activities. Remember, a secure server is a happy server!
– Hardware Maintenance: Maintain the physical well-being of your server by ensuring proper ventilation and keeping it dust-free. Overheating can shorten the lifespan of your server’s components, so keep it cool and clean.
Troubleshooting Common Issues:
- Server Unresponsive: Check power connections, cables, and ensure all components are securely seated. If the issue persists, consider resetting the server or performing hardware diagnostics.
- Slow Performance: Address this by monitoring resource utilization. If CPU or memory usage is consistently high, consider upgrading components or optimizing applications. Defragmenting hard drives can also improve performance.
- Network Problems: Ensure proper network configuration and check for any loose or damaged cables. Troubleshooting network issues might require consulting your router’s documentation or contacting your ISP.
- Data Loss: In case of data loss, check your backups. If you don’t have backups, specialized data recovery software might be worth exploring.
Remember, a well-maintained server is a reliable server. By implementing these troubleshooting and maintenance practices, you’ll ensure your home server delivers consistent performance and serves you well for years to come.
Sources:
– How to Maintain a Home Server and Troubleshoot Common Issues
– 7 Troubleshooting Tips for Home Server Issues
FAQ
Q1: How much does it cost to build a cheap home server?
A1: The cost of building a cheap home server can vary depending on the components used, but it is possible to build a functional server for under $500.
Q2: What are the essential components needed to build a cheap home server?
A2: The essential components needed to build a cheap home server include a CPU, motherboard, RAM, storage, and an operating system.
Q3: What are the best operating systems for a cheap home server?
A3: Some popular operating systems for cheap home servers include Amahi, Linux, and FreeNAS.
Q4: How much storage space do I need for a cheap home server?
A4: The amount of storage space needed for a cheap home server depends on the intended use. However, it is recommended to have at least 1TB of storage space.
Q5: What are some tips for building a cheap home server?
A5: Some tips for building a cheap home server include using used components, opting for a low-power CPU, and using hard disk drives (HDDs) instead of solid-state drives (SSDs).

- 4 Inch Recessed Lighting Transforms Your Rooms Ambiance - June 16, 2026
- Ceiling Lights 4-Inch Options for Smart Home Integration - June 15, 2026
- Garage Recessed Lighting Transforms Your Workspace with Modern Illumination - June 14, 2026