Thinking about enhancing your home’s exterior with the classic appeal of cedar lap siding? This comprehensive guide dives into everything you need to know about cedar clapboard, from its inherent benefits to the nuances of installation and maintenance. Whether you’re a homeowner, contractor, or simply exploring options, this guide will equip you with the knowledge to make an informed decision. Protect its warm, natural tones with a high-quality cedar stain that enhances its inherent elegance.
Why Choose Cedar Siding?
Cedar’s popularity stems from several key benefits. Its natural durability and resistance to rot, decay, and insects suggest a long lifespan with minimal upkeep. This natural resilience may also contribute to its insulating properties, potentially reducing energy costs. Furthermore, cedar is a renewable resource, aligning with eco-conscious building practices.
Understanding Cedar Varieties and Grades
Choosing the right cedar involves understanding the different species and grades available. Western Red Cedar, known for its rich hues and exceptional decay resistance, is a popular choice, albeit potentially pricier. Eastern White Cedar offers a lighter aesthetic and good durability at a more budget-friendly price point. Alaskan Yellow Cedar boasts notable strength and a refined grain.
Beyond species, the grade of cedar impacts both appearance and cost. “Clear” grades offer a smooth, uniform look, while “Knotty” grades showcase the wood’s natural character, including knots and imperfections. Considering both species and grade is essential for matching your siding to your overall design vision. Clapboard sizes also vary; common dimensions include ½” x 6″ and 11/16″ x 8″. Accurately calculating the required quantity based on your home’s square footage is crucial for a smooth installation process.
Mastering Cedar Clapboard Installation
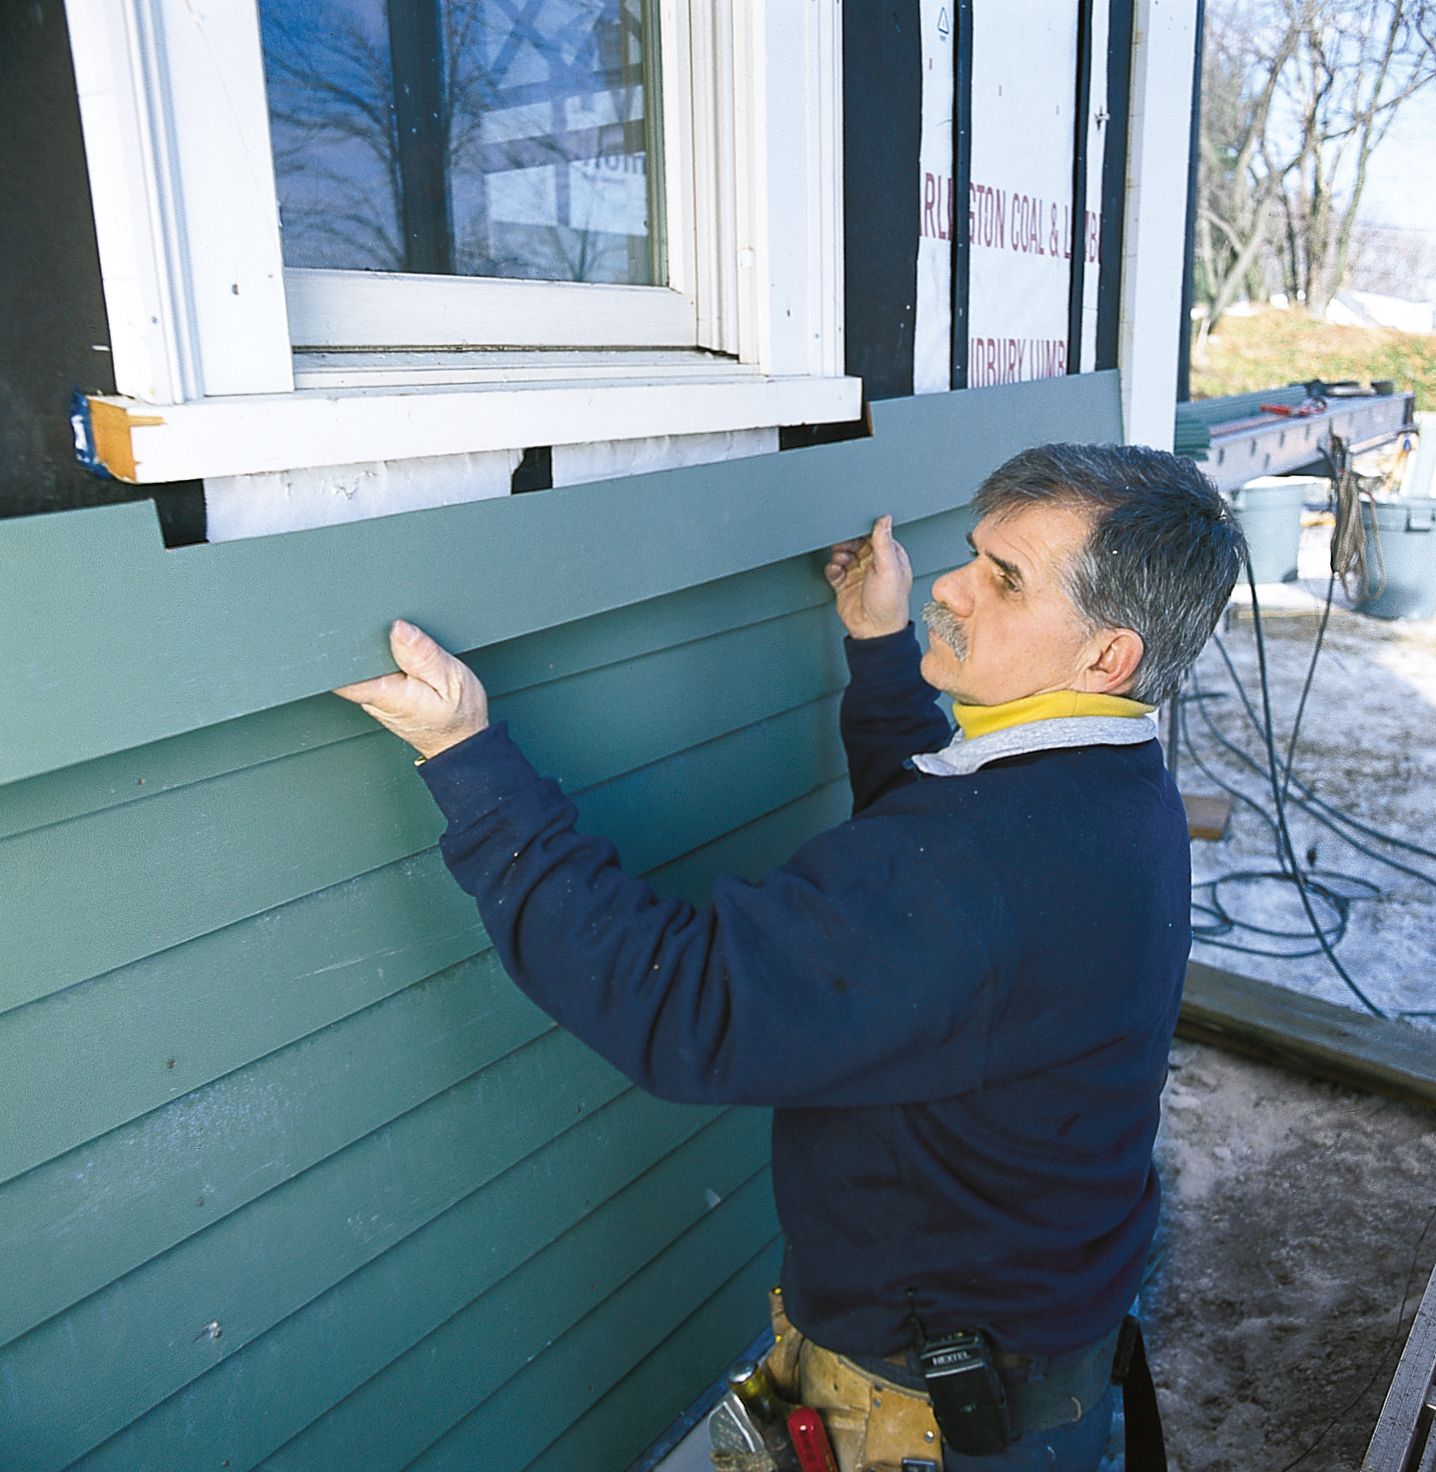
Proper installation is paramount for maximizing the lifespan and performance of your cedar siding. Here’s a step-by-step overview:
- Preparation is Key: Ensure a clean, dry, and level surface.
- Weatherproofing: Install a weather-resistant barrier to protect against moisture damage.
- Starting from the Bottom: Work upwards, overlapping each plank correctly to create a weathertight seal and visually appealing pattern.
- Nailing Techniques: Use corrosion-resistant nails and follow recommended nailing patterns to prevent warping and ensure secure fastening.
- Finishing Touches: Caulk and seal any gaps for a complete weather-resistant finish. Remember to consult local building codes for specific requirements.
Maintaining Your Cedar Siding’s Beauty
Maintaining cedar siding involves regular cleaning with a mild detergent and water to prevent mildew and maintain its fresh appearance. Staining allows the wood grain to shine through while adding protection, while painting offers broader color options but may require more frequent touch-ups. Applying a sealant provides an additional shield against the elements.
Weighing the Costs of Cedar Siding
Cedar siding typically involves a higher upfront investment compared to vinyl or other materials. Factors influencing cost include the chosen species, grade, and installation complexity. While premium grades and professional installation contribute to higher costs, cedar’s durability and long lifespan often balance the investment over time. Considering long-term maintenance costs is also wise, though cedar generally requires less upkeep than some alternatives.
Cedar vs. Other Siding Materials
| Feature | Cedar Clapboard Siding | Vinyl Siding | Fiber Cement Siding |
|---|---|---|---|
| Durability | High | Moderate | High |
| Maintenance | Moderate | Low | Low |
| Cost | High | Low | Moderate |
| Appearance | Natural, Classic | Varies | Varies |
| Insulation | High | Low | Moderate |
This comparison provides a general overview. Some experts believe that cedar’s longevity and aesthetic appeal outweigh the initial cost, while others might prioritize the low maintenance and affordability of vinyl or fiber cement. Your individual needs and preferences will dictate the best choice.
Cedar’s Timeless Aesthetic
Cedar clapboard siding offers timeless elegance, boosting curb appeal and adding value to your home. Its natural textures and warm tones complement a variety of architectural styles. Whether you opt for a natural finish or a vibrant stain, cedar provides a versatile backdrop for your design vision.
Making the Right Siding Choice
Choosing siding is a significant decision. Cedar clapboard siding, with proper installation and care, can last for decades, enhancing your home’s beauty and protection. Factors like budget, style, and maintenance preferences, along with local climate and house-specific needs, should inform your decision. Further research and professional consultation can provide tailored guidance.
Is cedar siding the same as clapboard siding?
“Cedar” refers to the material the siding is made from, while “clapboard” describes the style – overlapping horizontal boards. Cedar is a popular choice for clapboard due to its durability and rot resistance, but clapboard can be made from other woods (pine, spruce, redwood). Cedar can also be used for other siding styles like shingles and shakes. Choosing the right wood depends on your budget, desired aesthetic, and local climate. A local contractor can provide expert advice and samples.
How long does cedar clapboard siding last?
Cedar clapboard siding typically lasts 20-40 years, potentially exceeding 70 with optimal care. Factors impacting lifespan include the cedar type (Western Red Cedar is generally more durable), climate, installation quality, and maintenance. Regular cleaning, staining/painting, and prompt repairs are essential. While vinyl might be cheaper initially, cedar’s longevity and aesthetic appeal could make it more cost-effective in the long run. Fiber cement also offers durability but may lack cedar’s natural warmth. The best choice depends on your individual needs, budget, and aesthetic preferences.
Is cedar siding expensive?
Yes, cedar siding is generally more expensive than alternatives like vinyl, fiber cement, or aluminum. Costs for installed cedar clapboard range from $6-$12 per square foot, cedar shakes from $7-$16, and cedar shingles from $6-$15. Premium grades or intricate designs can exceed $30 per square foot. This higher cost is due to cedar’s natural durability, the specialized labor required for installation, and the type of cedar chosen. While alternatives like vinyl and fiber cement offer cost savings, cedar’s long-term value, including its beauty and potential to increase home value, makes it a worthwhile investment for many. Factors influencing the final cost include the type and grade of cedar, siding profile, finish, installation complexity, geographic location, and time of year. Obtaining multiple quotes from reputable contractors is recommended.
- Glass On Tile: A Stylish Kitchen Backsplash Option - December 1, 2025
- Glass Tiles for Kitchen: Style and Durability Tips - November 30, 2025
- Decorative Wall Tiles for Kitchen: Stylish Design Ideas - November 29, 2025


