Cedar’s warm color is perfect for outdoor projects. But sun and rain can turn it gray and weaken it. Think of stain as sunscreen for your wood. This guide covers everything from choosing the right stain to achieving a flawless finish, ensuring your cedar project is the envy of the neighborhood.
Selecting the Perfect Cedar Stain
Choosing the right stain can feel overwhelming. Let’s break it down to make the process easier.
Oil-Based vs. Water-Based Stains
One of the first decisions is oil-based vs. water-based. Oil-based stains penetrate deeply, offering robust protection and rich colors, but require solvents for cleanup and have longer drying times. Some suggest oil-based stains offer the most durable finish. Water-based stains are easier to clean (soap and water) and dry faster, but may not penetrate as deeply, though newer formulas are improving. Ongoing research suggests the durability gap between the two is shrinking.
Transparency Levels: Showcasing the Grain
Your aesthetic preference plays a role here.
- Solid Color Stains: These act like paint, completely masking the grain while providing the highest level of protection. Ideal for hiding imperfections or significantly changing the color.
- Semi-Transparent Stains: A balance between color and showcasing the wood grain. They offer decent protection while still highlighting the cedar’s natural beauty.
- Transparent Stains: Perfect for purists who love the natural cedar look. They enhance the wood’s natural tone and offer basic protection, but may require more frequent reapplication.
| Stain Type | Protection | Appearance | Ease of Application | Cleanup |
|---|---|---|---|---|
| Oil-Based | High | Rich, deep color | Moderate | Requires solvents |
| Water-Based | Moderate to High | Varies, often lighter | Easy | Soap and water |
| Solid Color | Highest | Opaque | Easy | Soap and water |
| Semi-Transparent | Moderate | Subtle color enhancement | Easy to Moderate | Soap and water/Solvents |
| Transparent | Low | Natural wood tone | Easy | Soap and water/Solvents |
Prepping Your Cedar: The Foundation of a Flawless Finish
Proper preparation is essential for a long-lasting finish.
Step 1: Cleaning
Clean the cedar with a wood cleaner or a mild detergent and water mixture. This removes dirt, grime, and mildew, ensuring proper stain adhesion. Let it dry completely.
Step 2: Sanding (If Necessary)
If your cedar is rough, lightly sand with medium-grit sandpaper (120-150 grit) following the wood grain. Wipe away dust with a tack cloth.
Step 3: Conditioning (Highly Recommended)
A wood conditioner, especially for new cedar, helps ensure even stain absorption and prevents blotchiness. Apply according to the manufacturer’s instructions.
Applying the Stain: Achieving a Professional Look
Now for the main event!
Step 1: Thin Coats
Apply thin coats, whether brushing, spraying, or wiping. Thick coats can lead to stickiness, uneven drying, and peeling.
Step 2: Follow the Grain
Apply stain in the direction of the wood grain for even coverage and to prevent streaks.
Step 3: Wipe Away Excess
Remove excess stain with a clean cloth to prevent buildup and ensure proper drying.
Step 4: Drying and Curing
Allow the stain to dry and cure completely, as per the manufacturer’s instructions. This is vital for maximum protection and durability.
Maintaining Your Stained Cedar
Regular cleaning and reapplication will keep your cedar looking its best. Reapplication frequency depends on climate, stain type, and wear. Periodic cleaning with mild detergent and water helps maintain the appearance.
Troubleshooting Common Issues
Here’s how to address common problems:
- Lap Marks: Maintain a “wet edge” during application to prevent overlapping onto partially dried areas.
- Blotchiness: Use a wood conditioner before staining.
- Peeling: Ensure proper surface preparation and complete curing of previous coats.
What Type of Stain is Best for Cedar?
Cedar requires proper care for longevity. Staining offers protection and enhances aesthetics. Choosing the right stain can seem daunting, so let’s explore the best options for your cedar projects.
Key Considerations:
- Semi-transparent stains often balance protection and showcasing natural beauty.
- Water-based stains are generally suitable for siding and fences, allowing the wood to age naturally.
- For high-traffic decks, a durable oil-based stain designed for cedar might be best.
- Thorough surface preparation is essential for optimal results.
- Regular maintenance preserves the finish.
Understanding Cedar Stain Options
Oil-based stains penetrate deeply, providing robust protection but may darken the wood and possibly hinder its natural aging. Some research suggests they might trap moisture. Water-based stains offer excellent protection, especially against UV rays and mildew, while allowing the wood to “breathe” and age gracefully. Cleanup is also easier.
| Feature | Oil-Based | Water-Based |
|---|---|---|
| Penetration | Deep | Moderate |
| Color | Rich, warm | More natural |
| Durability | High | High (with proper formula) |
| UV Protection | Good | Excellent |
| Mildew Resistance | Good | Excellent |
| Drying Time | Longer | Faster |
| Cleanup | Solvent required | Soap and water |
Choosing for Your Project
The best stain depends on the project. High-traffic decks might benefit from a high-quality oil-based stain designed for cedar, although some experts advocate for water-based for moisture control. There’s ongoing debate, so research both.
For siding and fences, water-based stains are often preferred. They let the wood breathe and age naturally while offering protection. Transform your home’s exterior with the timeless beauty of cedar lap siding and create a classic, captivating curb appeal. Elevate your home’s aesthetic with the refined elegance of cedar clapboard siding, adding a touch of sophistication and charm.
Staining Cedar: A Step-by-Step Guide
- Preparation: Clean the cedar with a cedar-friendly cleaner.
- Smoothing: Lightly sand if rough.
- Conditioning: Apply wood conditioner, especially for new cedar.
- Application: Apply thin coats in the direction of the wood grain.
- Excess Removal: Wipe off any excess stain.
- Drying: Allow ample drying time.
By following these steps and selecting the appropriate stain, your cedar will remain beautiful for years. Stay updated on the latest best practices, as wood finishing techniques are constantly evolving.
Should Cedar Be Sealed or Stained?
Cedar is naturally durable, resisting rot and insects due to its oils and tannins. However, untreated cedar weathers to a silvery gray. Some prefer this look, while others prefer to maintain the original tone. So, seal or stain? It depends on your desired outcome.
Protection from the Elements
Both sealing and staining protect cedar from moisture, UV damage, warping, and cracking.
Sealing: Preserving the Natural Look
Sealing preserves the cedar’s warm, honey-brown color. It provides a protective layer without significantly altering the appearance.
Staining: Adding Color and Protection
Staining also protects but adds color. Options range from subtle tints to bold shades.
Sealer vs. Stain: A Comparison
| Feature | Sealer | Stain |
|---|---|---|
| Appearance | Maintains natural color | Adds color |
| Protection | Excellent | Excellent |
| Maintenance | Reapplication every few years | Reapplication every few years |
| Best Uses | Preserving original look | Adding color |
Long-Term Care
Both sealing and staining require reapplication. Frequency depends on climate, product, and wear.
Project Recommendations
- Decks: A high-quality oil-based deck stain designed for cedar is often recommended.
- Siding: A semi-transparent water-based stain is a good option.
- Fences: Similar to siding, fences benefit from water-based stains.
Preparation is Key
Proper surface preparation, including cleaning and drying, is essential before applying any product. Test the product on a small, inconspicuous area first.
Ultimately, the choice depends on your preferences, project, and local climate.
What Color is Cedar Stain?
Cedar stain comes in a wide variety of colors. Choosing the right shade can transform your project.
Exploring Color Options
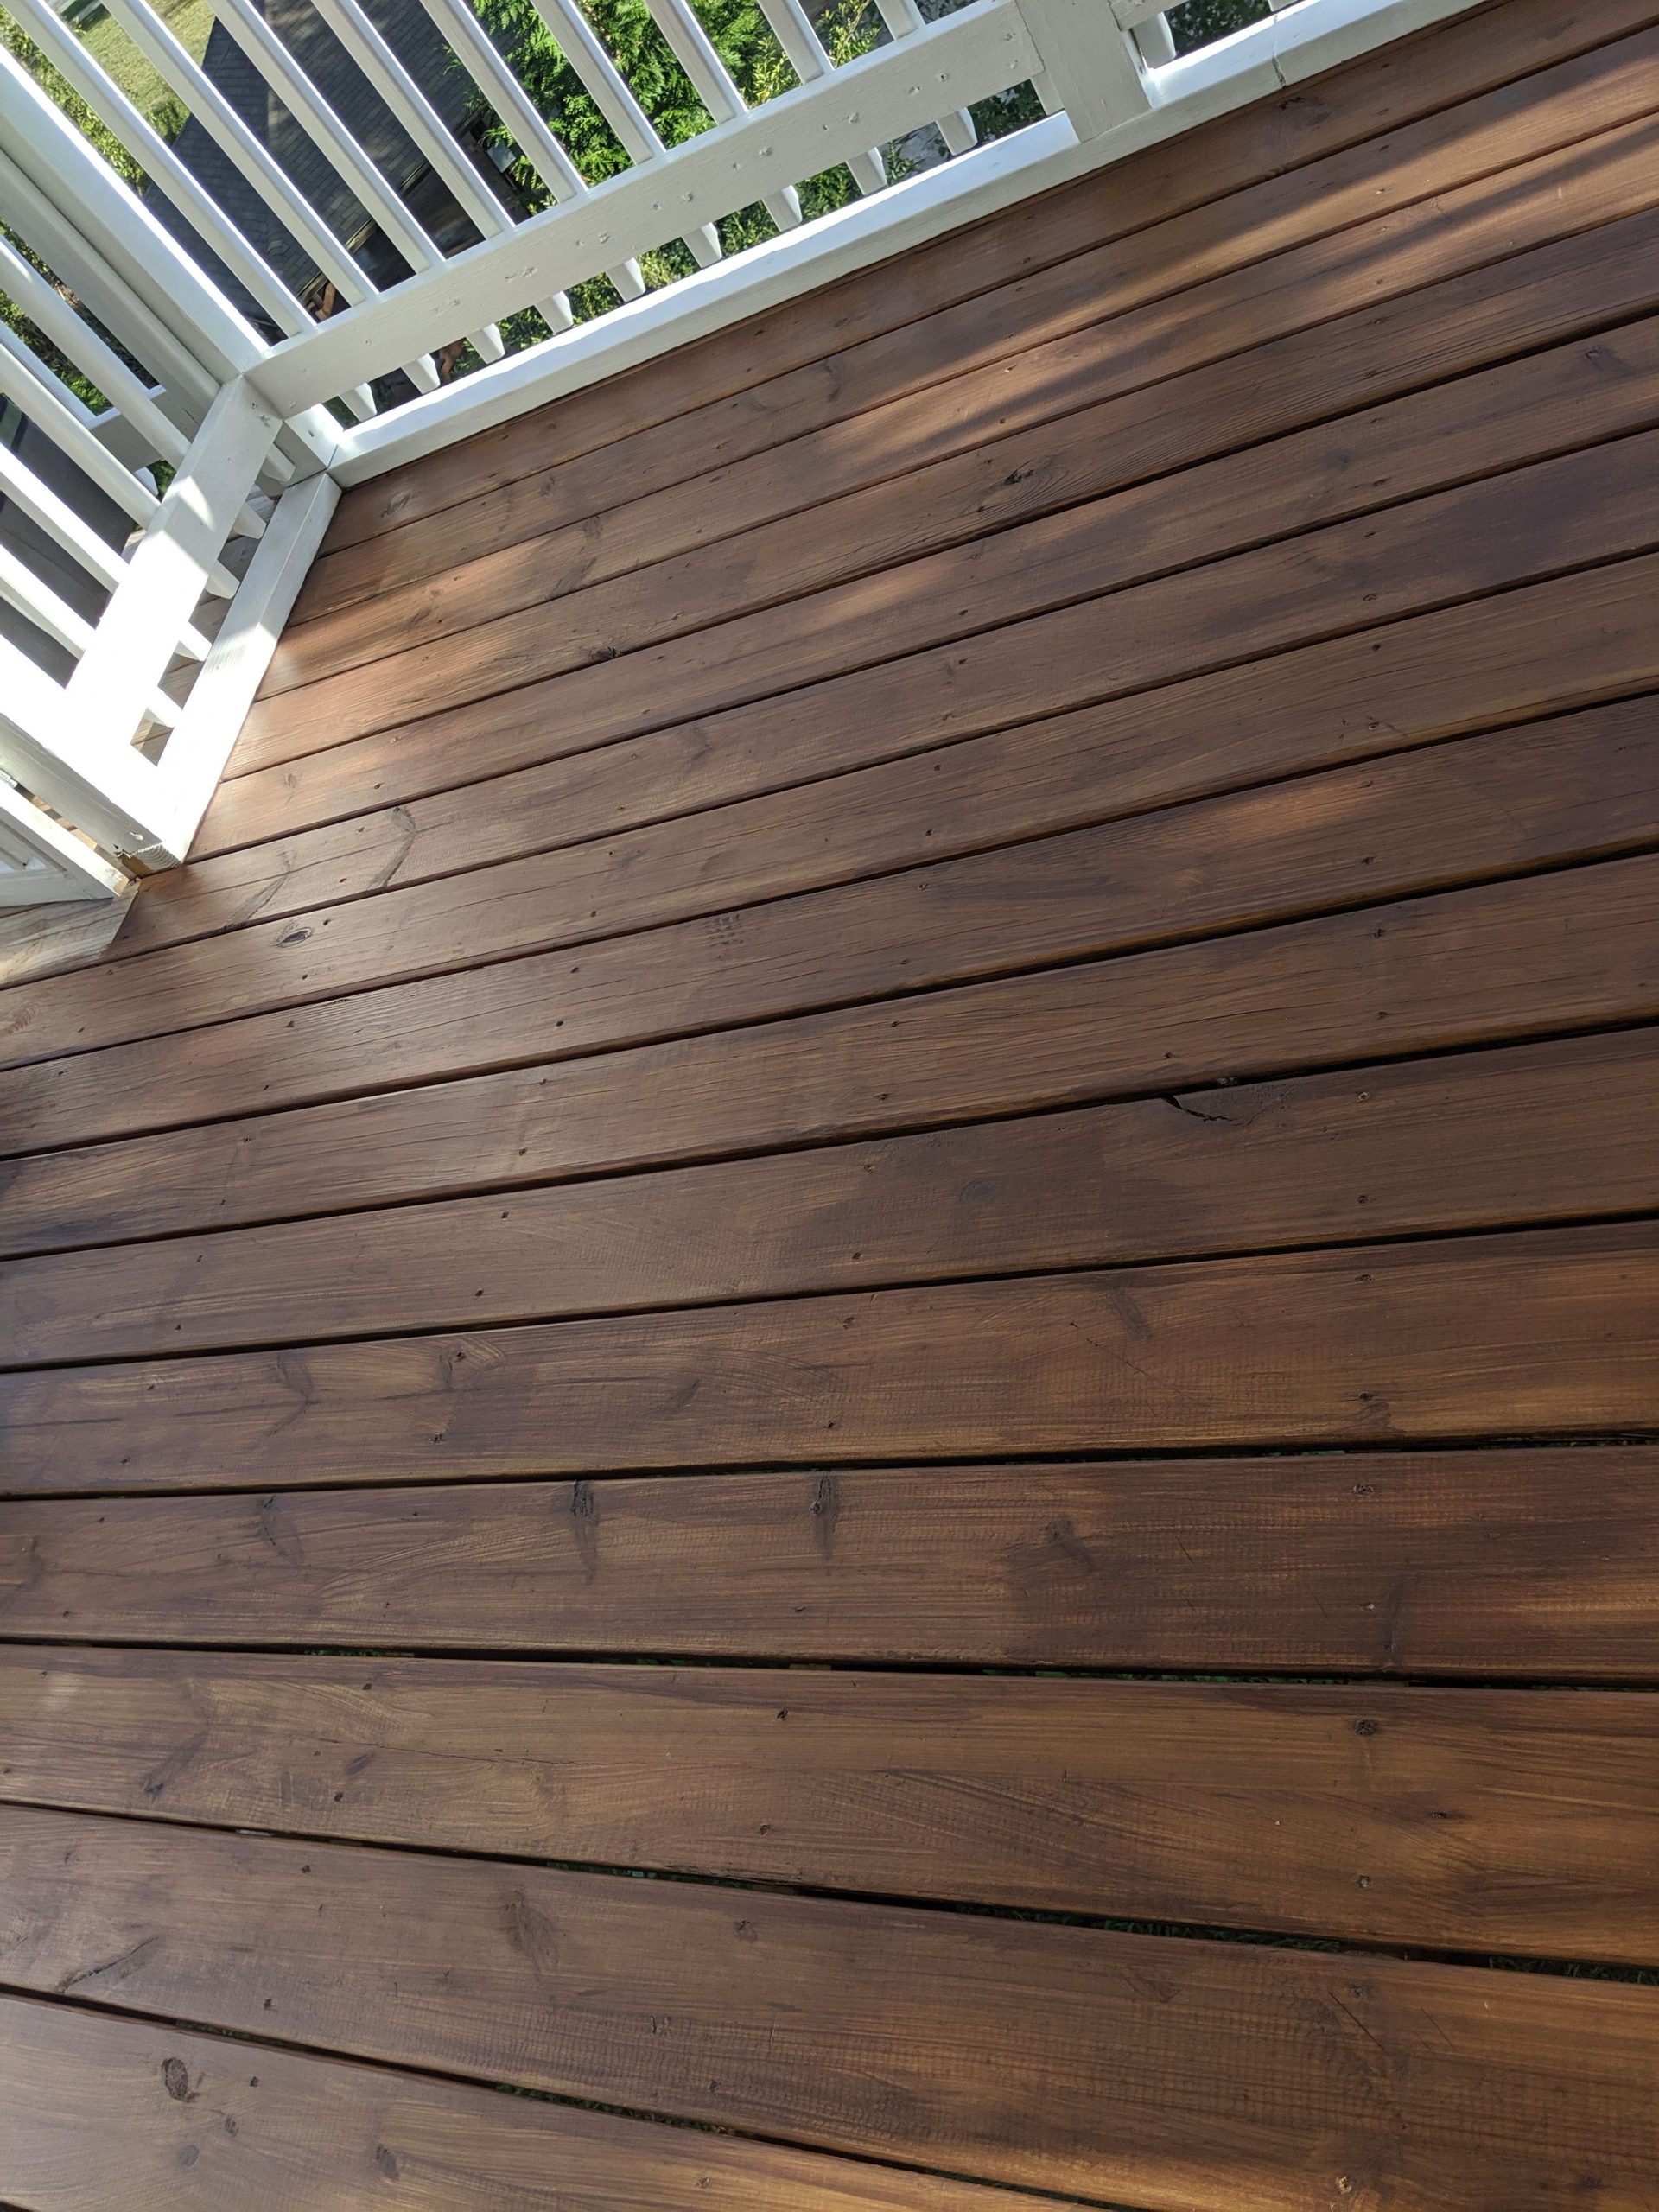
- Clear/Natural: Enhances cedar’s natural reddish-brown tones while providing UV protection.
- Tinted/Semi-Transparent: Adds a subtle hint of color while allowing the wood grain to show through (e.g., honey gold, redwood, driftwood gray).
- Semi-Solid: Offers a richer color, partially obscuring the grain while still showing some texture.
- Solid/Opaque: Completely covers the wood grain, like paint, providing maximum protection and diverse color options.
Visualizing the Finished Product
Searching for images of cedar stained with different colors can be incredibly helpful.
Keeping Up with Trends
Stain formulas and colors are constantly evolving. Check manufacturer websites (Ready Seal, Olympic, Behr) for the latest information.
| Stain Type | Color Impact | Wood Grain Visibility | UV Protection |
|---|---|---|---|
| Clear | Minimal | High | Low |
| Tinted/Semi-Transparent | Subtle | Medium | Medium |
| Semi-Solid | Moderate | Low | High |
| Solid/Opaque | Significant | None | Highest |
This table summarizes stain types and characteristics. Final results depend on the type of cedar, number of coats, and weather conditions during application. With a little research, you can choose the perfect stain to protect and beautify your cedar project.

- Dora the Explorer Wipe-Off Fun: Safe & Mess-Free Activities for Little Explorers - April 18, 2025
- Does Lemongrass Repel Mosquitoes? Fact vs. Fiction + How to Use It - April 18, 2025
- Do Woodchucks Climb Trees?Fact vs. Fiction - April 18, 2025