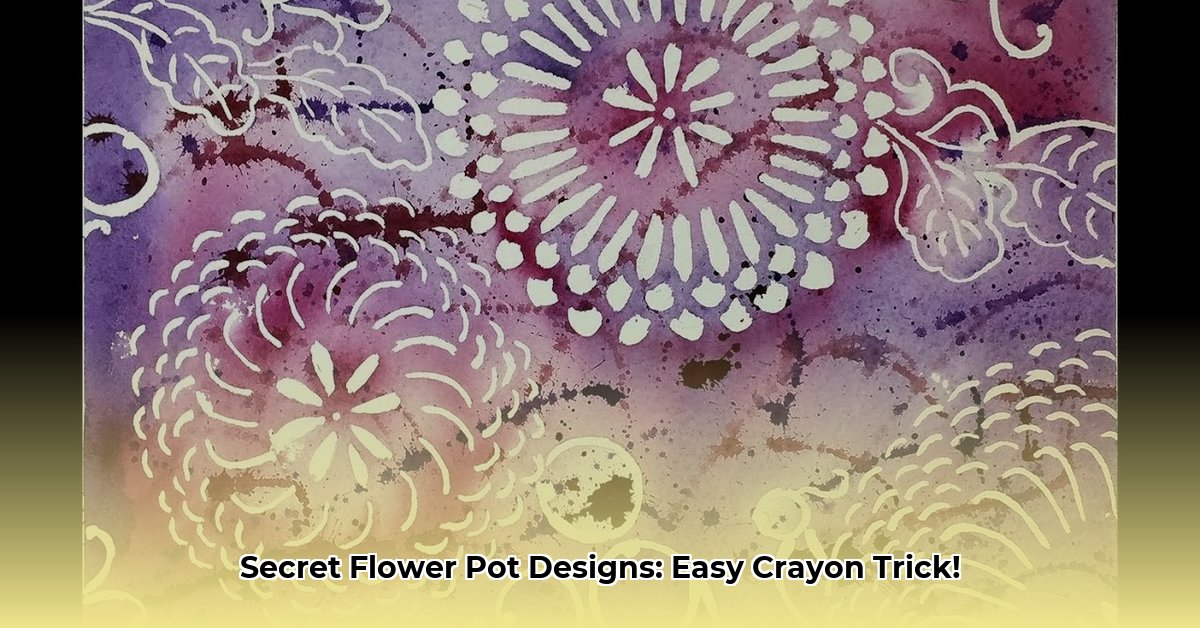
Transform ordinary terracotta pots into vibrant works of art with the crayon resist technique! This easy and fun project is perfect for all skill levels, from beginners to seasoned crafters. Let’s dive in!
Gathering Your Supplies
Before we begin, let’s gather our artistic arsenal. Most of these items are likely already in your home, but a quick trip to the craft store might be necessary.
- Terracotta Pots: Choose any size you like, from small succulent pots to larger planters. Other materials like ceramic or plastic can work, but terracotta is the classic choice.
- Crayons: Thick wax crayons are ideal for covering the pot’s curves. Lighter colors create a vibrant contrast, but don’t be afraid to experiment! Metallic or glitter crayons add a touch of sparkle.
- Paint: Acrylic paints are recommended for their durability and vibrant colors. Watercolors provide a softer, more translucent effect.
- Sealant (Optional): A clear acrylic sealant protects your artwork from the elements, especially for outdoor pots. Look for non-toxic options if planting edibles.
- Paintbrushes: A variety of sizes is helpful for different design details.
- Cleaning Supplies: Soap, water, and a lint-free cloth for prepping your pots.
- Extras (Optional): Stencils, masking tape, natural elements (leaves, flowers), a heat gun for melting crayon effects, and sandpaper for smoother surfaces can add a unique touch.
Prepping Your Pot
- Cleanse: Thoroughly wash your pot with soap and water, removing any dust or debris. A degreaser like Krud Kutter can be particularly helpful for stubborn grime.
- Dry: Ensure the pot is completely dry before starting your design. Residual moisture can interfere with crayon application.
- Smooth (Optional): Lightly sand the pot for a smoother surface if desired. This helps the crayons glide effortlessly.
- Prime (Optional): A base coat of spray paint or acrylic paint can create a more uniform surface and vibrant backdrop for your crayon art.
Designing Your Masterpiece
Now for the fun part! Let your creativity bloom as you plan your design.
- Inspiration: Draw inspiration from nature (flowers, leaves, insects), geometric shapes, abstract patterns, or even personal doodles. The possibilities are endless!
- Crayon Application: Press firmly with your crayons to create vibrant lines and patterns. Experiment with different pressures and layering techniques for unique effects. Thicker crayon layers create a bolder resist.
Painting & Revealing Your Art
With your crayon design complete, it’s time for the magic to happen!
- Paint Application: Using smooth strokes, apply a thin, even coat of paint over the entire pot, covering all the crayon markings. Avoid scrubbing, which can remove the wax.
- Drying: Allow the paint to dry completely. The crayon design will magically emerge as the paint adheres to the pot but resists the wax.
- Layering (Optional): A second coat of paint intensifies the colors. Experiment with layering different hues for depth and dimension.
Sealing Your Creation (Optional)
- Sealant Application: Once the paint is dry, apply a thin, even coat of sealant. Multiple thin coats offer the best protection.
- Drying: Allow the sealant to dry completely before handling or planting.
Troubleshooting & Tips
- Smudging Crayons: Chill crayons in the refrigerator for firmer application.
- Bleeding Paint: Ensure a thick, even crayon layer. Apply paint in thin coats.
- Streaky Sealant: Apply thin, even coats of sealant, allowing each to dry completely.
- Removing Smudges: A cotton swab dipped in rubbing alcohol can lift away crayon smudges.
Advanced Techniques & Inspiration
- Mixing Media: Combine crayons with oil pastels, colored pencils, or other drawing materials for unique textures and effects.
- Natural Elements: Use leaves or flowers as stencils by placing them on the pot and painting over them. Glue small pebbles, shells, or other natural treasures onto the pot for added texture.
- Heat Effects: Carefully use a heat gun to melt the crayon lines for a textured, almost batik-like effect.
- Stencils and Masking Tape: Create sharp lines, geometric patterns, or intricate designs with stencils or masking tape.
- Color Combinations: Explore different color combinations. Contrasting colors create a bold look, while analogous colors create a harmonious feel.
The Science Behind the Magic
The crayon resist technique works because crayon wax is hydrophobic, meaning it repels water. When water-based paint is applied, it beads up and slides off the wax, revealing the crayon design underneath. Research suggests the temperature of the wax plays a role, and further study may reveal more nuances to this simple yet effective technique.
Remember, the beauty of this craft lies in its simplicity and versatility. Embrace experimentation, enjoy the process, and create unique flower pots that reflect your personal style! Share your creations with the world and inspire others to unleash their inner artist.
- Best Finish for Butcher Block Countertops: Choosing the Right Option - December 30, 2025
- Seal for butcher block: Find the best food-safe finish - December 29, 2025
- Finishes For Butcher Block Counters: Choosing The Right Food-Safe Option - December 28, 2025


