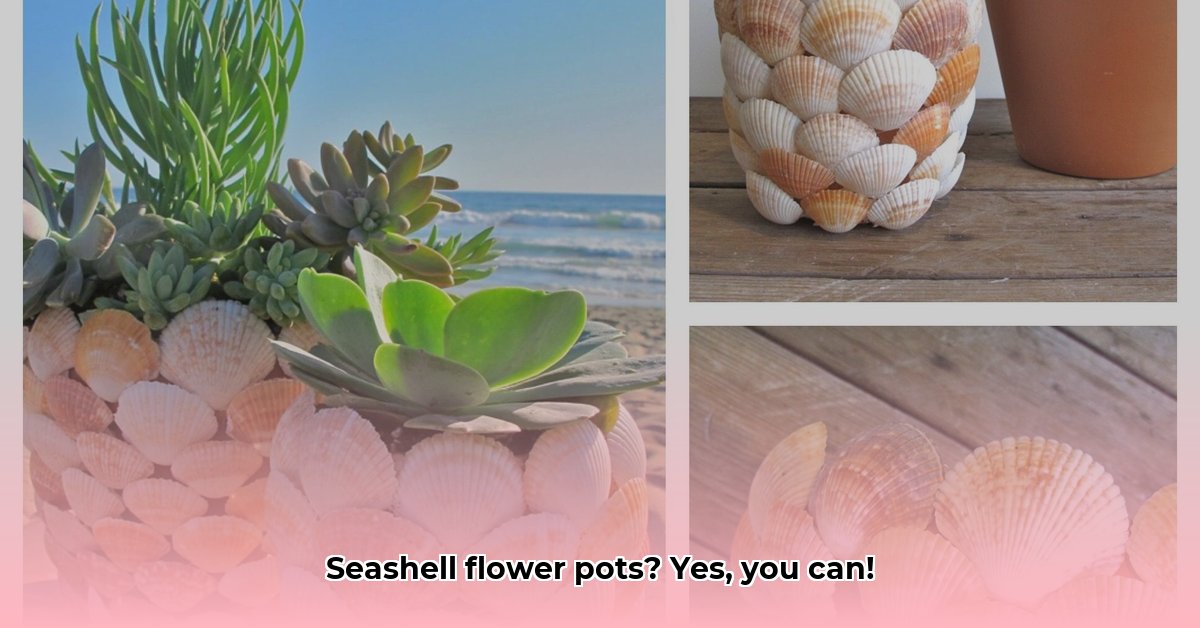
Bring the serene beauty of the beach to your living space with these charming DIY seashell flower pot decorations. Whether you’re a seasoned crafter or just starting out, this guide offers easy-to-follow instructions and creative inspiration for transforming ordinary flower pots into stunning coastal masterpieces. From simple shell accents to intricate mosaics, you’ll find a project that fits your style and skill level. So, gather your shells and let’s get crafting!
Prepping Your Materials: Shells and Pots
Before we dive into decorating, let’s prepare our materials. This crucial first step ensures a smooth crafting experience and a beautiful, long-lasting result.
Shell Spa Time
Give your shells a refreshing spa treatment! Rinse them thoroughly under warm water, then soak them in a solution of nine parts water to one part bleach for about 30 minutes. This removes any lingering sand, barnacles, or ocean odors. A gentle scrub with a toothbrush can help dislodge stubborn debris. Rinse again and allow the shells to dry completely. Clean shells are key to a successful project.
Pot Prep
Your flower pot is your canvas. Whether you choose classic terracotta, lightweight plastic, or something more unique, ensure it’s clean and dry. A quick wash and light sanding, especially for terracotta, will improve adhesion. A base coat of paint can add a vibrant backdrop for your shell designs.
Choosing Your Adhesive Wisely
The right adhesive is crucial for a beautiful and durable finished product. Here’s a guide to help you choose:
| Adhesive | Pros | Cons | Best For |
|---|---|---|---|
| Hot Glue | Fast drying, easy to use | Not as strong, may become brittle | Small shells, indoor projects, quick crafts |
| Gorilla Glue | Super strong, waterproof | Longer drying time, can be messy | Larger shells, outdoor projects |
| Epoxy | Extremely strong, waterproof, durable | Requires precise mixing, can be messy | Heavy shells, permanent adhesion |
| Grout | Seamless finish, durable, weather-resistant | Requires more time and precision | Mosaic designs, full coverage |
| Construction Adhesive | Strong, versatile, weather-resistant | Longer drying time | Larger projects, outdoor use |
| Tile Adhesive | Excellent for porous surfaces, strong | Longer drying time | Terracotta pots, mosaic designs |
Designing Your Seashell Masterpiece
Now for the creative fun! Let your imagination run wild and experiment with these decorating techniques:
1. Full Coverage: A Shell Extravaganza
Transform your pot into a textured, shell-encrusted wonder! Start with larger shells at the base and fill in the gaps with smaller ones, creating a stunning, three-dimensional effect.
2. Mosaic Magic: Patterns and Designs
Arrange your shells in intricate patterns—geometric designs, swirling waves, or even miniature shell flowers. Lightly sketch your design on the pot before gluing for precise placement.
3. Rim Accents: A Touch of Elegance
A simple border of shells around the rim adds a touch of understated coastal charm. This is a perfect option for a quick and elegant upgrade.
4. Mixed Media: Beyond the Shell
Combine shells with other natural elements like sea glass, pebbles, or driftwood. Add paint, beads, or twine for extra personality and texture.
5. The Seashell-Covered Form (for plastic pots)
This technique utilizes glazing putty to create a textured, sculpted look. Apply a generous layer of putty to the pot, embed your shells, and let it dry completely. You can even mix acrylic paint into the putty for added color.
Planting Considerations
Once your decorated pot is ready, choose plants that complement the coastal theme. Succulents, cacti, and trailing plants are excellent choices. Consider the pot’s size, shape, and sun exposure when selecting your plant.
Troubleshooting and Tips
- Shells falling off? Try a stronger adhesive, rough up the pot’s surface with sandpaper, or use a combination of adhesives.
- Glue showing? Apply glue sparingly, use a toothpick for precision, or fill gaps with grout.
- Drainage issues? Ensure your pot has drainage holes. If not, drill a few small holes in the bottom before decorating.
- Sealing for outdoor use: Apply a sealant to protect your creation from the elements and enhance its longevity.
Remember, crafting is about expressing your creativity. Don’t be afraid to experiment with different techniques, materials, and designs. Embrace imperfections and enjoy the process of creating your own unique seashell flower pot decorations!
More Creative Inspiration
Looking for more ideas?
- Themed Designs: Create nautical, mermaid, or tropical themes.
- Textured Putty: Experiment with textured putty for a rustic look.
- Incorporating Other Materials: Add stones, mosaic tiles, or paint for added flair.
- Creative Grouting: Explore different grouting techniques for unique effects.
- Natural Elements: Combine shells with driftwood, sea glass, or other beach finds.
Have fun and happy crafting!
- Memorial Stones for Gardens: A Guide to Creating a Lasting Tribute - April 29, 2025
- Melon Cut Diamonds: A Comprehensive Guide - April 29, 2025
- MarketStreet Lynnfield Stores: A Complete Directory & Shopping Guide - April 29, 2025


