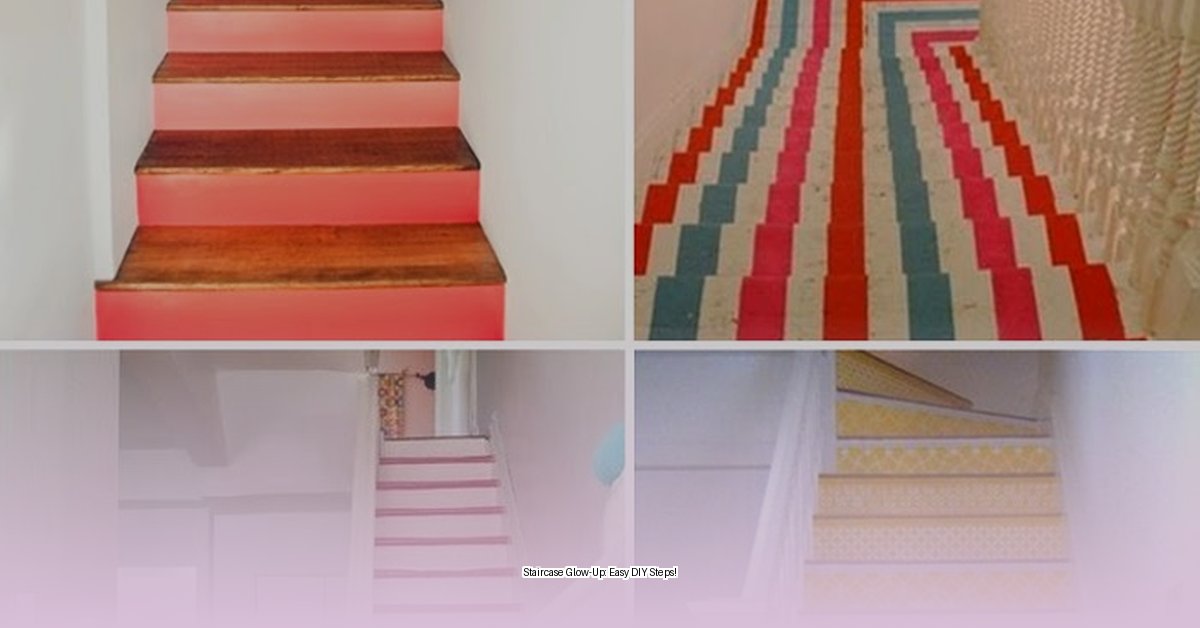
Is your staircase looking a little tired? A fresh coat of paint can dramatically transform this high-traffic area, adding style and value to your home. This comprehensive guide provides everything you need for a professional-looking staircase makeover, whether you’re a seasoned DIYer or a beginner.
Prepping for Perfection: The Foundation of a Flawless Finish
Proper preparation is crucial for a durable and beautiful paint job. Skipping this step can lead to peeling, chipping, and an overall unprofessional look.
Cleaning: A Clean Slate for Your Masterpiece
Just like an artist preps their canvas, you need to clean your staircase thoroughly. Vacuum every nook and cranny to remove dust and cobwebs. Then, wash with warm, soapy water and a scrub brush. For stubborn grease stains, a degreaser or a vinegar-water solution can be effective. Rinse with clean water and let dry completely.
Protecting Your Surroundings: Shielding Against Stray Paint
Painter’s tape, drop cloths, and plastic sheeting are your best friends during a painting project. Tape off baseboards, walls, and any fixtures you don’t want painted. Drop cloths and plastic sheeting protect your floors from spills and splatters.
Repairing Imperfections: Smoothing Out the Rough Patches
Fill nail holes, cracks, and chips with wood filler or spackling paste. Apply with a putty knife, let dry, and sand smooth. For wood stairs, lightly sanding with 120-150 grit sandpaper improves paint adhesion. Vacuum up all dust afterwards. Seal gaps between treads, risers, and baseboards with caulk or wood filler.
Priming: The Secret Weapon for Vibrant, Lasting Color
Primer is essential, especially for wood staircases. A stain-blocking primer prevents wood tannins from bleeding through the paint, ensuring a true, vibrant color. Consult your local paint store for the appropriate primer for other materials. Apply a thin, even coat and let it dry completely.
Choosing Your Arsenal: Paints, Tools, and Techniques
Selecting the right paint and tools is just as important as the prep work.
Paint Selection: Durability Meets Design
High-traffic areas like staircases demand durable paint. A high-quality interior enamel in a satin or semi-gloss finish is recommended for easy cleaning and resistance to scuffs. Specialized floor and stair paints offer even greater durability. For metal railings, a rust-inhibiting primer and metal-specific paint are essential.
Tools of the Trade: Equipping Yourself for Success
Gather your essential tools:
- Sandpaper: Various grits (120-220)
- Sanders: Orbital sander for large areas, detail sander for tight spots
- Paintbrushes: Angled brushes for cutting in, smaller brushes for details
- Rollers: For larger surfaces like treads and risers
- Painter’s Tape: For clean lines and protection
- Drop Cloths: To protect floors
- Cleaning Supplies: TSP, degreaser, or mild detergent
- Safety Gear: Safety glasses and gloves
- Ventilation: Ensure good airflow
Painting Techniques: Mastering the Art of the Brushstroke
Work from the top down to avoid stepping on wet paint. Paint every other tread or one side of each step to maintain access. Apply thin, even coats to prevent drips and ensure smooth coverage. Use angled brushes for details and rollers for larger surfaces.
For intricate areas like spindles and railings, a smaller brush is best. Consider removing hardware for a cleaner finish. Some DIYers find success with spray paint for railings, but practice is recommended. Always follow the manufacturer’s instructions for drying and recoating times.
Trendsetting Transformations: Elevating Your Staircase Style
Beyond the basics, explore creative paint techniques to personalize your staircase:
- Two-Toned Staircases: Contrast colors on risers and treads create a modern look.
- Geometric Patterns and Stenciling: Add unique designs for a touch of personality.
- Runner Look: A contrasting paint stripe down the center of the treads mimics a runner.
- Ombre Effect: A gradual color transition adds a touch of drama.
- Distressing Techniques: Create a vintage or rustic vibe.
- Glazing: Achieve depth and richness.
Browse online for “staircase painting before and after” examples to spark your creativity.
Troubleshooting: Tackling Common Challenges
Even with careful planning, issues can arise. Here’s how to tackle common problems:
- Drips: Gently sand down dried drips and touch up with a small brush.
- Uneven Coverage: Apply another thin coat.
- Adhesion Problems: You might need a different primer or better surface preparation.
The Finishing Touches: Drying, Curing, and Cleanup
Allow ample drying time between coats and at least 24 hours for the final coat to dry. The curing process, which takes several days to a week, allows the paint to fully harden. Avoid heavy traffic during this time.
Clean brushes and rollers immediately after use. Remove painter’s tape carefully once the paint is dry. Now, admire your transformed staircase!
Specific Material Considerations:
Wood Staircases:
- Primer: Oil-based or latex primer designed for interior wood. Shellac-based primers are excellent for stain blocking.
- Paint: Durable enamel or floor paint in a satin or semi-gloss finish. Porch and floor paints are specifically designed for high-traffic areas.
Metal Staircases:
- Primer: Metal primer, possibly with rust-inhibiting properties.
- Paint: Durable enamel or exterior paint in a satin or semi-gloss finish.
Concrete Staircases:
- Primer: Masonry primer or concrete bonding primer.
- Paint: Masonry paint or concrete floor paint.
Remember, always prioritize safety. Ensure good ventilation, wear safety glasses and gloves, and follow the safety instructions on all products.
- Greenhouse Storage Shed Combos: Your Guide to Combining Growing and Storage - April 21, 2025
- Greenhouse Shed Combo: Design, Build & Grow Year-Round - April 21, 2025
- Gingham vs. Plaid: What’s the Difference? A Complete Guide - April 21, 2025


