Banish Bathroom Drips: Choosing and Installing the Right Seal
A leaky shower door is a common annoyance, leading to messy floors and potential mildew problems. This guide provides a comprehensive, step-by-step approach to identifying, selecting, and installing the correct shower door seal, empowering you to fix this issue yourself.
Identifying the Leak Source and Choosing the Right Seal
Where’s That Drip Coming From?
Before rushing to replace a seal, pinpoint the leak’s origin. Is water pooling at the bottom of the door? This suggests a worn sweep. Leaking from the sides? The vertical seals or caulking are likely suspects. For sliding doors, inspect the tracks and where the door meets the wall.
Seal Selection: Finding Your Perfect Match
Choosing a seal can feel overwhelming, but understanding the different types simplifies the process. Here’s a quick guide:
- Bulb Seals: Flexible and bulb-shaped, these conform to uneven surfaces, making them ideal for frameless doors and larger gaps.
- Magnetic Seals: Employing magnetic attraction, these create a tight seal, typically used for hinged and sliding doors.
- Sweep Seals: Attached to the door’s bottom, these deflect water back into the shower. Essential for any shower door.
- Compression Seals: Designed for tracks or channels, these compress against the door for a watertight seal, commonly found in framed enclosures.
- T-Shaped Seals: These fit into the tracks of sliding glass doors, providing a simple yet efficient barrier.
- U-Channel Seals: Versatile and flexible, U-channel seals work with both framed and frameless doors, fitting snugly along the glass edges.
Your choice depends on your door type (hinged, sliding, pivot), framing (framed or frameless), and the gap size. Measure the gap before buying – accuracy is crucial for a proper fit.
Material Matters: Choosing the Right Seal Material
Seal materials impact durability and longevity. Consider these options:
| Material | Pros | Cons |
|---|---|---|
| Vinyl | Cost-effective, easy to install | Less durable, may crack over time |
| Silicone | Durable, water-resistant, mildew-resistant | More expensive, can be difficult to remove |
| Rubber | Flexible, durable | May stiffen in cold temperatures |
| Co-extruded | Combines rigid and flexible materials for enhanced durability and sealing | Can be more expensive than other options |
Step-by-Step Installation Guide
Tools and Materials
Assemble your toolkit: new seal, utility knife/scissors, measuring tape, damp cloth/sponge, soapy water, flat tool (putty knife/scraper), hairdryer (optional), and silicone caulk (optional).
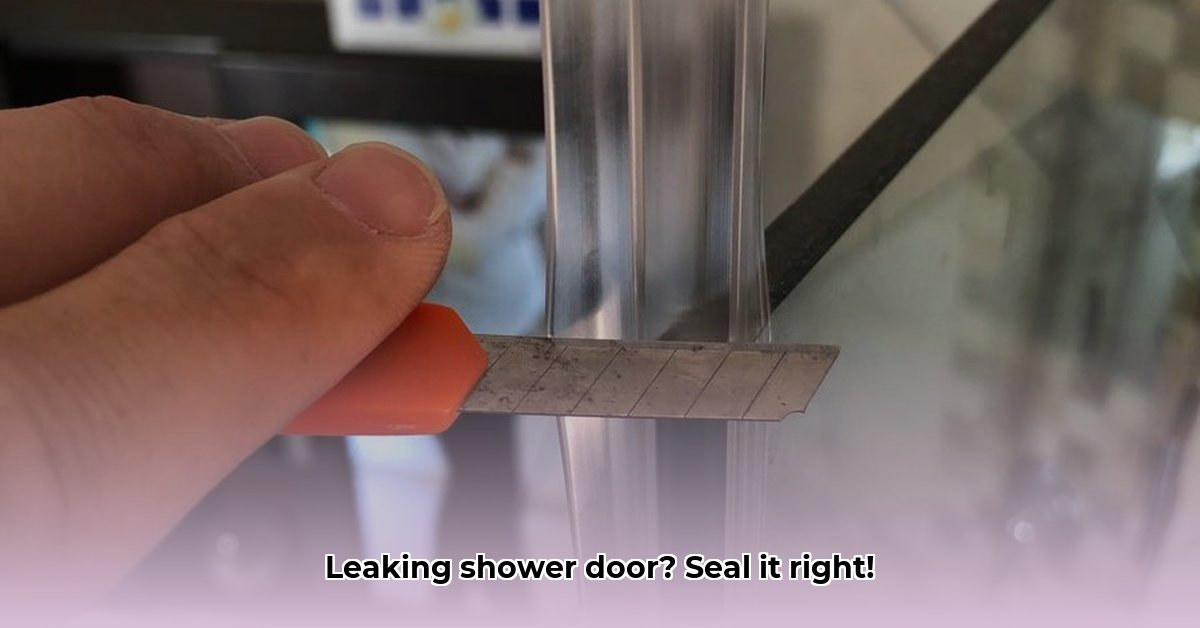
Removing the Old Seal
Gently pull off the old seal. If it resists, use a flat tool to pry it loose. A hairdryer can soften stubborn adhesive. Clean the surface thoroughly afterwards.
Measuring and Cutting
Measure the area for the new seal, adding a small extra length for adjustments. Cut the seal with a sharp blade for a clean edge.
Installing the New Seal
Starting at one end, carefully apply the seal, pressing firmly. For snap-in seals, align and press until secure. For slide-in seals, insert the fin into the track.
Final Touches and Testing
Trim any excess seal material. Run the shower to check for leaks. Adjust the seal or door if needed. Apply silicone caulk to fill small gaps if necessary.
Maintaining Your Seals: Keep it Clean and Leak-Free
Regular cleaning with mild soap and water prevents mildew and extends seal life. Avoid harsh chemicals. Inspect seals annually for wear.
Troubleshooting
- Stiff Seal: Warm it with a hairdryer for easier installation.
- Loose/Tight Seal: Double-check measurements.
- Persistent Leaks: Apply silicone caulk along the seal’s edges.
Product Recommendations and Ongoing Research
While specific product recommendations can be helpful, it’s important to remember that availability and suitability can vary based on location and individual shower setups. Always prioritize checking manufacturer instructions and consulting with local hardware professionals.
Ongoing research in materials science promises even better seal options in the future. Keep an eye out for new materials and designs for optimal performance.
By following this guide and maintaining your seals, you can likely conquer those pesky shower leaks and enjoy a dry, mold-free bathroom. If you’re uncertain about any step, consulting a professional plumber is always a good option.

- Does Ammonia Kill Mold? The Truth About Using It for Removal - April 15, 2025
- Does Bleach Kill Spiders? Effectiveness, Safety, and Better Alternatives - April 15, 2025
- Does Soap Expire? How to Tell if Your Soap Has Gone Bad - April 15, 2025