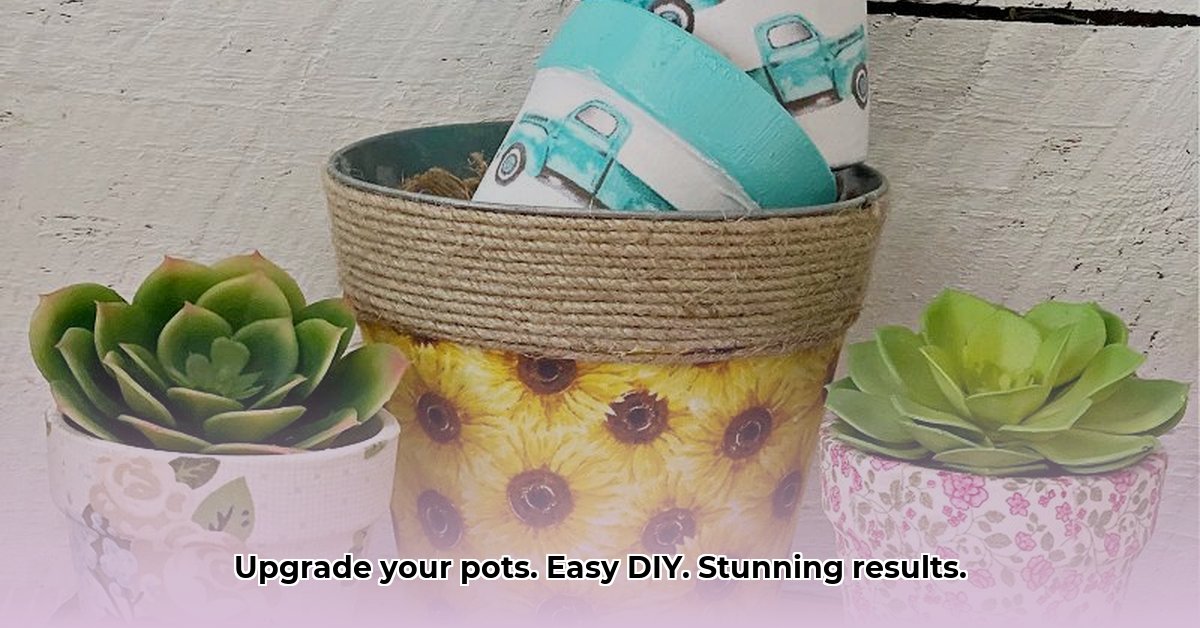
Ready to give your plain terracotta pots a charming makeover? This guide will walk you through creating beautiful fabric-covered flower pots, adding a splash of personality to your plants and home décor. Whether you’re a seasoned DIYer or just starting out, we’ll cover various techniques, from simple no-sew methods to the elegant art of decoupage. So gather your supplies, and let’s get crafting!
Choosing Your Materials: Fabric & More
The right materials set the stage for success. Let’s talk fabric and gather our crafting arsenal.
Fabric Selection: The Star of the Show
Your fabric is the key to transforming your pots. Sturdy woven fabrics like cotton are ideal – easy to work with and available in countless colors and patterns. For outdoor pots, weather-resistant outdoor fabrics are probably a better choice, offering protection from the elements. While repurposing is admirable, stretchy knit fabrics are likely too tricky for this project, potentially fraying and making gluing difficult.
Gathering Your Supplies: The Crafting Toolkit
Along with your fabric and terracotta pots, you’ll need Mod Podge (outdoor formula for outside use). Brushes are essential for even application. Sharp scissors make cutting a breeze. A sealant protects the inside of pots for live plants, while a weatherproofing sealant adds extra protection for outdoor pots. A template (paper cut to your pot size) ensures accurate fabric cuts.
Transforming Your Terracotta: A Step-by-Step Approach
- Prep Your Pot: Clean your terracotta pot and let it dry completely. Seal the inside with a sealant if planting directly in the pot.
- Cut the Fabric: Using your template or measurements, cut your fabric with a little extra for overlap and folding.
- Apply the Adhesive: Brush a thin, even layer of Mod Podge onto the pot.
- Attach the Fabric: Gently smooth the fabric onto the pot, removing air bubbles and wrinkles. Trim excess fabric.
- Seal & Finish: Apply a final coat of Mod Podge or sealant. Let it dry completely before adding embellishments like ribbons, buttons, or stencils.
No-Sew Fabric Pots: Quick & Easy
This method is perfect for beginners and uses fabric scraps.
Materials:
- Terracotta pot
- Fabric scraps
- Mod Podge (outdoor formula recommended)
- Foam brush
- Scissors
- Clear sealant spray (optional)
Instructions:
- Prep Fabric: Cut fabric larger than the pot, allowing for overhang.
- Apply Mod Podge: Apply Mod Podge to the pot in sections.
- Attach Fabric: Smooth fabric onto the pot, eliminating wrinkles.
- Finish Edges: Trim excess fabric and fold the overhang into the pot, securing it with Mod Podge. Consider a “V” cut for a cleaner finish.
- Seal: Apply a final coat of Mod Podge or sealant.
Upcycled Sweater Cozy: Warm & Textured
Give old sweaters new life as cozy pot covers. Wool or blends work best. Experiment with other materials, noting that some synthetics may be suitable. Note that results may vary, and some experimentation might be required.
Materials:
- Old sweater
- Scissors
- Hot glue gun (optional)
Instructions:
- Cut the Sweater: Cut a section large enough to cover the pot.
- Wrap the Pot: Wrap the fabric around the pot like a present.
- Secure & Finish: Trim excess fabric and secure edges with hot glue (optional).
Decoupage Flower Pot Flair: Napkin Artistry
Create intricate designs with decorative napkins.
Materials:
- Terracotta pot
- Decorative napkins (top printed layer only)
- Mod Podge
- Paintbrush
- Scissors
Instructions:
- Prepare Napkins: Cut out desired designs.
- Apply Designs: Apply Mod Podge to the pot and position napkin cutouts. Smooth gently.
- Seal & Protect: Seal the pot with a coat of Mod Podge. Multiple coats may be needed.
Mastering the Mod Podge Technique: In-Depth Guide
This section dives deeper into the versatile Mod Podge technique.
Choosing Your Mod Podge:
- Outdoor Mod Podge: Weather-resistant, ideal for outdoor projects.
- Matte Mod Podge: Classic, non-shiny finish.
- Ultra Mod Podge: Strongest, durable for high-traffic areas.
Preparing & Applying:
Follow the steps outlined in the “Transforming Your Terracotta” section, paying close attention to fabric preparation, accurate measurements, and even Mod Podge application.
Troubleshooting Mod Podge Projects:
- Wrinkles: Use a hairdryer on low heat to smooth them out.
- Bubbles: Prick with a pin and gently flatten.
- Uneven Coverage: Apply another thin layer of Mod Podge.
Creative Variations:
Explore patterns, knit fabrics (with caution, as they can be more complex), or go bold with embellishments.
Troubleshooting Common Issues: Fabric Pot Care
Here’s how to tackle common fabric pot problems:
- Tangled Roots: Gently loosen roots during repotting. Consider a larger pot or trim excess roots.
- Mold/Mildew: Ensure good airflow and allow pots to dry between waterings. Wipe with diluted bleach or hydrogen peroxide if needed.
- Dents/Tears: Repair small tears with fabric glue or stitching. Replace severely damaged pots.
- Watering: Water more frequently than other pots, use a saucer, or consider thicker fabric/liners.
- Cleaning: Soak in mild soapy water and use a soft brush for stubborn dirt.
- Pests: Regularly check for pests and use appropriate insecticides. Elevate pots to deter crawling pests.
- Durability: Lifespan varies depending on quality, care, and weather exposure. Proper cleaning and storage extend their life.
Caring for Your Fabric Pots: Longevity Tips
Dust regularly with a soft cloth. Wipe outdoor pots with a damp cloth. Avoid harsh cleaners. With proper care, your creations will last for years.
By understanding these techniques and troubleshooting tips, you can confidently create beautiful fabric-covered flower pots that add a personal touch to your home. Experiment, get creative, and enjoy the process!
- How to Get Rid of Mushrooms in Your Lawn: A Complete Guide - April 24, 2025
- How to Get Rid of Ground Hornets: A Safe and Effective Guide to Eliminating Nests - April 24, 2025
- How to Get Rid of German Roaches Fast: DIY Methods for Quick Control - April 24, 2025


