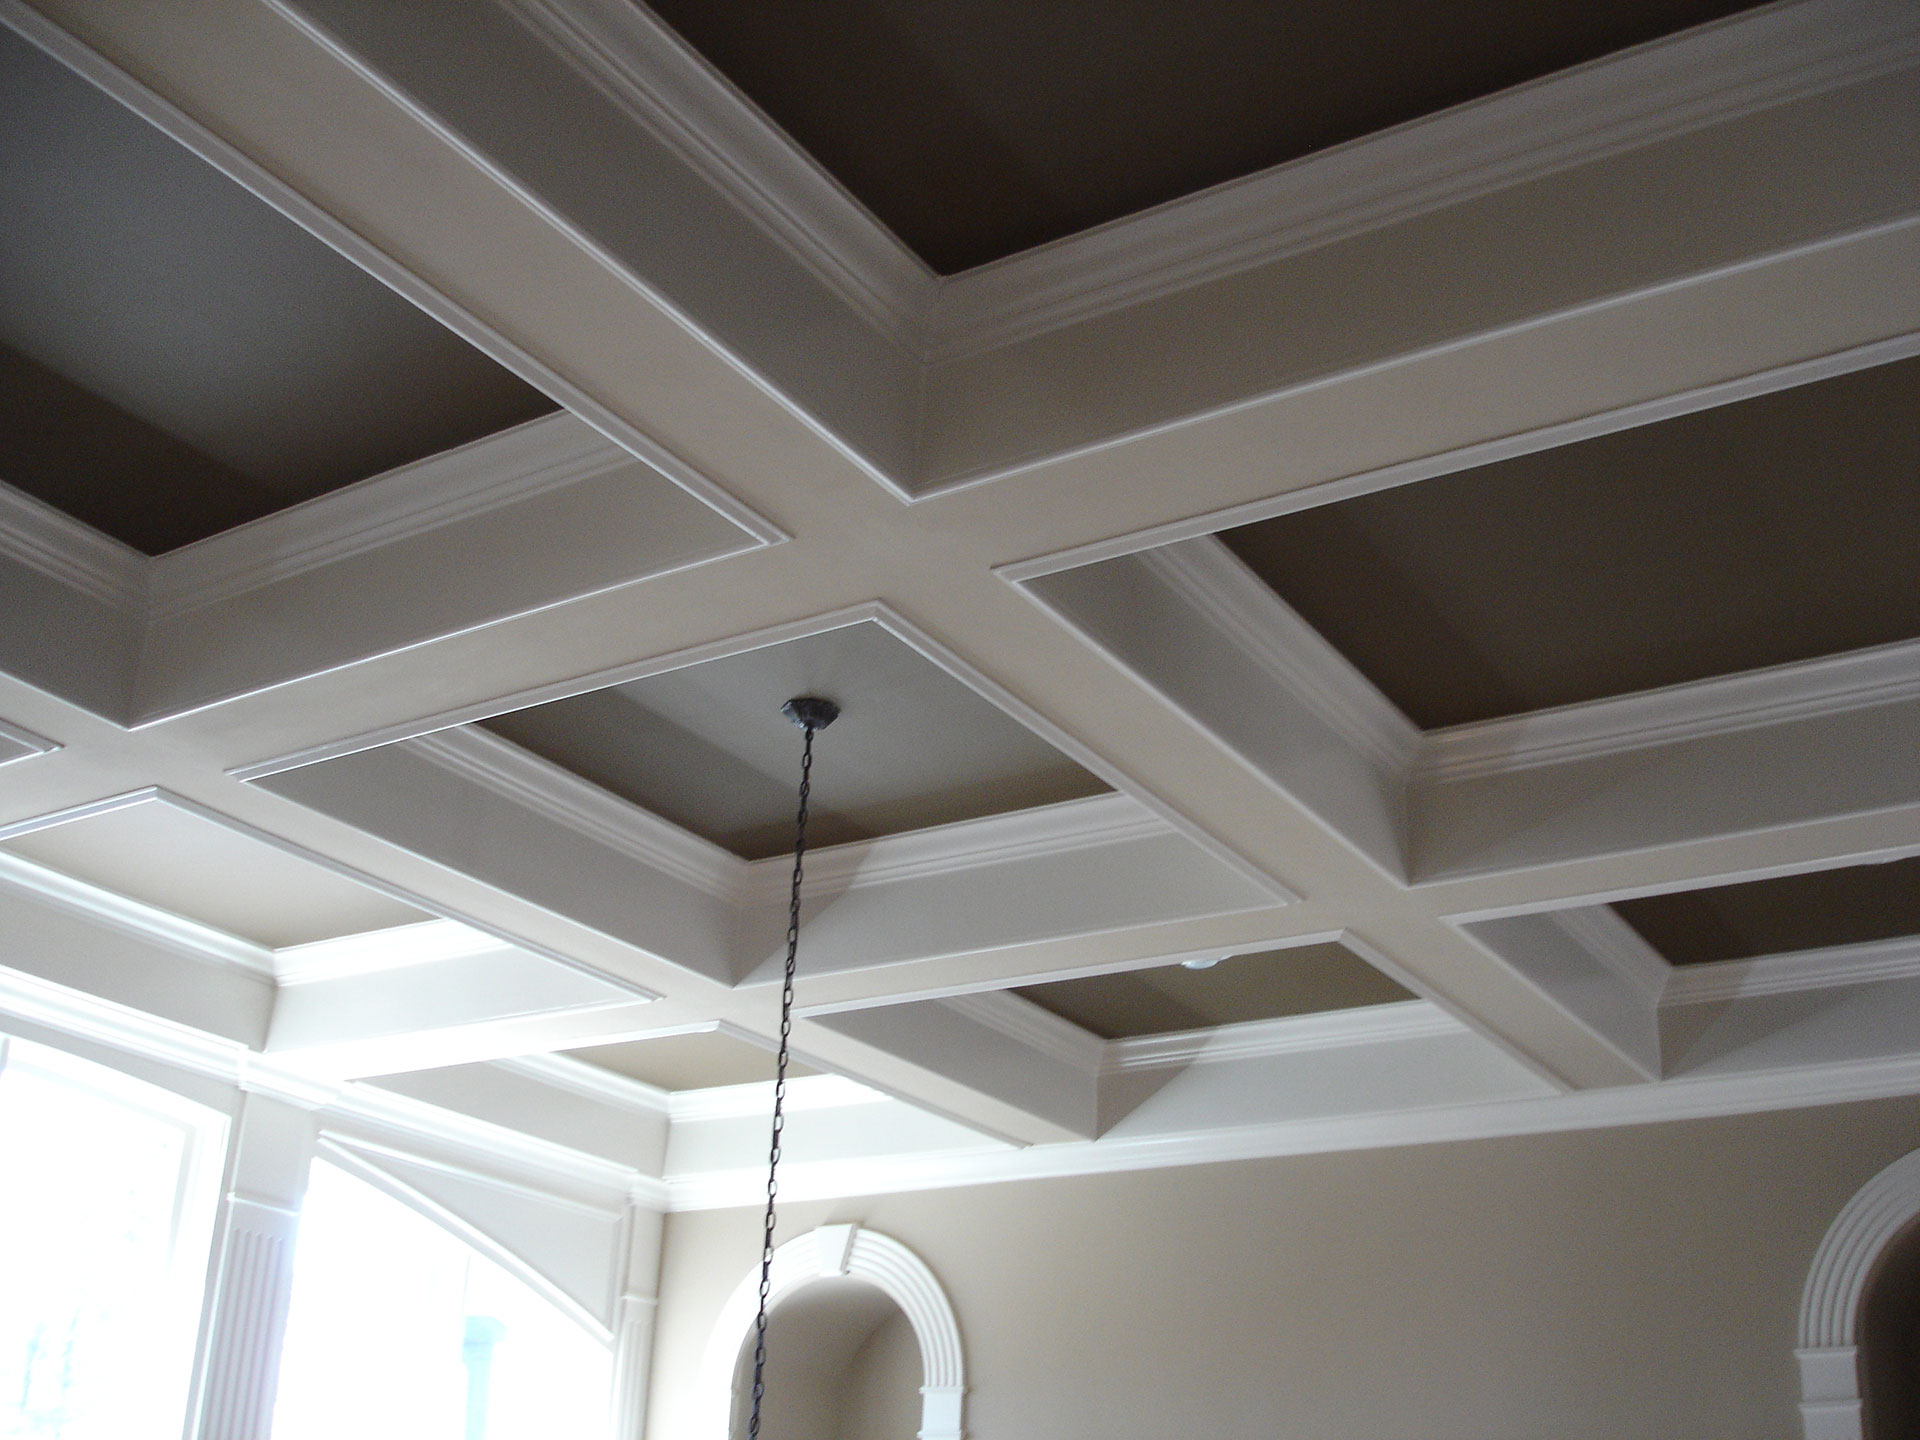
Faux beam ceilings: they bring a touch of rustic charm, modern elegance, or architectural intrigue (depending on your style) without the weight, cost, and maintenance of real wood. Whether you’re drawn to the allure of a farmhouse kitchen or the sleek lines of a contemporary living space, faux beams can instantly elevate your ceiling from “blah” to “breathtaking.”
Why Choose Faux Beams?
Before we dive into the how-to, let’s explore why faux beams have become increasingly popular:
- Budget-Friendly: Solid wood beams can put a serious dent in your wallet. Faux beams deliver the same captivating look for a fraction of the price.
- Lightweight: Made from materials like polyurethane or foam, faux beams are incredibly lightweight, making installation a breeze and minimizing stress on your ceiling structure.
- Low-Maintenance: Say goodbye to the upkeep of real wood! Faux beams require minimal maintenance – simply dust or wipe them down occasionally.
- Design Chameleon: With an extensive range of styles, colors, and finishes, faux beams seamlessly blend with any décor, from rustic farmhouse to modern minimalist and everything in between.
- Master of Disguise: Dealing with unsightly ceiling features? Faux beams expertly conceal wiring, pipes, or those pesky cracks that you’d rather not showcase.
Exploring Faux Beam Options
Faux beams come in a variety of materials and styles to suit your taste and project needs.
Material Matters
- Polyurethane: The reigning champion of faux beams! Polyurethane is lightweight, incredibly versatile, and boasts realistic wood-grain textures. Plus, it’s available in a vast spectrum of colors and finishes.
- Wood Veneer: For those seeking a more authentic wood experience, wood veneer beams strike a perfect balance. These beams feature a thin layer of real wood on top of a less expensive core, offering genuine wood beauty with added affordability.
- DIY Box Beams: Embrace your inner DIY enthusiast! Construct your own custom box beams using lumber. This method provides a cost-effective alternative to solid wood beams while allowing you to tailor the size and look to your exact specifications.
Style Savvy
- Rustic/Distressed: Channel the warmth and character of a timeworn farmhouse. Rustic beams typically feature a weathered, aged appearance with knots, grains, and imperfections that tell a story.
- Smooth/Modern: For contemporary or minimalist interiors, smooth beams offer clean lines and an understated elegance. These beams often come in darker finishes that complement modern aesthetics.
- Hand-Hewn: Replicate the charm of hand-crafted beams with faux versions that capture the look of adzes and other hand tools. Hand-hewn beams add a touch of rustic charm and history to any space.
Mastering the Installation: DIY or Pro?
Prepping for Faux Beam Success: Essential Tools & Materials
- Faux Beams: Choose the style, material, and finish that align with your vision.
- Mounting Blocks: These sturdy supports act like hidden brackets, providing a secure anchor for your beams.
- Construction Adhesive: This heavy-duty adhesive ensures your beams stay securely fastened to the mounting blocks.
- Screws: Use screws to attach the mounting blocks to the ceiling joists and the beams to the blocks.
- Drill: Pre-drilling pilot holes (especially for hardwood) will prevent splitting and make driving screws much easier.
- Screwdriver: Choose the type that corresponds to your screw heads (typically Phillips or flathead).
- Measuring Tape: Precision is key! Accurate measurements are crucial for proper beam placement and spacing.
- Level: Avoid the dreaded “wonky beam” syndrome! A level ensures your beams are perfectly straight, both horizontally and vertically.
- Pencil: Lightly mark beam locations on your ceiling for easy reference during installation.
- Wood Filler or Caulk (Optional): Conceal screw heads for a polished, seamless look.
- Paint (Optional): If using wood filler, match the paint to your beam color for a flawless finish.
Step-by-Step DIY Installation
Ready to transform your ceiling? Let’s break down the process:
-
Plan Like a Pro: Before you pick up a tool, visualize your desired outcome. Measure your ceiling carefully to determine the ideal number of beams and their placement. Consider your room’s proportions – for example, in a large room, you might opt for larger beams or closer spacing to create a sense of intimacy. Use your pencil to lightly mark beam locations on the ceiling for easy reference.
-
Mounting Block Magic: Cut your mounting blocks to match the width of your faux beams. These blocks will attach directly to your ceiling joists (the structural beams hidden above your ceiling drywall). Locate your joists using a stud finder. (Note: If you’re unsure about locating joists or if you have a complex installation, consult with a professional contractor.) Pre-drilling holes in the mounting blocks before attaching them to the joists will make installation smoother. Once your blocks are ready, secure them to the ceiling joists using your screws.
-
Beam Time: Now for the satisfying part! Run a generous bead of construction adhesive along the top of each mounting block. Carefully lift your first faux beam into place, aligning it with your pencil marks. Gently press the beam against the adhesive, ensuring good contact. To provide extra stability, secure the beam to the mounting blocks using screws. As you work, use your level frequently to double-check that your beams are perfectly straight.
-
Flawless Finish (Optional): For a polished, professional appearance, conceal those screw heads. Simply fill them with a bit of wood filler or caulk, let dry completely, and then paint over the filler to match the color of your faux beams. Voila – a seamless look!
When to Call in the Pros
While DIY faux beam installation is achievable for many homeowners, there are instances when professional assistance is recommended:
- Complex Designs: Intricate layouts, vaulted ceilings, or challenging angles might require the expertise of experienced installers.
- Large, Heavy Beams: While faux beams are generally lighter than real wood, larger sizes can still be unwieldy and benefit from professional handling.
- Structural Concerns: If you have any doubts about your ceiling’s structural integrity or the location of joists, consult with a qualified contractor before proceeding.
Designing with Faux Beams: Style Inspirations
From cozy cottages to modern lofts, faux beams enhance a wide range of design aesthetics.
Architectural Styles
- Farmhouse: Embrace rustic charm with distressed faux beams in whitewashed or natural wood tones. Pair them with shiplap walls, wrought iron accents, and vintage-inspired décor for a cozy and inviting ambiance.
- Modern: In contemporary settings, sleek, smooth faux beams in darker finishes add a touch of sophistication. Embrace minimalism by pairing them with neutral color palettes, concrete accents, and statement lighting.
- Industrial: Create an urban loft vibe with faux beams that complement exposed ductwork, metal accents, and raw, unfinished textures. Opt for beams with a weathered or reclaimed wood appearance to enhance the industrial aesthetic.
Room Applications
- Living Room: Define seating areas, add warmth, and create a focal point with faux beams. Consider installing them to accentuate a fireplace, frame a large window, or visually separate open-plan spaces.
- Kitchen: Faux beams add a touch of rustic elegance to kitchens. Install them over a kitchen island to create a cozy dining nook atmosphere or use them to visually lower the ceiling in larger kitchens.
- Bedroom: Enhance vaulted ceilings, add a touch of grandeur, or create a cozy retreat ambiance with faux beams in bedrooms. Consider installing them to frame a bed, highlight a reading nook, or add architectural interest to a plain ceiling.
Sourcing Your Faux Beams
Ready to embark on your faux beam project? Here’s where to find the perfect materials:
- Home Improvement Stores (Home Depot, Lowe’s): Your local home improvement stores are a great starting point, offering a wide selection of faux beams at competitive prices.
- Online Retailers (Amazon, Wayfair): Online retailers provide the convenience of browsing from home and often offer a more extensive variety of styles, finishes, and sizes.
- Specialty Suppliers (Architectural Depot, FauxWoodBeams.com): For unique, custom-made, or hard-to-find faux beams, specialty suppliers dedicated to architectural elements are your go-to resources.
Faux Beams: Your Ceiling’s New Best Friend
Faux beams provide a transformative design element that can elevate any space. They offer the coveted look of real wood without the drawbacks, making them a budget-friendly, DIY-accessible, and design-versatile option for homeowners seeking to add character, warmth, and architectural interest to their ceilings.
Now that you’re armed with the knowledge and inspiration to tackle your own faux beam ceiling project, gather your tools, unleash your creativity, and transform those boring ceilings into stunning focal points!

- Grass Forever in Livermore: Your Guide to Artificial Turf - April 22, 2025
- German Roaches vs. American Roaches: Key Differences and Control - April 22, 2025
- 150+ Flowers That Start With S: A Comprehensive Guide - April 22, 2025