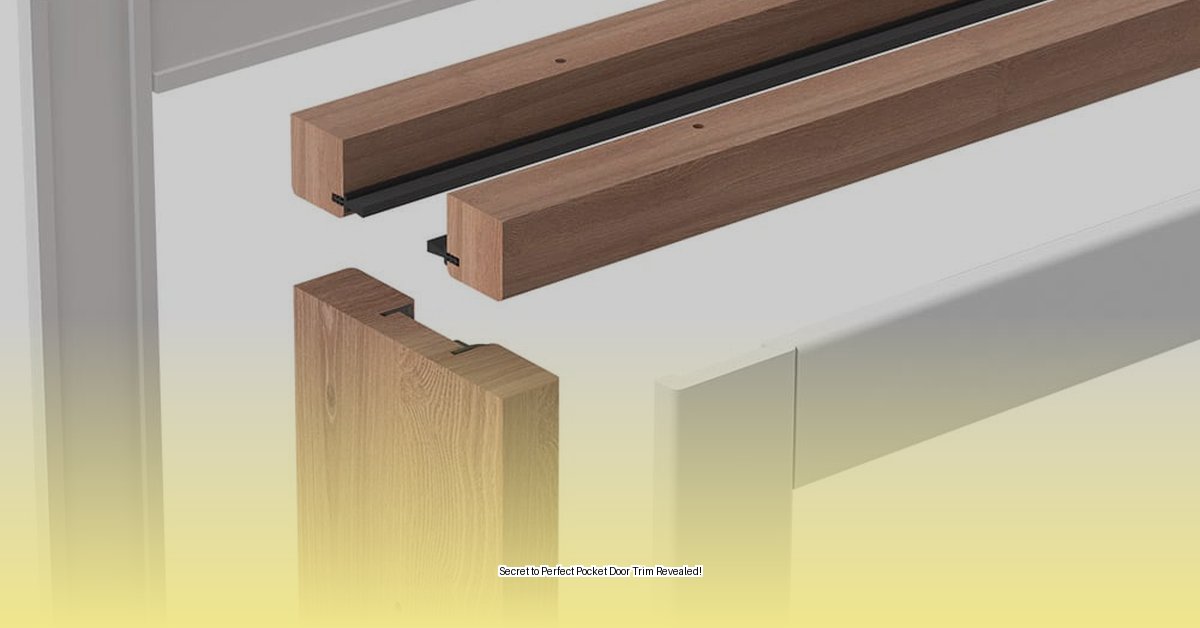
Pocket doors are fantastic space savers, disappearing into walls and maximizing room flow. But an untrimmed pocket door looks unfinished. Think of it as a picture without a frame – it’s just not complete. This guide provides a comprehensive, step-by-step approach to installing pocket door trim, transforming your door from a simple opening to a stylish architectural feature.
Prepping for a Polished Pocket Door: Gathering Your Supplies and Tools
Before you begin, gather your tools and materials. Having everything on hand streamlines the process and prevents frustrating interruptions.
Materials:
- 1x trim material (wood, MDF, or composite)
- Wood glue
- Trim screws (small-headed)
- Brad nails (short)
- Caulk (paintable)
- False stop (optional, for a traditional look)
- Wood filler
- Primer
- Paint or stain
Tools:
- Measuring tape
- Miter saw
- Drill with appropriate drill bits for pilot holes
- Finish nailer (or hammer and nails)
- Putty knife
- Sandpaper (fine grit)
- Safety glasses and hearing protection (when using power tools)
Pocket Door Frame Installation: Setting the Stage for Success
This guide primarily focuses on trim, but properly installing the pocket door frame is the crucial first step. Some manufacturers provide pre-assembled frames, while others are knock-down kits. Ensure the frame is plumb, level, and square within the rough opening.
Important Considerations:
- Frame Material: Wood, steel, or aluminum? Consider durability, cost, and your door’s weight.
- Frame Size: The frame must be roughly twice the width of your door. Verify dimensions and allow for smooth door operation.
- Rough Opening: Measure precisely. A too-small or too-large opening complicates installation.
Consult the manufacturer’s instructions for specific frame installation guidelines.
Step 1: Jamb Installation – Building the Trim Foundation
The jambs are the backbone of your trim. Accurate measurements and careful installation are essential.
- Measure: Determine the combined depth of the pocket door frame and drywall. This is typically around 1-1/4 inches but may vary.
- Rip the Pocket-Side Jamb: Cut the pocket-side jamb piece lengthwise to match this depth. This ensures a flush fit within the pocket door frame.
- Attach Jambs: Secure the jamb pieces to the door frame using trim screws. Pre-drilling pilot holes prevents splitting, especially crucial with hardwoods.
Step 2: Casing Installation – Framing Your Doorway with Style
With the jambs in place, it’s time to add the casing. This is where your design choices come into play.
- Mitering Corners: For a seamless look, miter the casing corners at 45-degree angles. Practice on scrap pieces first to perfect your technique.
- Pre-Painting (Optional but Recommended): Priming and painting the casing before installation saves time and creates a cleaner finish.
- Secure the Casing: Apply wood glue to the back of the casing and secure it to the jambs with short brad nails. Double-check clearance to avoid hitting the pocket door.
- Pocket Side Care: Take extra precaution when nailing on the pocket side. Use shorter brads and a stud finder to avoid hitting the door within the wall. Nail placement (closer to the inner or outer edge) is subject to debate among carpenters, but ultimately depends on individual wall framing and trim thickness.
Step 3: Finishing Touches – Achieving a Professional Look
The finishing touches elevate your trim from functional to fabulous.
- Fill Nail Holes: Use wood filler to conceal nail holes. Let it dry completely before sanding smooth.
- Caulk: Apply a thin bead of paintable caulk along the seams where the trim meets the wall. This seals gaps and creates a polished look.
- Paint or Stain: Apply your chosen finish. Multiple thin coats, lightly sanded between each coat, produce a professional-grade result.
Troubleshooting and Tips for a Smooth Installation
- Gaps: Caulk fills minor gaps effectively. For larger gaps, consider wood filler or shims.
- Sticking Door: The issue probably lies with the track or hardware, not the trim. Adjust as needed.
- Uneven Walls: Scribing techniques can help the casing conform to uneven wall surfaces.
Choosing the Right Trim: Style and Material Considerations
Trim style and material greatly influence the final look. Match your home’s architectural style and existing décor.
- Wood: Classic, versatile, but can warp in humid environments.
- MDF (Medium-Density Fiberboard): Smooth, paint-ready, cost-effective.
- Composite: Moisture-resistant, ideal for bathrooms or laundry rooms.
- Style: Flat stock offers clean lines, while more ornate profiles add detail. Research various styles to determine the optimal fit for your specific design goals.
Maintaining Quality: Future-Proofing Your Pocket Door Trim
Regularly inspect your pocket door trim for signs of damage or wear. Touch up paint or stain as needed to maintain its appearance and protect it from moisture or pests.
Explore Further: Ongoing Research and Innovation
The world of pocket doors and trim is constantly evolving. New materials, designs, and smart home integration features are regularly being developed. Ongoing research suggests that future advancements may lead to quieter and more efficient pocket door systems.
By following this comprehensive guide, your pocket door trim installation is likely to be a success. Remember to consult manufacturer instructions for specific details and to prioritize safety throughout the process. With a bit of patience and these expert tips, you can transform your pocket door into a beautiful and functional feature of your home.
- Dora the Explorer Wipe-Off Fun: Safe & Mess-Free Activities for Little Explorers - April 18, 2025
- Does Lemongrass Repel Mosquitoes? Fact vs. Fiction + How to Use It - April 18, 2025
- Do Woodchucks Climb Trees?Fact vs. Fiction - April 18, 2025


