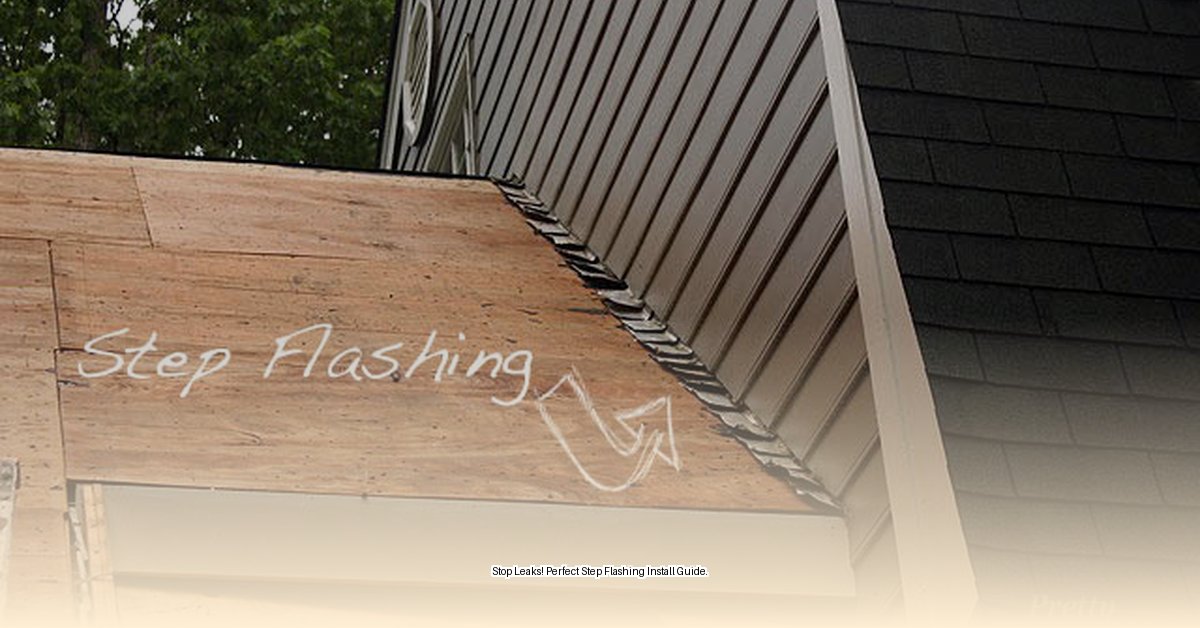
Shielding Your Home: Understanding Step Flashing
Step flashing: those unsung heroes of your roofing system, tirelessly protecting your home from water damage. Imagine rain cascading down your roof. When it hits a wall—your chimney, a dormer, or even the side of your house—it needs a clear path away from your home’s structure. Without proper protection, water can infiltrate, leading to rot, mold, and costly repairs. That’s where step flashing comes in. These L-shaped metal pieces, woven between your shingles and the wall, create a crucial barrier, diverting water down and away, preserving your home’s integrity.
Why Step Flashing Matters: It’s Not Just for Looks
While sealants might offer a temporary fix, they’re no match for step flashing’s long-term protection. Sealants can crack and deteriorate, leaving your home vulnerable. Step flashing, however, provides a durable, reliable defense against the elements. It safeguards your roof sheathing and wall framing from water damage, preventing rot, mold, and those dreaded structural issues that can lead to expensive repairs. It’s a small investment that offers significant long-term savings and peace of mind.
Choosing Your Armor: Selecting the Right Flashing Material
Just like choosing the right tool for the job, selecting the appropriate step flashing material is crucial. Several options exist, each with its own set of advantages and disadvantages. Let’s break them down:
Flashing Face-Off: Comparing Popular Materials
| Material | Advantages | Disadvantages | Cost | Typical Lifespan |
|---|---|---|---|---|
| Galvanized Steel | Budget-friendly, generally resists rust | Prone to rust in harsh coastal environments, can react poorly with treated lumber | Low | 20-30 years |
| Aluminum | Lightweight, easy to handle, resists corrosion, paintable | May corrode in salty air, needs a barrier with treated lumber | Moderate | 30-50 years |
| Copper | Extremely long-lasting, develops a beautiful patina over time | Quite expensive, can stain surrounding materials | High | 50+ years |
| Lead-Coated Copper | Highly durable, less likely to stain than pure copper | Most expensive option, environmental concerns regarding lead | Very High | 75+ years |
Galvanized Steel: The economical choice, suitable for many climates but vulnerable in coastal areas due to salt air. It requires a protective barrier when used with treated lumber.
Aluminum: A lightweight and versatile option, resistant to corrosion and easily paintable. Like galvanized steel, it needs a barrier with treated lumber.
Copper: The premium choice, known for its longevity and aesthetic appeal. It develops a beautiful patina but can stain surrounding materials.
Lead-Coated Copper: Combines copper’s durability with reduced staining potential but comes at a premium price and raises environmental considerations.
Ongoing research continually explores new flashing materials and installation techniques. Staying informed about the latest advancements can help you make the best long-term decision for your home. If you’re unsure which material is right for you, a qualified roofing contractor can offer expert advice.
Step-by-Step Installation: Flashing Like a Pro
Ready to install your step flashing? Let’s get down to business. This is where we build that crucial defense against water intrusion.
Preparing the Stage: Setting the Foundation
Before you touch the flashing, ensure your roof felt or synthetic underlayment is snug against the wall, with the drip edge securely in place. This base layer is essential for preventing water from sneaking in.
Cornering the Enemy: Installing Corner Flashing
Corners are vulnerable points. Use pre-formed corner flashing or create your own by overlapping two pieces of step flashing, sealed tightly with roofing sealant.
The First Step: Leading the Way
Bend your first piece of step flashing to curve around the corner flashing. Nail it high on the wall, ensuring your siding will cover it later for a clean finish.
Building the Shield: Integrating Shingles and Flashing
Lay a shingle, then a piece of step flashing over the exposed part of the shingle below it, tucked under the shingle above. Nail each flashing piece to the wall only, allowing for roof expansion and contraction.
Sealing the Deal: The Final Touches
At the top, cut and bend the last flashing piece flush against the wall, sealing the top edge with sealant. Lay your remaining shingles, and admire your handiwork!
Troubleshooting: Addressing Common Flashing Issues
Even with meticulous installation, problems can arise. Here’s how to tackle them:
Leak Detection: Finding the Culprit
- Visual Inspection: Examine the flashing for rust, holes, cracks, loose pieces, and sealant issues.
- Water Test (with a helper): Gently spray water above the suspected leak area, observing for interior dripping.
- Interior Check: Look for water stains, discoloration, mold, or rot inside.
Repairing the Breach: DIY and Professional Solutions
- Minor Repairs (DIY):
- Sealant Repair: Clean and apply fresh, UV-resistant roofing sealant.
- Replacing Flashing: Carefully remove and replace damaged pieces, ensuring proper overlap and sealing.
- Major Repairs (Professional):
- Extensive Rust/Damage: Consult a professional for complete flashing replacement.
- Complex Issues: Seek professional help for rotted wood, improper installation, or hard-to-reach areas.
Safety is paramount when working on your roof. Use proper equipment, avoid hazardous conditions, and don’t hesitate to contact a professional if you’re unsure about anything. Remember, ongoing research in roofing constantly evolves best practices. A professional roofer can offer up-to-date advice and ensure your roof remains protected for years to come.
- Dora the Explorer Wipe-Off Fun: Safe & Mess-Free Activities for Little Explorers - April 18, 2025
- Does Lemongrass Repel Mosquitoes? Fact vs. Fiction + How to Use It - April 18, 2025
- Do Woodchucks Climb Trees?Fact vs. Fiction - April 18, 2025


