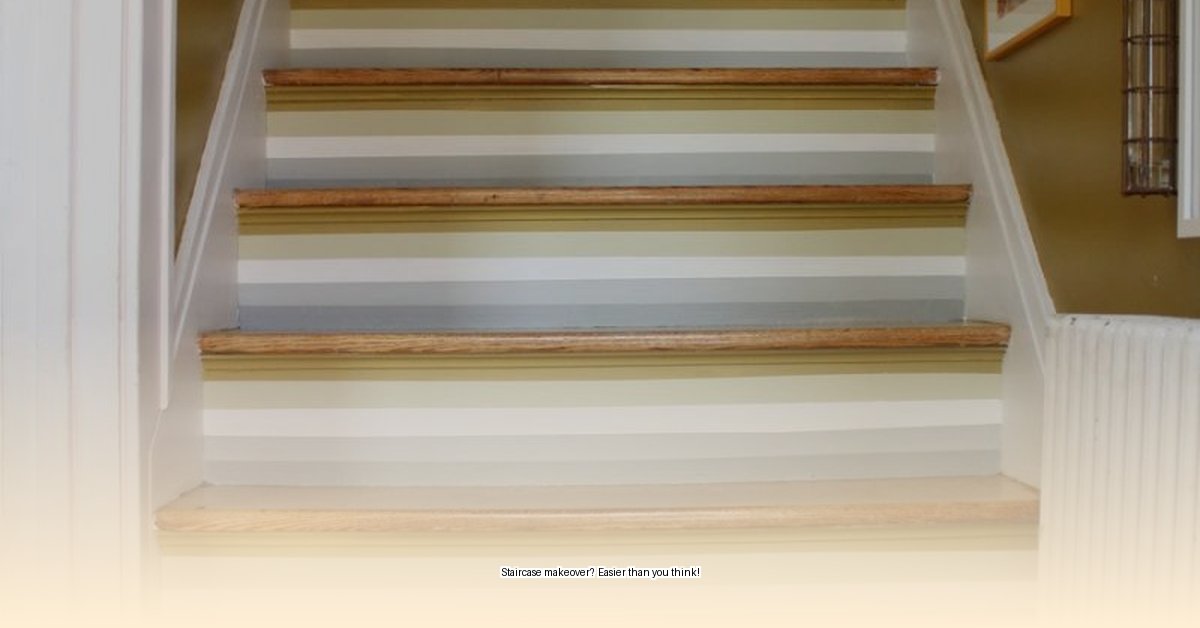
Transforming your entryway can be as simple as a fresh coat of paint on your staircase. Whether your stairs are looking worn or you crave a style refresh, this comprehensive guide will empower you to achieve professional-looking results. We’ll cover everything from prepping and priming to painting techniques, troubleshooting, and design inspiration, ensuring your staircase becomes a stunning focal point.
Prepping Your Canvas: The Foundation for Success
Proper preparation is crucial for a long-lasting, beautiful finish. Think of it as creating a smooth canvas for your artistic vision.
1. Deep Cleaning: Banishing Dust and Grime
Start by thoroughly cleaning your staircase. Vacuum up loose debris, then wash with warm, soapy water. A degreaser can tackle stubborn grime. Allow the surface to dry completely before proceeding.
2. Shielding Your Surroundings: Protecting Walls and Floors
Protect your floors and walls from accidental splatters using drop cloths and painter’s tape. This precaution will save you cleanup headaches later. Securely cover baseboards and any intricate trim work with painter’s tape for crisp, professional lines.
3. Surface Smoothing: Addressing Imperfections
Remove any existing carpet, staples, or nails. Scrape away loose or peeling paint with a paint scraper. This “staircase exfoliation” creates a smoother surface for the new paint.
4. Sanding (Optional): Enhancing Adhesion
While some modern paints adhere well without sanding, lightly sanding wooden surfaces (120-150 grit) can improve primer and paint grip, especially on smoother surfaces or when using oil-based primers. Sand in the direction of the wood grain and vacuum up all dust afterward.
5. Filling Gaps: Achieving a Flawless Surface
Fill any cracks, holes, or dents with wood filler. After it dries completely, sand the filled areas smooth for a seamless finish.
6. Priming: The Key to a Vibrant, Lasting Finish
Priming creates a uniform base for your paint, improving adhesion and preventing wood tannins from bleeding through. Choose a high-quality primer specifically designed for stairs and wood trim. Apply a thin, even coat and allow it to dry completely.
Painting Techniques: Mastering the Art of Application
With your staircase prepped, it’s time to bring your vision to life. These techniques will help you achieve a professional-looking result.
1. Sizing Up Your Staircase: Material Matters
Identify your staircase material (wood, metal, concrete). This determines the appropriate paint type. Wood typically calls for latex paints, while metal or concrete require specialized formulas.
2. Choosing Your Weapon: Selecting the Right Paint
Durability and traction are paramount. For wood, acrylic latex or epoxy paints offer excellent resilience. Consider slip-resistant options or additives for enhanced safety. For metal or concrete, consult with a paint specialist for recommendations.
3. Sheen Selection: Balancing Aesthetics and Practicality
The sheen (gloss level) impacts both appearance and practicality. High-gloss reflects light beautifully but highlights imperfections. Flat sheen minimizes flaws but can be harder to clean. Satin and semi-gloss offer a balance of aesthetics and cleanability.
4. Painting the Risers: Starting Vertically
Begin with the risers, applying thin, even coats and allowing each to dry thoroughly. Working from top to bottom is generally recommended, but consider your lifestyle and traffic flow.
5. Painting the Treads: Stepping Carefully
Once the risers are dry, paint the treads. To maintain access, consider painting every other tread, allowing them to dry before painting the remaining ones.
6. Painting the Banister: Detail-Oriented Approach
A high-quality angled brush is your best tool for navigating the banister’s intricate details. Steady strokes and patience are key. Consider using a specialized banister paint designed for railings.
Design Inspiration: Unleashing Your Creative Flair
Beyond a single color, explore design possibilities. Two-tone staircases, stencils, decorative tape, and hand-painted designs can personalize your space.
1. Two-Tone Elegance: Classic and Chic
A two-tone approach, with a darker color for the treads and a lighter color for the risers, creates a striking visual effect.
2. Stencils and Patterns: Adding Visual Interest
Stencils, decorative tape, or hand-painted designs inject personality and visual interest, elevating your staircase to an art piece.
3. Bold Banister: A Statement Piece
Consider a contrasting color for the banister to make it a statement piece, adding a touch of elegance or a pop of color depending on your aesthetic.
Troubleshooting: Tackling Common Challenges
Even with meticulous planning, issues can arise. Here’s how to address common problems:
| Problem | Solution |
|---|---|
| Paint Drips | Let dry, lightly sand, and repaint. |
| Uneven Coverage | Apply another thin coat. |
| Peeling Paint | Sand, clean, prime, and repaint. Moisture may be a contributing factor, so address any potential leaks. |
| Brush Marks | Use a higher quality brush, thin your paint, and maintain a wet edge while painting. |
Finishing Touches and Maintenance: Preserving Your Masterpiece
Once the paint is completely dry, carefully remove the painter’s tape at a 45-degree angle. This prevents pulling up any paint. For added durability, especially on high-traffic staircases, apply a sealant like polyurethane. This protects against scratches and wear. Periodic cleaning with a gentle detergent preserves your staircase’s beauty. Regularly assess for any necessary touch-ups, thereby extending the lifespan of your painting efforts.
By following this comprehensive guide, your painted staircase will elevate your entryway and speak volumes about your personal style. Don’t hesitate to explore, experiment, and enjoy the transformative power of paint!
- Black Backsplash With White Cabinets: A Bold Kitchen Design - November 5, 2025
- Black and White Kitchen Backsplash: Ideas for Timeless Style - November 4, 2025
- Kitchen Backsplash Ideas: Fresh Looks to Upgrade Your Space - November 1, 2025


