Understanding Drip Edge: Purpose and Importance
Drip edge flashing, that often-overlooked metal strip along your roof’s edge, plays a vital role in protecting your home. It acts as a first line of defense against water damage, channeling runoff away from vulnerable areas like the fascia, soffit, and underlying roof structure. This seemingly minor component can significantly extend the life of your roof and prevent costly repairs.
What Exactly Is Drip Edge?
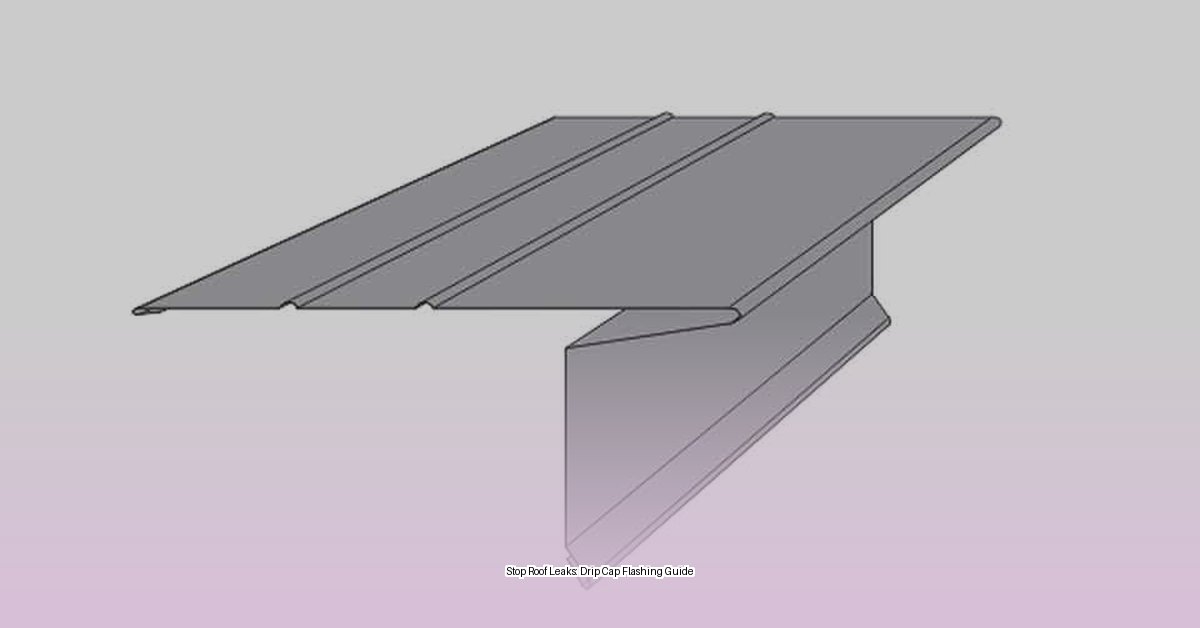
Drip edge, also known as drip cap flashing, is a thin metal strip installed along the eaves (the lower horizontal edge of your roof) and rakes (the angled edges). It sits beneath the shingles at the eaves and over the shingles at the rakes. This strategic placement allows it to guide water away from the fascia board (the board behind your gutters) and into the gutters, preventing water infiltration.
Why Is Drip Edge So Important?
Imagine this: rainwater seeps into your fascia and soffit. Over time, this moisture becomes a breeding ground for mold and mildew, attracts wood-destroying insects, and ultimately causes the wood to rot. Drip edge flashing acts as a shield against this slow but steady destruction. By diverting water away, it protects your roof and home, providing valuable long-term benefits:
- Prevents Rot and Decay: Protects fascia, soffit, and roof decking from water damage.
- Mitigates Ice Dams: In colder climates, drip edge can help reduce ice dam formation by promoting proper drainage.
- Deters Pests: Seals gaps that could be entry points for insects and rodents.
- Extends Roof Lifespan: Safeguards your roof from water damage, increasing its longevity.
- Protects Home Structure: Prevents water from compromising the structural integrity of your home.
- Enhances Gutter Performance: Works seamlessly with gutters to effectively manage water runoff.
Choosing the Right Drip Edge: Materials and Profiles
Selecting the right drip edge requires considering material, profile (shape), and cost. Making an informed choice ensures optimal performance and longevity.
Drip Edge Materials: Weighing the Options
Just as there are different types of shoes for various activities, different drip edge materials exist, each with its pros and cons. Choosing the right one depends on your budget, climate, and desired aesthetic:
| Material | Pros | Cons | Cost Range (per 10 linear feet) |
|---|---|---|---|
| Aluminum | Lightweight, rust-resistant, available in various colors, affordable | Can bend under pressure (e.g., heavy snow, strong winds) | $3-$10 |
| Galvanized Steel | Strong, durable, highly weather-resistant | Heavier than aluminum, potentially more difficult to install | $5-$12 |
| Copper | Extremely durable, develops attractive patina, highly corrosion-resistant | Most expensive option | $35-$75 |
| Vinyl | Lightweight, rust-proof, easy to install, cost-effective | Less durable than metal, can become brittle in freezing temperatures | Varies |
Drip Edge Profiles: Finding the Right Fit
Drip edge comes in various shapes, each designed for a specific purpose:
- L-shaped: The most common type, effective for most roofing situations.
- T-shaped: Offers enhanced protection by sliding under the roofing material.
- C-shaped (Gutter Apron): Designed for homes with gutters, extending further to guide water directly into the system.
- F-shaped: Similar to C-shaped but wider, offering superior protection against wind-driven rain.
- Z-shaped: Specifically designed for steeper roofs to prevent water from flowing back up the roof surface.
Installing Drip Edge Flashing: A DIY Guide
Installing drip edge is a manageable DIY project, even for beginners. Here’s how:
-
Preparation: Clear debris, measure your roof edges (eaves and rakes), and gather your materials: drip edge, roofing nails, sealant, safety glasses, tin snips, utility knife (for vinyl), measuring tape, and a sturdy ladder.
-
Measure and Cut: Measure twice, cut once! Factor in a 1-2 inch overlap at joints. Tin snips provide the cleanest cuts for metal drip edge, while a utility knife works best for scoring vinyl.
-
Eaves Installation: Starting at a corner, slide the drip edge under the shingles, extending it over the gutter (if applicable). Secure with roofing nails every 12 inches.
-
Rake Installation: Position the drip edge over the shingles on the rake edges, extending it over the fascia board. Secure with roofing nails every 12 inches.
-
Overlaps and Sealant: Overlap drip edge pieces by 1-2 inches at joints and corners. Apply roofing sealant under the overlap for a watertight seal.
-
Final Inspection: Check for gaps, loose nails, or areas where sealant is needed.
Handling Different Roof Styles:
- Flat Roofs: Ensure a slight slope for drainage. Sealant is particularly crucial.
- Gable Roofs: Install on rake edges first, then eaves. Pay attention to gable end overlaps.
- Hip Roofs: Start at the eaves and work up the hip ridges. Accurate overlapping at hip intersections is essential.
Common Installation Mistakes:
- Insufficient Overlap: Aim for a consistent 1-2 inch overlap.
- Uneven Nail Spacing: Maintain consistent 12-inch spacing between nails.
- Damaging Shingles: Exercise caution to avoid damaging shingles during installation.
Maintaining Your Drip Edge:
Regularly inspect your drip edge for rust, loose nails, or sealant gaps. Promptly address any issues to ensure continued protection.
Beyond the Basics: Future Trends and Professional Help
Building science is constantly evolving. Research suggests that integrating drip edge with advanced underlayment systems can further enhance roof protection. While DIY installation is possible, consult a professional roofing contractor if you’re uncomfortable working at heights or if your roof has complex features. Professional installation may also be required to maintain your roof warranty. Choosing the right drip edge and ensuring proper installation are crucial steps in protecting your home from water damage and preserving its value.
- Does 100% Polyester Shrink? A Complete Guide to Washing & Drying - April 16, 2025
- Elegant Drapery Solutions for Arched Windows: A Complete Guide - April 16, 2025
- The Best Dining Room Tables with Drop Leaves: A Buyer’s Guide - April 16, 2025


