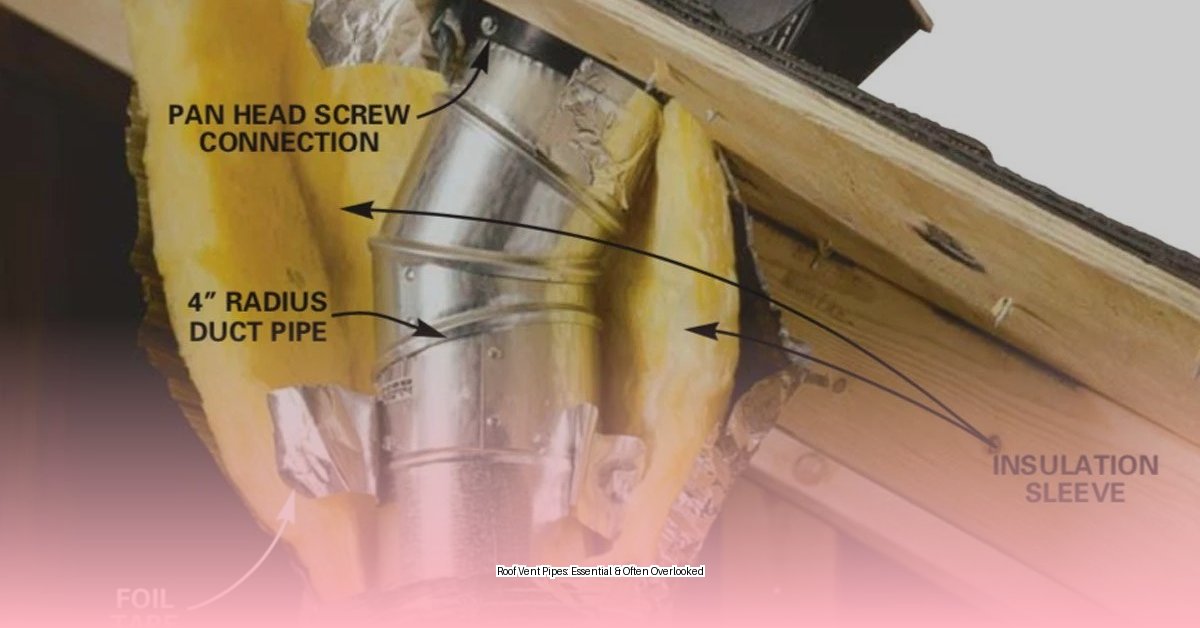
That mysterious pipe sticking out of your roof? It’s more important than you think! It’s your roof vent pipe, and it’s working hard to keep your plumbing system healthy and your home smelling fresh. This guide covers everything you need to know about roof vent pipes, from understanding their function to troubleshooting common problems and performing regular maintenance.
Why You Need a Roof Vent Pipe
Roof vent pipes, also known as vent stacks or soil stacks, are essential for a properly functioning plumbing system. They perform three key jobs:
- Pressure Regulation: These pipes maintain balanced air pressure within your drainage system, allowing wastewater to flow smoothly. Without proper venting, your drains would gurgle and drain slowly, like trying to pour liquid out of a bottle without letting any air in.
- Gas Release: Vent pipes safely expel hazardous sewer gases, preventing unpleasant odors and potential health risks. They are your first line of defense against those unwelcome smells.
- Trap Protection: Every drain has a P-trap—a U-shaped pipe that holds water, creating a seal that blocks sewer gases. Vent pipes ensure these traps stay filled, preventing gases from entering your home.
Vent Pipe Varieties
Vent pipes come in various materials, each with its own characteristics:
- PVC and ABS: These plastics are cost-effective, lightweight, and easy to install, making them a popular choice for modern construction.
- Copper: Although more expensive, copper is renowned for its durability and corrosion resistance, offering a longer lifespan.
- Cast Iron: A traditional material known for its strength, cast iron is exceptionally durable but can be heavy and more challenging to install.
The best choice for your home depends on factors like your budget, local climate, and existing plumbing. Consulting a plumber can help you make the right decision.
Troubleshooting Common Vent Pipe Problems
Like any part of your home, vent pipes can experience issues. Here are some common problems and their likely solutions:
| Problem | Likely Cause(s) | Solution |
|---|---|---|
| Blockage | Leaves, debris, nests, ice buildup | Remove debris by hand or with a plumber’s snake. Flush with water. |
| Leak | Cracked pipe, damaged flashing, deteriorated boot | Repair or replace the damaged component. Consult a roofer if needed. |
| Corrosion | Age, environmental factors, material degradation | Replace corroded sections or the entire pipe. |
| Unpleasant Odors | Dry P-trap, leak, blockage | Refill P-traps, repair leaks, clear blockages. |
Keeping Your Vent Pipe in Top Shape: A Maintenance Guide
Regular maintenance can prevent most vent pipe problems. Here’s a simple checklist:
- Inspect Regularly: Check your vent pipe twice a year, ideally in spring and fall. Look for debris, cracks, loose flashing, and any signs of wear.
- Clear Debris: Remove any leaves, twigs, or nests around the pipe opening.
- Flush the Pipe: Use a garden hose to flush out any remaining debris.
- Seal and Secure: Inspect the sealant around the pipe’s base. If cracked or dry, replace it with roofing cement. Check the flashing, too; replace it if damaged.
- Consider a Vent Cap: A vent cap prevents debris and animals from entering the pipe while allowing proper ventilation.
When to Call a Pro
While some maintenance tasks are easy to handle yourself, don’t hesitate to call a qualified roofer or plumber for complex issues, extensive damage, or if you’re uncomfortable working on your roof. Safety first!
Installing a New Vent Pipe: A Quick Overview
Installing a vent pipe is a complex project best left to professionals. They understand local building codes and proper venting techniques, ensuring a safe and effective installation. However, here’s a general overview of the process:
- Planning and Permits: Determine the location, ensure compliance with building codes, and obtain necessary permits.
- Materials: Gather the required pipes, fittings, flashing, sealant, and tools.
- Roof Penetration: Carefully create the opening in the roof, protecting surrounding shingles.
- Pipe Installation: Install the vent pipe, ensuring it’s plumb and properly supported.
- Flashing and Sealing: Install flashing to create a watertight seal around the pipe.
- Vent Cap: Install a vent cap to prevent debris and animals from entering.
- Inspection: Thoroughly inspect the installation for leaks and proper function.
Python Vent Pipes: Special Considerations
Python brand vent pipes, manufactured by Marco Industries, are a popular choice. While general vent pipe maintenance often applies, it’s crucial to identify your specific Python model for accurate troubleshooting and replacement parts. Contact Marco Industries directly or consult their website for model-specific information.
Beyond the Basics: Additional Insights
A well-maintained vent pipe system not only ensures proper plumbing function but also contributes to better indoor air quality by effectively venting sewer gases. Ongoing research continues to explore advancements in vent pipe materials and ventilation systems, so staying informed about the latest technologies can benefit homeowners.
Disclaimer: This information is for general knowledge and does not constitute professional advice. Consult qualified professionals for specific roofing or plumbing concerns. Safety should always be your top priority.
This comprehensive guide provides valuable information about roof vent pipes. By understanding their function, performing regular maintenance, and addressing issues promptly, you can keep your plumbing system healthy and your home safe and comfortable.
- Dora the Explorer Wipe-Off Fun: Safe & Mess-Free Activities for Little Explorers - April 18, 2025
- Does Lemongrass Repel Mosquitoes? Fact vs. Fiction + How to Use It - April 18, 2025
- Do Woodchucks Climb Trees?Fact vs. Fiction - April 18, 2025


