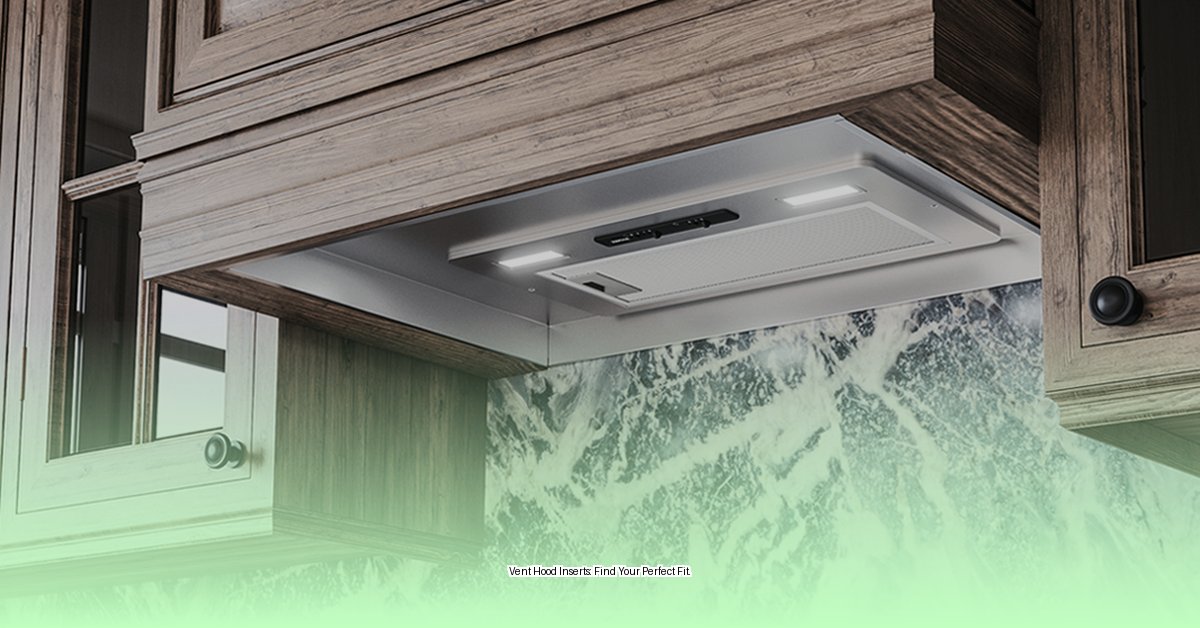
Understanding Ventilation Hood Inserts
Ventilation hood inserts are the unsung heroes of a clean and stylish kitchen. They’re the engine behind those beautiful, built-in range hoods, quietly whisking away cooking fumes and keeping your kitchen air fresh. Essentially, the insert houses the motor, fan, lights, and filters, all packaged together within your cabinetry for a seamless, integrated look. This guide will break down everything you need to know to choose the right insert for your culinary haven.
What is a Ventilation Hood Insert?
Unlike a standard range hood that comes with its own housing, a ventilation hood insert is the internal component designed to be installed within a custom hood or existing cabinetry. This offers significant design flexibility, allowing you to perfectly match your kitchen’s aesthetic. Think of it as the powerhouse hidden behind a sleek, custom facade. If you’re aiming for a high-end, integrated look without the hefty price tag, a ventilation hood insert is likely the perfect solution.
Why Choose an Insert?
Ventilation hood inserts offer several advantages:
- Design Flexibility: Integrate seamlessly with your cabinetry for a custom look.
- Cost-Effective: Often more budget-friendly than purchasing a complete range hood.
- Powerful Performance: Offer comparable ventilation power to standalone units.
- Quiet Operation: Many models prioritize noise reduction for a peaceful kitchen.
Choosing the Right Insert: Key Factors
Picking the right insert involves several key considerations. Let’s explore these factors one by one:
Sizing Up Your Space
Measure your cooktop! Your insert should be the same width as your cooktop, or even slightly wider, for optimal capture of cooking fumes. Common sizes include 30″, 36″, and 42″, but some manufacturers offer even larger options. While a slightly larger insert can provide better coverage, an excessively large one might look disproportionate.
CFM: The Power of Airflow
CFM, or cubic feet per minute, indicates the insert’s airflow strength, essentially its “breathing capacity.” A higher CFM means more powerful ventilation. Consider these factors when determining the CFM you need:
- Cooking Style: Frequent high-heat cooking or stir-frying requires higher CFM (probably above 600).
- Cooktop Type: Gas cooktops generally need more CFM (around 100 CFM per linear foot of cooktop) than electric ones due to higher heat and combustion byproducts.
- Ducting: Longer or more complex duct runs might necessitate higher CFM to overcome resistance, ensuring efficient ventilation and avoiding undue strain on the motor. Consult a professional if you’re unsure about ductwork calculations.
Ducting Decisions: Vented or Recirculating?
- Ducted (Vented Outside): This is the most effective ventilation method, expelling smoke, grease, and odors completely outside your home. Think of it like opening a window and letting fresh air in.
- Ductless (Recirculating): This option filters the air and circulates it back into the kitchen. It’s easier to install, ideal for situations where external venting isn’t feasible. However, it is generally less effective at completely removing odors, akin to using an air purifier to improve overall air quality.
Filter Facts: Types and Maintenance
Filters are your first line of defense against grease and other airborne particles. Common types include:
- Baffle Filters: Angled metal baffles effectively capture grease while maintaining airflow. They are generally considered more durable than mesh filters and are often dishwasher-safe for easy cleaning.
- Mesh Filters: Simpler and less expensive, these might require more frequent cleaning than baffle filters.
- Charcoal Filters: Used in ductless systems to absorb odors. These filters need to be replaced periodically, typically every few months, depending on usage.
Keeping it Quiet: Understanding Sones
Noise levels are measured in sones. Lower sones mean quieter operation. A sone rating of 1 to 3 is considered relatively quiet. High-end models can operate even quieter (below 1 sone), offering a more peaceful cooking experience. Some ongoing research suggests that even slight reductions in noise levels can significantly impact user satisfaction.
Illumination: Integrated Lighting
Most inserts come equipped with integrated lighting to illuminate your cooktop. Options include:
- Halogen Lights: Provide bright, focused light.
- LED Lights: Energy-efficient and long-lasting, some models offer adjustable brightness levels and color temperature control.
Control Options: From Basic to Smart
- Push Buttons: Simple and straightforward.
- Touch Controls: Sleek and modern.
- Remote Controls: Convenient for operation from a distance.
- Smart Features: Some inserts connect to smart home systems and offer features like automatic fan speed adjustment based on cooking activity, voice control, and remote operation via smartphone apps.
Installation: DIY or Professional?
While some homeowners may be comfortable installing an insert themselves, particularly ductless models, professional installation is recommended, especially for ducted systems involving electrical wiring and complex ductwork. Incorrect installation can not only affect performance but also create safety hazards. A professional installer can also ensure compliance with local building codes and warranty requirements.
Maintaining Your Insert
Regular maintenance is essential for optimal performance and longevity.
- Clean Filters: Regularly clean (or replace, in the case of charcoal filters) according to the manufacturer’s instructions. Frequency depends on cooking habits. Some baffle and mesh filters are dishwasher-safe.
- Wipe Down Surfaces: Regularly wipe down the exterior surfaces of the insert to prevent grease buildup.
Finding the Right Fit: Top-Rated Inserts
While specific models and pricing can vary, this table offers a general overview of what to expect in different price ranges. Remember that features, performance, and availability are subject to change, so always check current product listings and user reviews.
| Feature | Budget-Friendly | Mid-Range | High-End |
|---|---|---|---|
| CFM | 300-400 | 600-800 | 900+ |
| Noise Level (Sones) | 3-5 | 1-2 | <1 |
| Lighting | Basic Halogen | Halogen/LED | LED (often dimmable) |
| Features | Basic speeds | Multiple speeds, light | Smart features, auto-adjust |
| Price Range | $200-$500 | $500-$1000 | $1000+ |
Troubleshooting Common Issues
- Poor Suction: Check for clogged filters, obstructed ductwork, or a malfunctioning motor.
- Excessive Noise: Verify that filters are securely installed and the hood is properly mounted. Loose parts or vibrations can contribute to noise. If the noise persists, there might be a problem with the motor or fan.
- Lights Not Working: Check the bulbs first. If the bulbs are fine, inspect the electrical connection and wiring.
By understanding these key aspects, you’re well-equipped to choose the perfect ventilation hood insert for your kitchen. Happy cooking!
- The Best Battery Picture Lamps for Effortless Artwork Illumination - April 1, 2025
- Double Sink Bath Vanity Tops: A Buyer’s Guide - April 1, 2025
- Bath Towel Measurements: A Complete Guide to Choosing the Right Size - April 1, 2025


