Introducing [- Discover the Best At Home Gel Nail Kit NZ for Salon-Quality Manicures -] your ultimate guide to achieving dazzling gel nails without stepping foot in a salon. In this comprehensive article, we’ll take you on a journey through the world of at-home gel nail kits, helping you identify the perfect kit to transform your nails from ordinary to extraordinary.
Key Takeaways:
-
Gel nail kits offer salon-quality manicures at home, providing long-lasting, chip-resistant results.
-
Consider the quality of the gel lamp and polish when selecting a kit.
-
Opt for cruelty-free, non-toxic, and vegan products for a healthier and eco-friendly option.
-
Evaluate factors such as drying time, finished look, staying power, and ease of removal to find the best kit for your needs.
-
Popular brands like Gelous and Morovan provide high-quality at-home gel nail kits.
-
Look for the Byrdie Verified seal to ensure the product has been thoroughly tested and approved by experts.
Best at Home Gel Nail Kit NZ
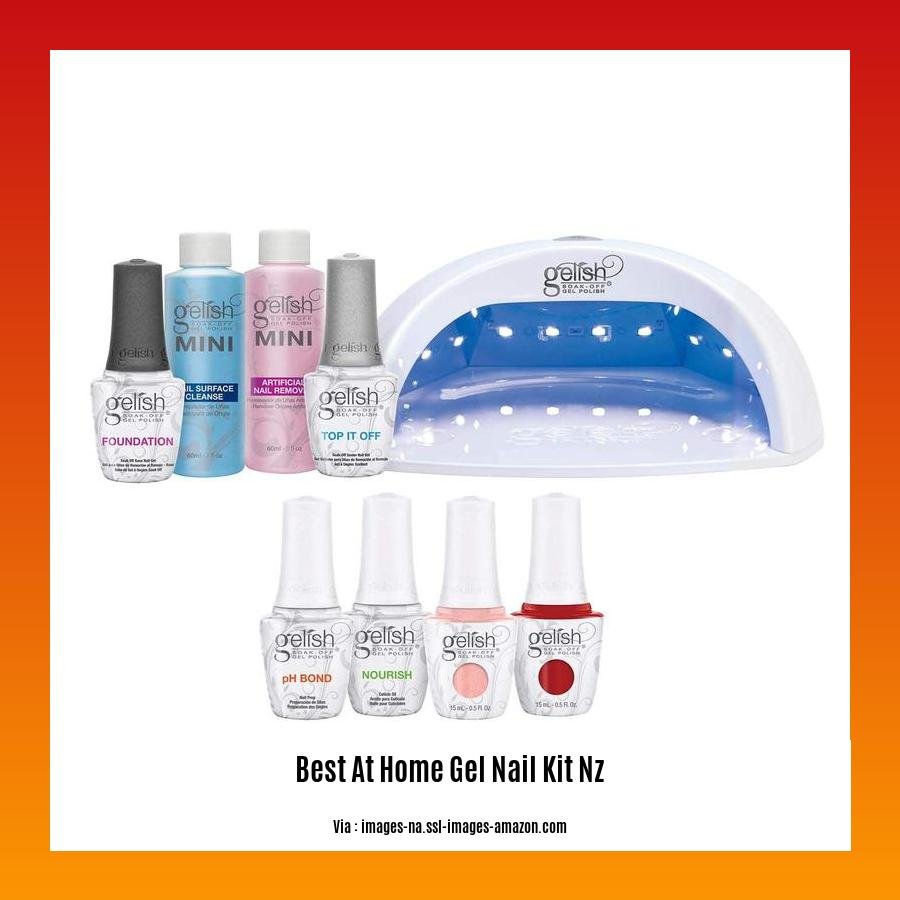
Hello, beauty enthusiasts! Are you ready to elevate your at-home manicures to salon-quality perfection? In this guide, we’ll uncover the secrets to finding the best at home gel nail kit NZ, transforming your nails into showstopping masterpieces. Whether you’re a seasoned pro or just starting, let’s dive in!
Choosing the Perfect Kit:
Selecting the right at-home gel nail kit is crucial for achieving a flawless, long-lasting manicure. Here are key factors to consider:
-
Gel Lamp:
The heart of any gel nail kit is the gel lamp, responsible for curing and hardening the polish. Look for a lamp with sufficient wattage and the ability to cure all gel polish types. -
Gel Polish Quality:
High-quality gel polish ensures vibrant colors, smooth application, and extended wear. Choose brands known for their exceptional formulas and long-lasting shine. -
Vegan, Cruelty-Free, and Non-Toxic:
In today’s beauty landscape, opting for vegan, cruelty-free, and non-toxic gel nail kits is essential. These products prioritize your health and the environment. -
Drying Time, Finished Look, Staying Power, and Ease of Removal:
Consider these factors based on your lifestyle and preferences. Fast-drying formulas save time, while a high-gloss finish adds a touch of elegance. Long-lasting wear ensures your manicure stays pristine, and easy removal prevents damage to your natural nails.
Top Brands in NZ:
When it comes to at-home gel nail kits, certain brands stand out in the New Zealand market:
-
Gelous:
Known for its innovative gel nail kits, Gelous offers a wide range of colors, long-lasting formulas, and a user-friendly application process. -
Morovan:
Morovan’s gel nail kits are adored for their affordability, extensive color selection, and impressive durability. -
Byrdie Verified Seal:
For added assurance, look for products that carry the Byrdie Verified seal. This seal signifies that the product has undergone thorough research and testing by beauty experts.
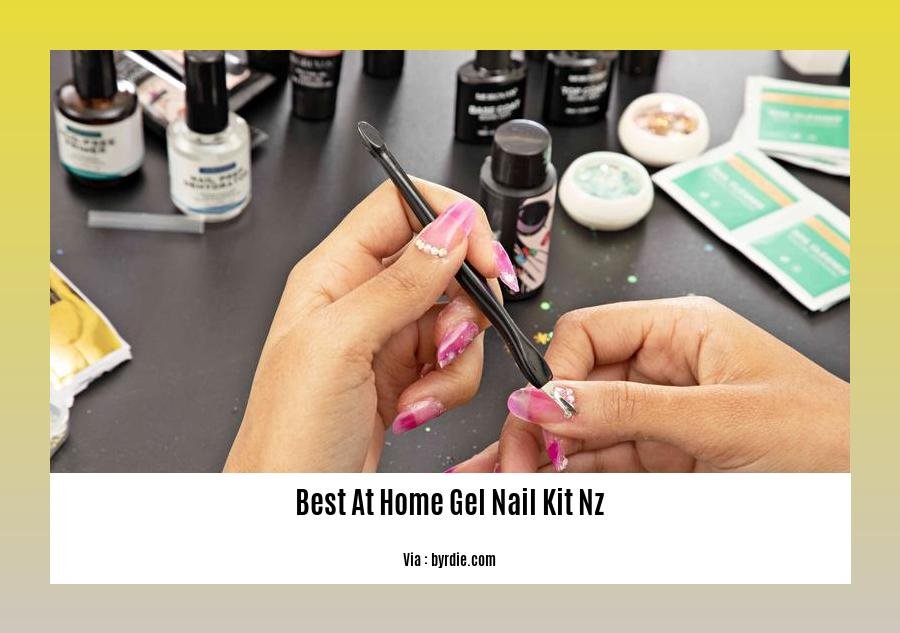
Application Tips for a Salon-Worthy Manicure:
-
Prep Your Nails:
File your nails to your desired shape, gently push back your cuticles, and remove any remaining polish. -
Apply a Base Coat:
This layer ensures the gel polish adheres better to your nails, preventing peeling and chipping. -
Cure Your Nails:
Place your nails under the gel lamp for the recommended time, following the kit’s instructions. -
Apply Gel Polish:
Using thin, even coats, apply the gel polish color of your choice. Cure each coat under the lamp. -
Finish with a Top Coat:
Seal your manicure with a top coat for added shine and protection. Cure it under the lamp. -
Remove Any Residue:
Gently wipe away any excess gel polish around your cuticles using a cotton swab dipped in acetone. -
Moisturize Your Hands:
Keep your hands and cuticles hydrated with a nourishing moisturizer.
With the right at-home gel nail kit and these expert tips, you can achieve salon-quality manicures in the comfort of your own home. Embrace your creativity, experiment with different colors and designs, and flaunt those gorgeous nails!
Searching for the best way to achieve salon-quality nails at home? Check out our comprehensive guide to the best at home gel nail kit Australia. Discover the best at home nail kit Australia to elevate your at-home manicure routine and unleash your inner nail artist.
Step-by-Step Guide on How to Use an At-Home Gel Nail Kit: Prep Nails, Apply Base Coat, Apply Color Coat, Cure Each Coat Under Lamp, Apply Top Coat, and Remove Any Excess Product
Key Takeaways:
- Choose an at-home gel nail kit that suits your needs, considering the gel lamp’s wattage, curing capabilities, gel polish quality, and ease of removal.
- Prep nails properly by filing, shaping, and removing old polish to ensure the gel polish adheres well.
- Apply a thin layer of base coat and cure it under the lamp as per the kit’s instructions to create a strong foundation for the gel polish.
- Apply thin, even coats of gel nail polish, curing each coat under the lamp for the specified duration.
- Finish with a layer of top coat and cure it under the lamp to protect the gel polish and provide a glossy shine.
- Remove any excess gel polish around the cuticles using acetone and a cotton swab for a clean and polished look.
Step 1: Prep Your Nails
- Gather Supplies:
File, buffer, orangewood stick, cuticle oil, lint-free wipes, gel base and top coat, gel polish colors, UV/LED lamp. - File and Shape Nails:
File your nails to your desired shape, remove any old polish, and gently push back cuticles using an orangewood stick.
- Buff Nails:
Use a buffer to smooth the surface of your nails, removing any ridges or imperfections.
- Apply Cuticle Oil:
Apply a small amount of cuticle oil to each nail to nourish the cuticles and prevent them from drying out.
Step 2: Apply the Base Coat
- Use Lint-Free Wipes:
Wipe your nails with lint-free wipes to remove any dust or residue.
- Apply Base Coat:
Apply a thin layer of gel base coat to each nail, ensuring it covers the entire surface.
- Cure Under Lamp:
Cure the base coat under the UV/LED lamp for the recommended duration specified in the kit’s instructions.
Step 3: Apply the Gel Nail Polish
- Select Gel Polish:
Choose your desired gel nail polish color and shake the bottle well.
- Apply First Coat:
Apply a thin, even layer of gel polish to each nail, avoiding the cuticle area.
- Cure Under Lamp:
Cure the gel polish under the lamp for the specified duration mentioned in the kit’s instructions.
- Apply Additional Coats:
Repeat steps 3 and 4 to apply additional coats of gel polish until you achieve the desired opacity and color intensity.
Step 4: Apply the Top Coat
- Use Top Coat:
Select a gel top coat that matches the gel nail polish brand you are using.
- Apply Top Coat:
Apply a thin layer of top coat to each nail, ensuring it completely covers the gel polish.
- Cure Under Lamp:
Cure the top coat under the UV/LED lamp for the specified duration stated in the kit’s instructions.
Step 5: Remove Excess Product
- Clean Up:
Use a lint-free wipe soaked in acetone to gently remove any excess gel polish from the nail surface, particularly around the cuticles.
Step 6: Enjoy Your Gel Manicure!
- Admire Your Nails:
Take a moment to appreciate your beautiful gel manicure and enjoy the long-lasting, salon-like finish.
Gel Nails at Home: A Simple DIY Guide for Beginners
How To Do Gel Nails: Step-by-Step Guide – Nailboo®
Tips and Tricks for Achieving the Best Results with At-Home Gel Nail Kits: Proper Nail Preparation, Thin Coat Application, Curing Each Coat Completely, and Using High-Quality Products
Hey there, nail enthusiasts! Are you looking to elevate your at-home manicure game and achieve salon-quality gel nails? Gel nail kits have revolutionized the way we do our nails, offering long-lasting, chip-resistant manicures in the comfort of our own homes. But to achieve that coveted salon-worthy finish, there are a few key tips and tricks you need to know. Let’s dive in!
Key Takeaways:
-
Prep is Key: Just like building a house, a solid foundation is essential for a flawless gel manicure. Start by gently pushing back your cuticles, filing your nails into your desired shape, and buffing away any ridges or imperfections.
-
Thin Coats, Multiple Layers: Patience is a virtue when it comes to gel nails. Apply thin, even coats of polish, curing each layer under the LED lamp according to the manufacturer’s instructions. This will prevent bubbling, peeling, and smudging.
-
Cure Completely: Don’t rush the curing process! Make sure each coat of gel polish is fully cured under the lamp before moving on to the next step. This ensures a strong and durable manicure that lasts longer.
-
High-Quality Products: Invest in high-quality gel nail kits that include a powerful LED lamp and long-lasting gel polish. Cheap kits often lead to disappointing results and can damage your nails.
Step-by-Step Guide:
-
Prep Your Nails: Remove any existing polish, gently push back cuticles, file your nails, and buff away any imperfections.
-
Apply Base Coat: Apply a thin layer of base coat and cure it under the LED lamp for the recommended time.
-
Apply Gel Polish: Apply a thin layer of gel polish and cure it under the lamp. Repeat this step until you achieve your desired opacity and color intensity.
-
Apply Top Coat: Apply a layer of top coat and cure it under the lamp. This will protect your gel manicure and give it a glossy shine.
-
Remove Excess Gel: Use a lint-free wipe soaked in alcohol to remove any excess gel polish around the cuticles.
-
Moisturize: Don’t forget to moisturize your hands and cuticles after removing the gel polish. This will help prevent dryness and keep your nails looking healthy.
Troubleshooting Common Problems:
-
Bubbling or Peeling: This can be caused by applying thick coats of polish or not curing each coat completely.
-
Smudging: Be careful not to touch your nails before they are fully cured. Use a top coat to seal in the color and prevent smudging.
-
Chipping: This can be caused by using low-quality gel polish or not applying the coats evenly. Make sure to apply thin, even coats and cure each coat completely.
Recommended At-Home Gel Nail Kits in NZ:
-
Gelous: Known for its innovative kits, diverse colors, and user-friendly application.
-
Morovan: Offers affordable kits with a wide color range and impressive durability.
Sources:
-
How to Do a Gel Manicure at Home: A Step-by-Step Guide
Recommendations for Top-Performing At-Home Gel Nail Kits in New Zealand: Brand Name, Product Name, Key Features, Pros, and Cons
Hey there, nail enthusiasts! Want to elevate your at-home beauty routine with salon-quality gel manicures? You’ve come to the right place! Let’s dive into the world of at-home gel nail kits available in New Zealand, exploring some top-performing options that’ll transform your nails into dazzling works of art.
Key Takeaways:
- Achieve professional-looking gel manicures in the comfort of your home.
- Explore a wide range of colors and styles to match your mood and personal style.
- Save money and time by skipping expensive salon visits.
- Enjoy long-lasting manicures that resist chipping and peeling for up to two weeks.
- Be prepared for a slightly longer application and removal process compared to traditional nail polish.
SensatioNail Gel Nail Polish Starter Kit: A Classic Choice for Beginners
If you’re a newbie to the world of gel manicures, the SensatioNail Gel Nail Polish Starter Kit is your perfect starting point. This user-friendly kit includes everything you need to get started: a gel lamp, base coat, top coat, and a selection of vibrant gel polish colors.
Pros:
– Beginner-friendly with easy-to-follow instructions.
– Affordable and readily available in New Zealand.
– Offers a wide range of colors and finishes to suit various tastes.
– Provides durable manicures that last up to two weeks.
Cons:
– The gel lamp may not be as powerful as professional lamps, affecting curing time.
– Some users have reported experiencing slight peeling or chipping after a few days.
Gelous New Zealand: A Vegan and Cruelty-Free Option
For those who prefer vegan and cruelty-free beauty products, Gelous New Zealand is the way to go. Their at-home gel nail kit boasts high-quality, non-toxic ingredients that are gentle on your nails. Plus, they offer a wide range of stunning colors that’ll make your nails pop.
Pros:
– Formulated with vegan and cruelty-free ingredients, perfect for conscious consumers.
– Offers a diverse selection of colors, including trendy shades and classic favorites.
– Known for its long-lasting formula that resists chipping and peeling.
Cons:
– Slightly pricier compared to other brands.
– The curing time may be longer than some users prefer.
Morovan Gel Nail Kit: A Budget-Friendly Option
If you’re on a budget but still want salon-quality gel manicures, Morovan Gel Nail Kit has got you covered. This affordable kit provides all the essentials you need to create beautiful gel manicures at home, without breaking the bank.
Pros:
– Surprisingly affordable, making it accessible for everyone.
– Includes a decent selection of gel polish colors to choose from.
– Delivers long-lasting results that rival those of expensive kits.
Cons:
– The gel lamp may not be as powerful as professional lamps, affecting curing time.
– Some users have reported experiencing slight smudging or bubbling of the gel polish.
Remember, the best at-home gel nail kit for you depends on your individual preferences and nail care needs. Consider factors like ease of use, color selection, durability, and price when making your choice. Happy gel-manicuring, my fellow beauty enthusiasts!
Citation:
- Best At-Home Gel Nail Kits
- Gelous New Zealand
FAQ
Q1: What are the benefits of using an at-home gel nail kit?
A1: At-home gel nail kits offer several advantages, including cost-effectiveness, convenience, long-lasting results, and a wide range of color options. They allow you to achieve salon-quality manicures in the comfort of your own home.
Q2: What is the curing process for gel nail polish?
A2: Gel nail polish requires curing under an LED or UV lamp to harden and set properly. The curing time varies depending on the brand and type of gel polish used, but typically ranges from 30 seconds to 2 minutes per layer.
Q3: Are at-home gel nail kits suitable for everyone?
A3: While at-home gel nail kits are generally safe for personal use, it’s essential to follow the instructions provided with the kit carefully to ensure proper application and removal. If you have sensitive nails or skin, it’s advisable to consult a professional nail technician before using a gel nail kit at home.
Q4: How long does a gel manicure typically last?
A4: When applied and removed correctly, a gel manicure can last up to two weeks without chipping or peeling. However, the longevity of the manicure may vary depending on factors such as nail preparation, application technique, and daily wear and tear.
Q5: What are some popular at-home gel nail kit brands?
A5: Some well-known and reputable at-home gel nail kit brands include Gelous, Morovan, SensatioNail, and Sally Hansen. These brands offer a range of kits suitable for different skill levels and preferences, making them accessible to both beginners and experienced DIY nail enthusiasts.

- Dora the Explorer Wipe-Off Fun: Safe & Mess-Free Activities for Little Explorers - April 18, 2025
- Does Lemongrass Repel Mosquitoes? Fact vs. Fiction + How to Use It - April 18, 2025
- Do Woodchucks Climb Trees?Fact vs. Fiction - April 18, 2025